Today I’m excited to share a set of four 5×7 Christmas cards I created using the Country Christmas Collection by Annie Williams for Spellbinders. This collection features beautiful large-scale dies that are perfect for creating full-scene cards, and while I usually reach for A2 sizes, the larger 5×7 format gave me room to really let each element shine. All cards use the Country Christmas 3D Embossing Folder for textured backgrounds, white gouache splatter for a snowy look, and gold cardstock matting for that elegant holiday touch.

I also kept the sentiments simple and coordinated by using Poppystamps Christmas Greetings Foil Tabs, making these cards quicker to finish while keeping the focus on the intricate die-cut scenes. Let’s take a closer look at each card in this cozy set!
Country Christmas Barn Card
Building the Barn Structure
To start this card, I used the Country Christmas Barn die set to create a traditional red barn, cutting the main structure from red cardstock and layering the roof and doors in brown. I added white snow accents to the roof for a frosty winter feel and topped the barn with a mini green wreath to bring in holiday charm.
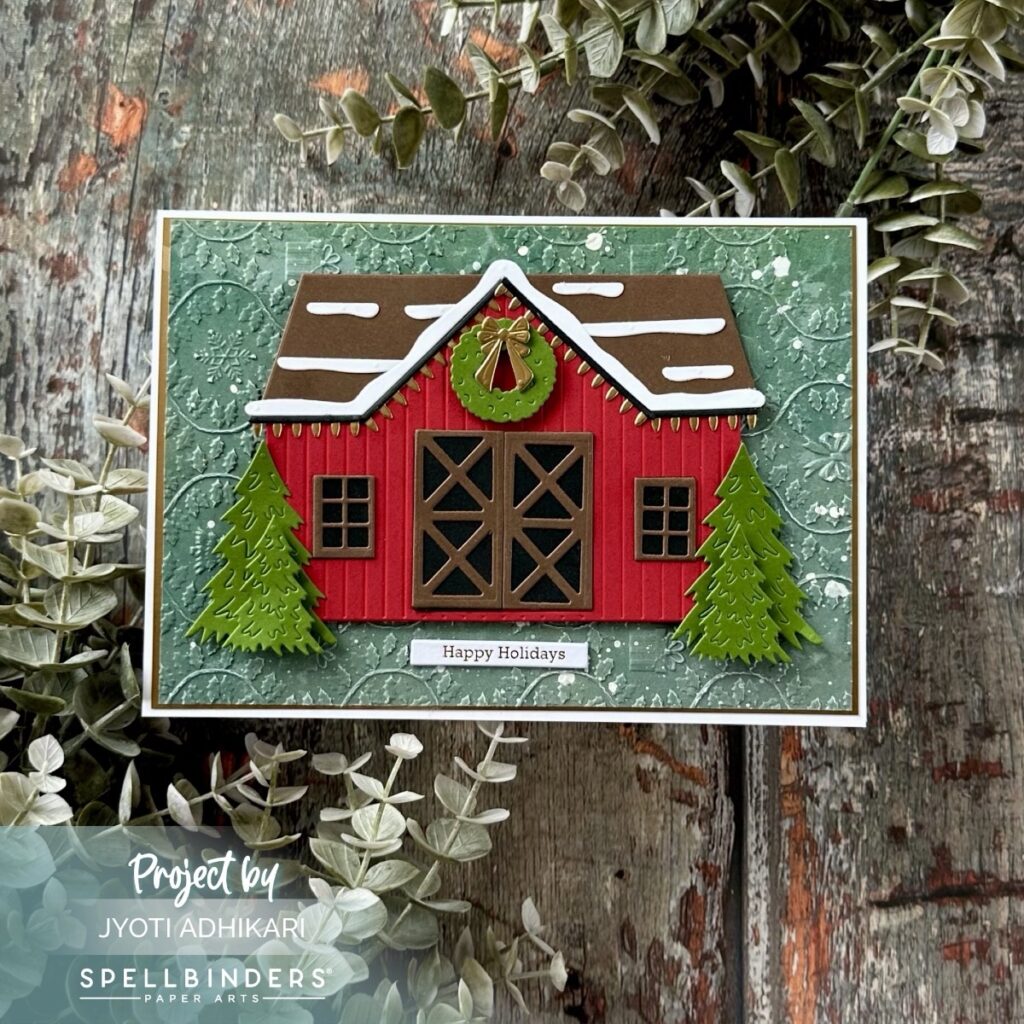
Adding the Scene Elements
To create a balanced scene, I flanked the barn with two pine trees, die-cut in green and added one on top of another with foam tape for dimension. These trees frame the barn beautifully and add texture and contrast against the warm red. All elements were arranged centrally for a clean and striking layout.
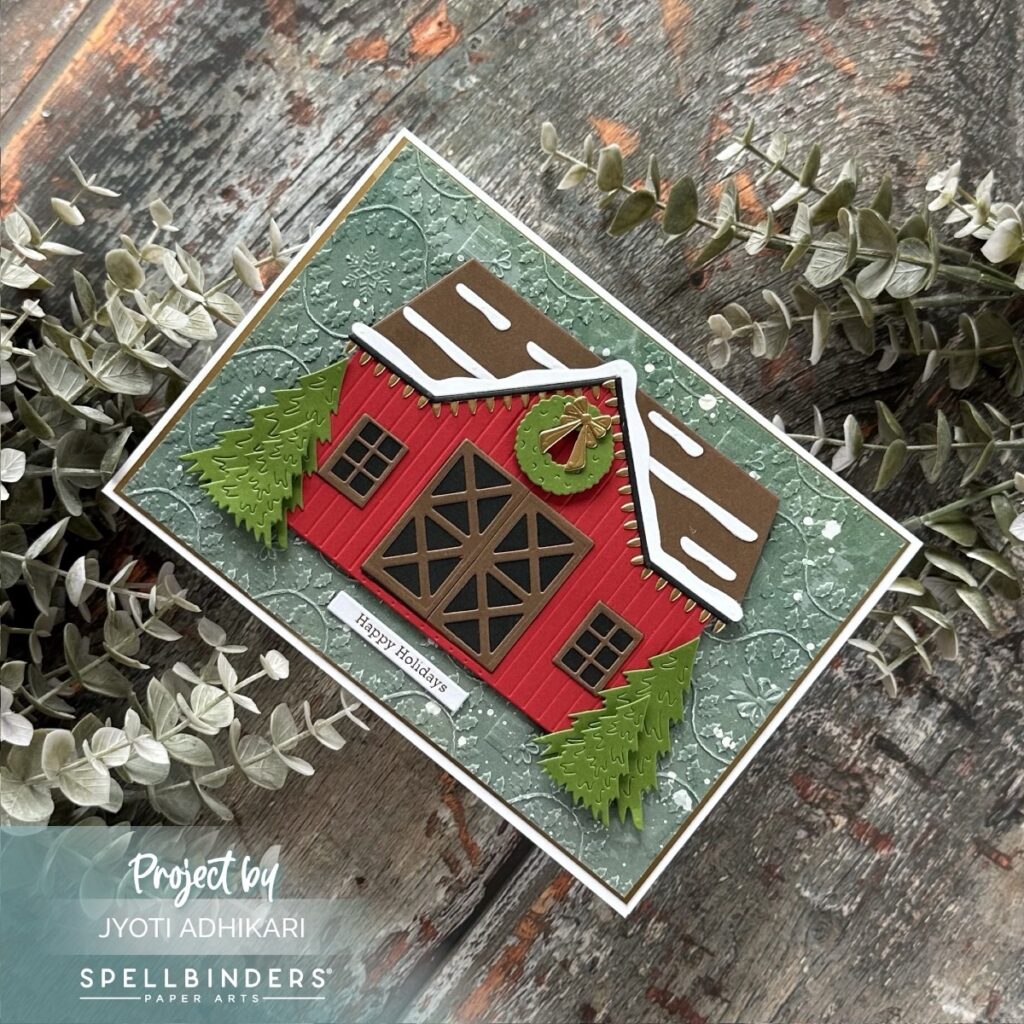
Texturing the Background
The background panel was cut from patterned green paper and run through the Country Christmas 3D Embossing Folder to add swirls and snowflake textures. I splattered white gouache over the panel to mimic falling snow, which added a subtle and cohesive wintery touch.
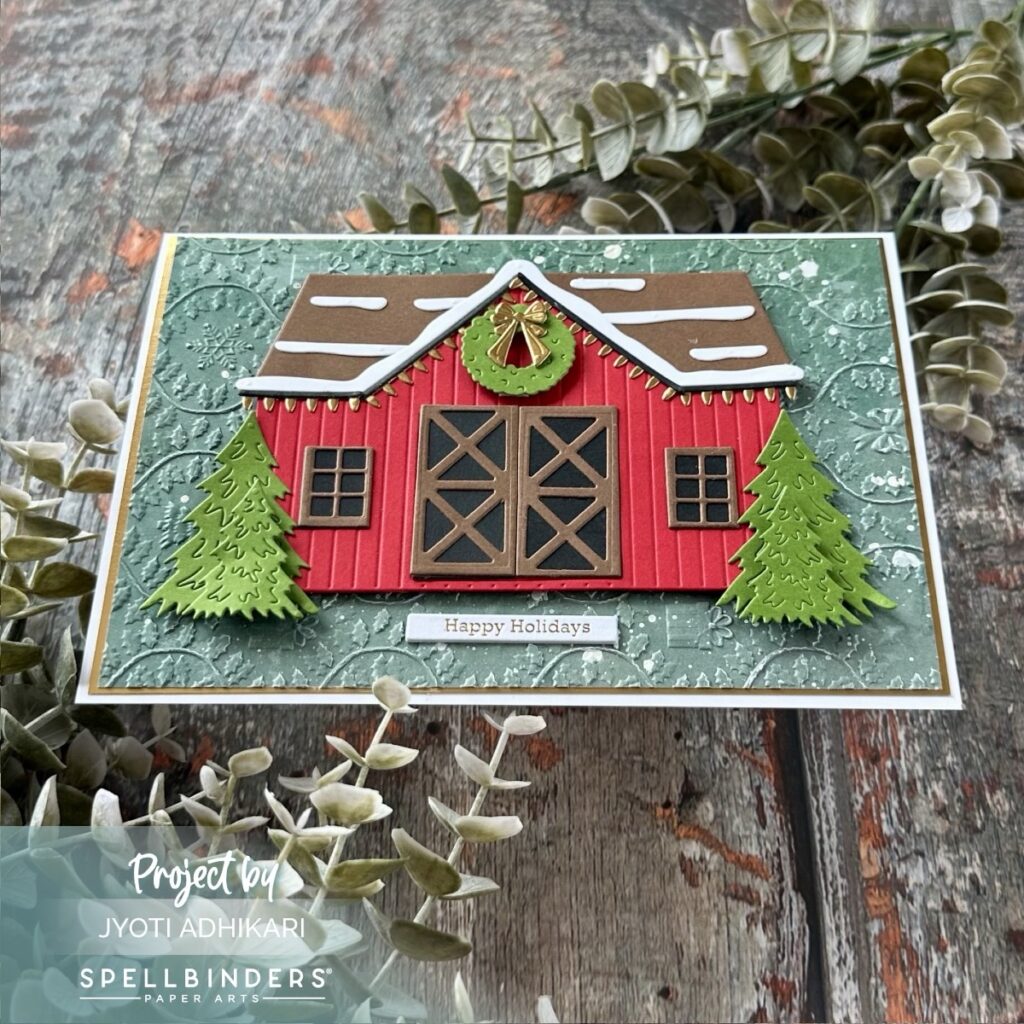
Finishing Details
I used foam tape to adhere all the die-cut elements to give the card extra depth. A simple “Happy Holidays” foil tab sentiment from Poppystamps was added beneath the barn to finish the design with a touch of shine without stealing attention from the scene.

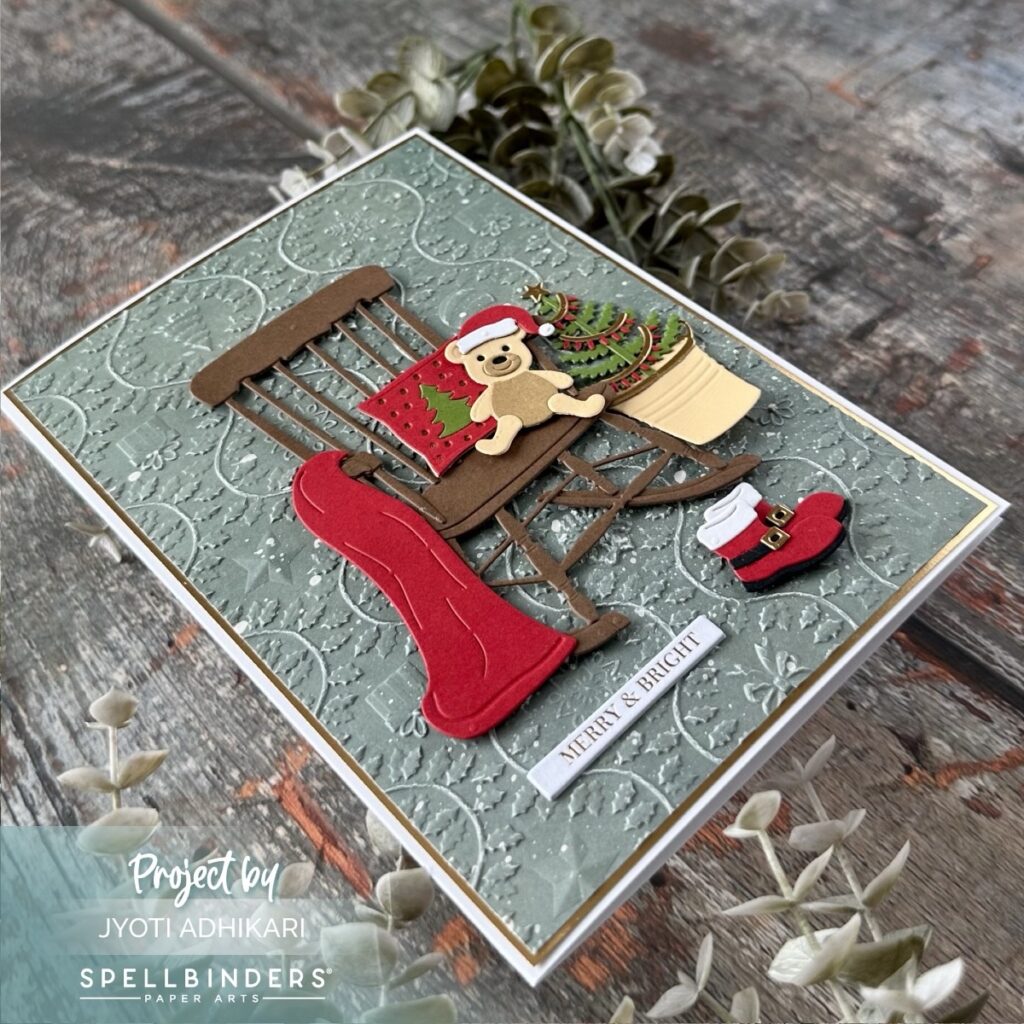
Christmas Rocking Chair Card
Die-Cutting the Chair and Base Scene
This card uses the Christmas Rocking Chair die set to build a cozy holiday nook. I began with a brown rocking chair as the focal point, placing it slightly off-center against the embossed green background to give the feeling of a decorated living space.
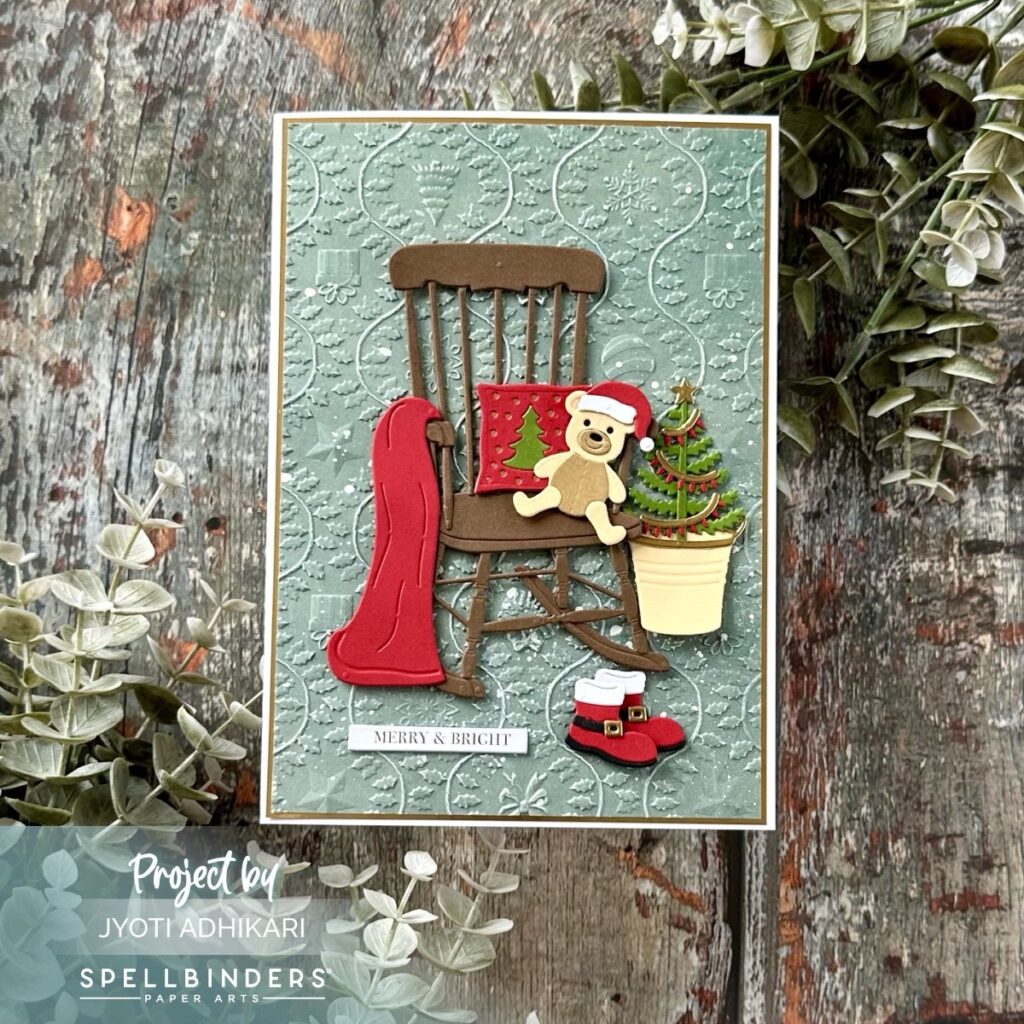
Layering the Holiday Accents
I added all the charming extras: a red pillow, a tiny teddy bear with a Santa hat, a potted Christmas tree, a bright red shawl, and even a pair of Santa boots under the chair. These little details help tell a story and bring a cozy, nostalgic vibe to the scene.
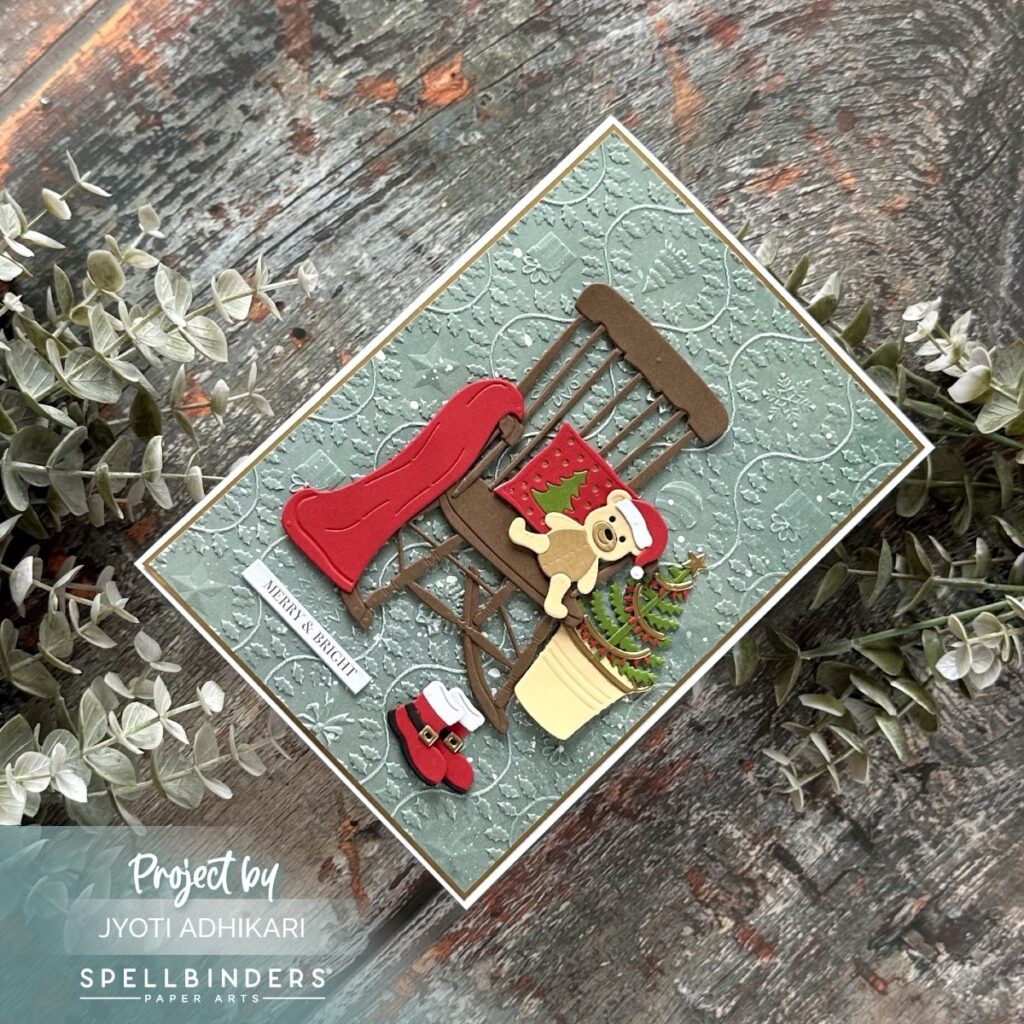
Creating the Background Atmosphere
I used the same patterned paper and Country Christmas 3D Embossing Folder as with the other cards, followed by a generous splatter of white gouache. The snowy effect adds softness and makes the vignette feel like it’s part of a larger winter setting.
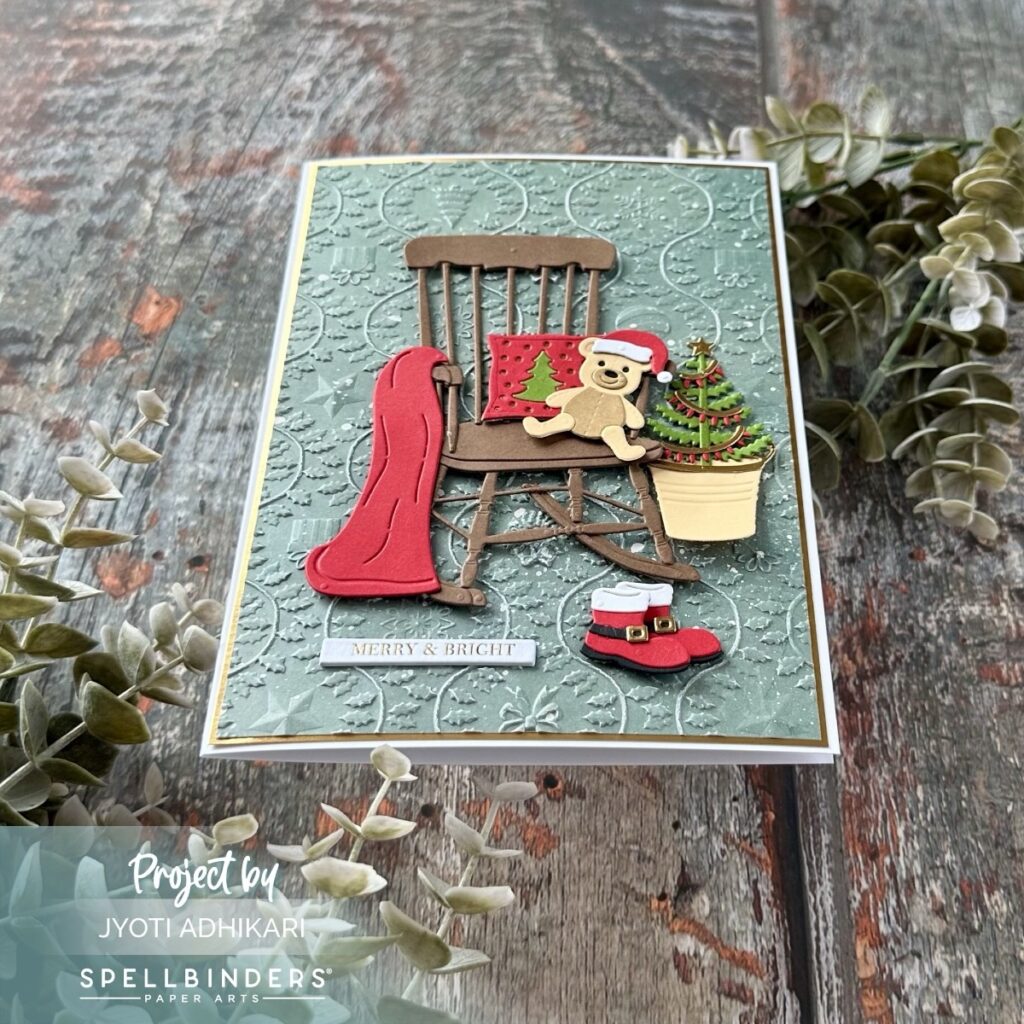
Simple Sentiment Placement
To keep the card balanced, I placed a “Merry & Bright” foil tab at the bottom center. The sentiment is subtle and elegant, allowing all the delightful details above to shine as the star of the card.
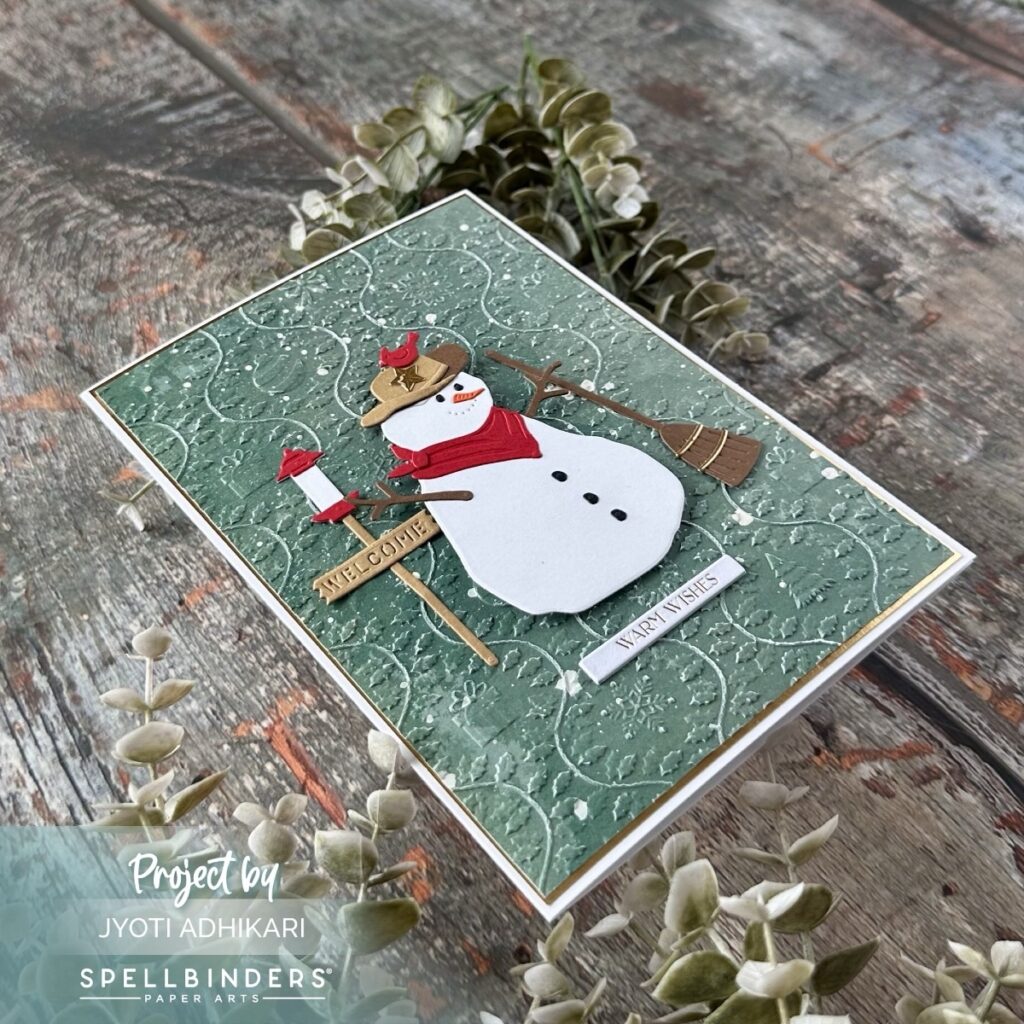
Country Snowman Welcome Card
Assembling the Snowman
Using the Country Snowman die set, I created a cheerful snowman in white with black buttons, a red scarf, and a tan hat. I perched a redbird on his brim for a festive touch and gave him a happy expression that brings life to the character.
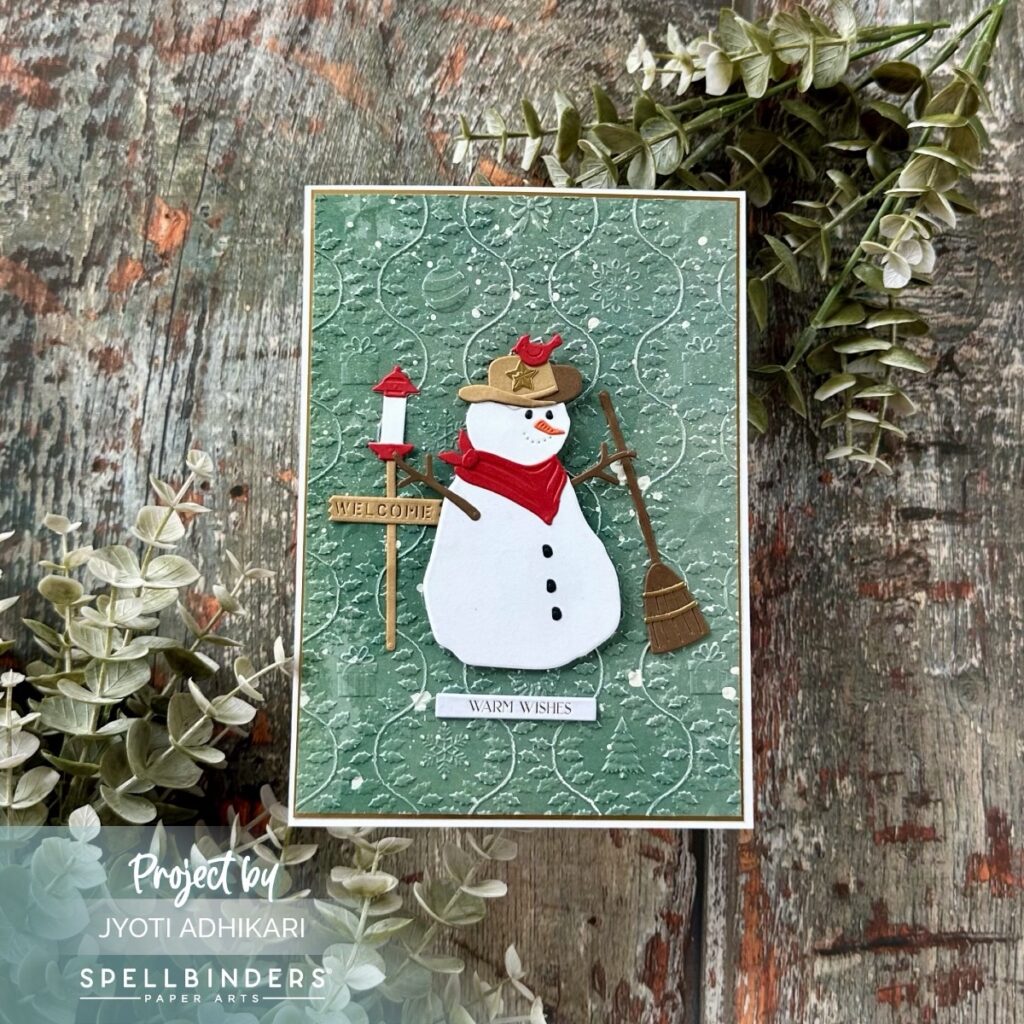
Adding Personality with Accessories
To ground the snowman in a wintry scene, I added a broom and a wooden “Welcome” sign. These elements frame him nicely and create a welcoming, front-porch-in-the-snow kind of vibe that feels both cozy and classic.
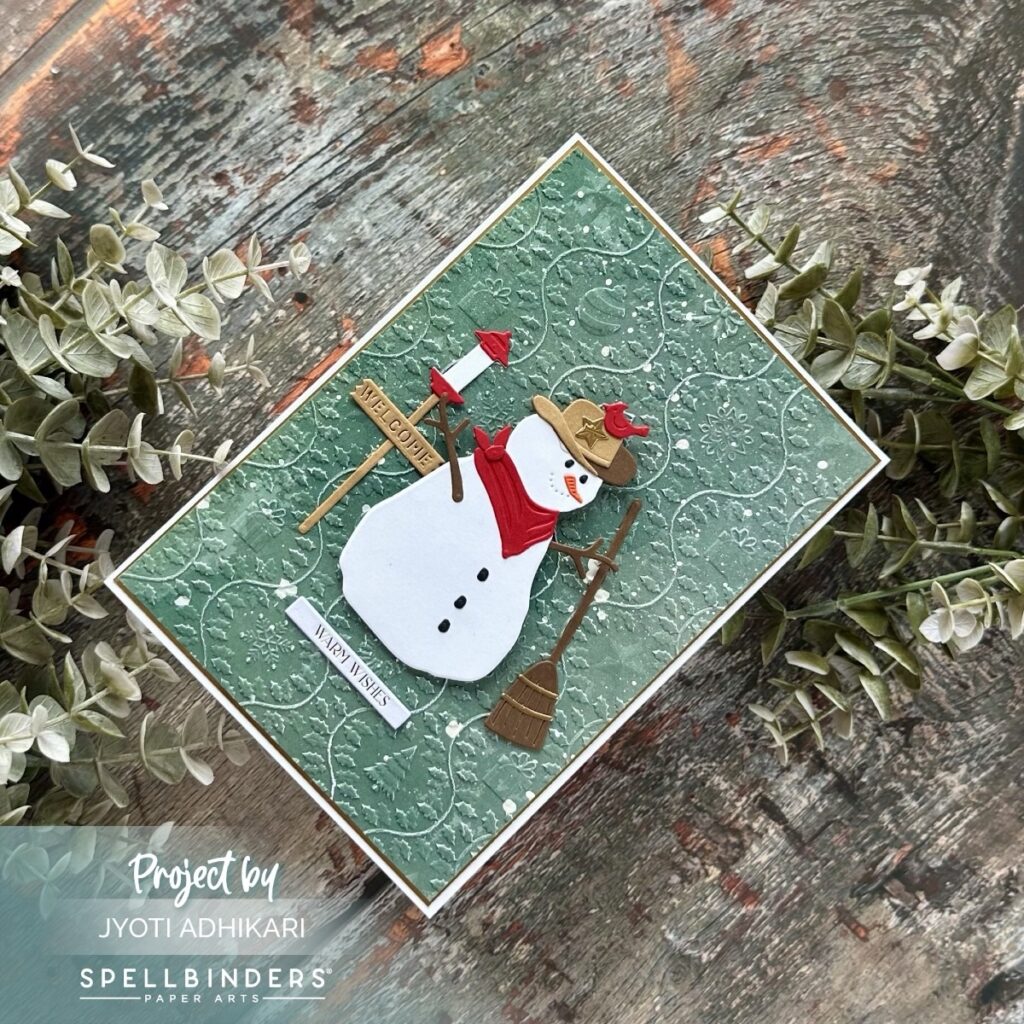
Coordinating the Background Texture
The background again uses patterned green paper, embossed with the Country Christmas 3D Embossing Folder to keep consistency across the set. A splatter of white gouache enhances the snowy feel and adds softness to the textured background.
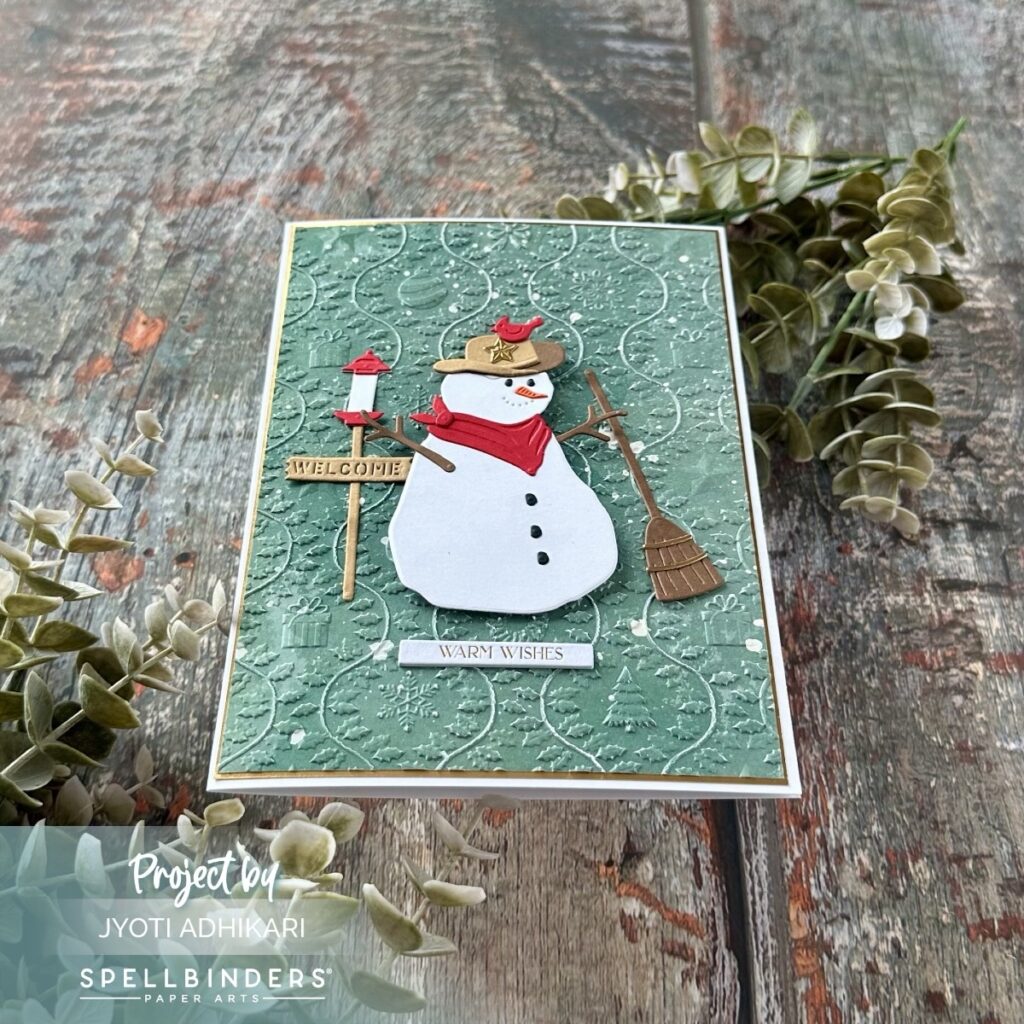
Clean Finish with a Sentiment Tab
I adhered the die-cuts with foam tape for dimension and placed a “Warm Wishes” sentiment tab at the bottom. It’s a lovely message that fits the tone of the card and completes this joyful winter welcome.
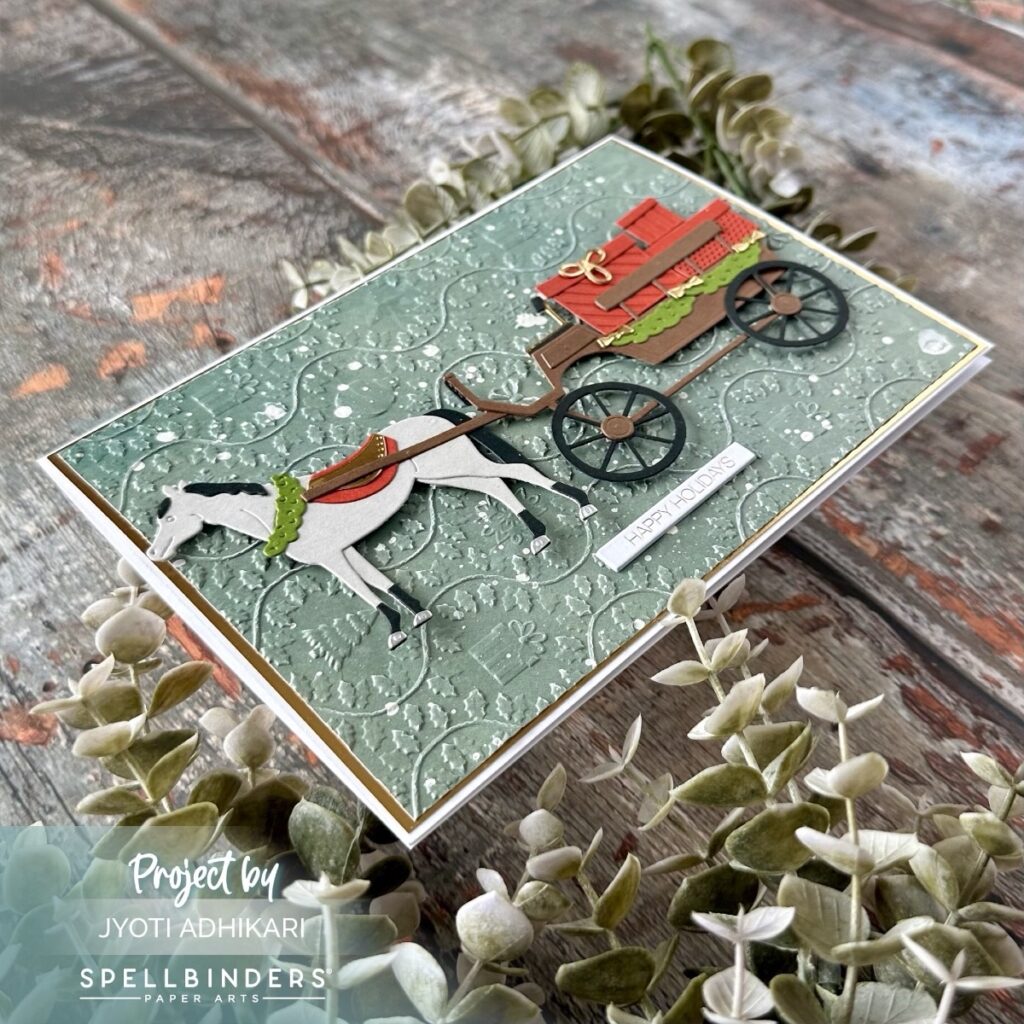
Christmas Horse Drawn Wagon Card
Creating the Horse and Harness
The Christmas Horse Drawn Wagon die set brought this elegant scene to life. I started with the horse, die-cutting it from cream cardstock and adding a black mane and tail. I decorated it with a green-and-red harness to give it a festive, classic touch.
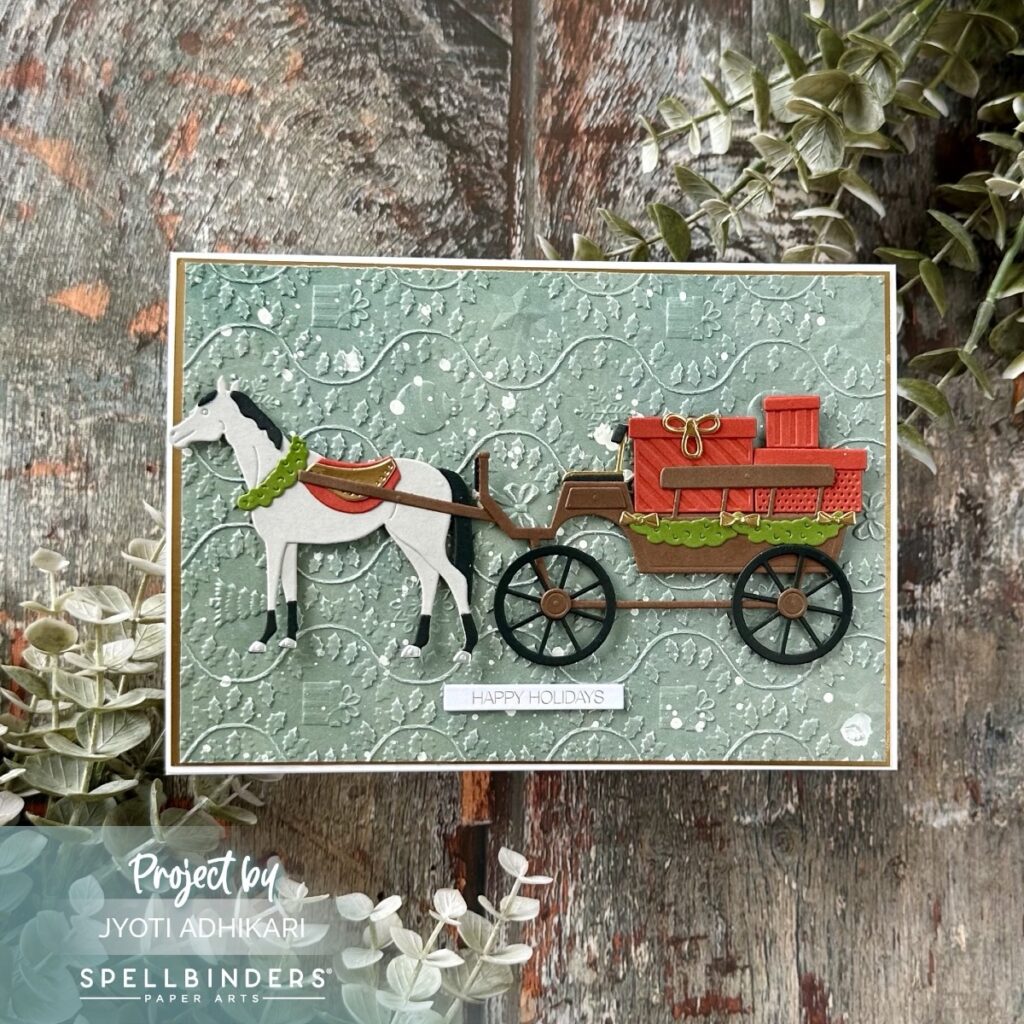
Building the Festive Wagon
The wagon was cut from warm brown tones, then filled with stacked red gifts and seasonal greenery. These tiny details give the impression that the wagon is delivering Christmas cheer straight from the countryside.
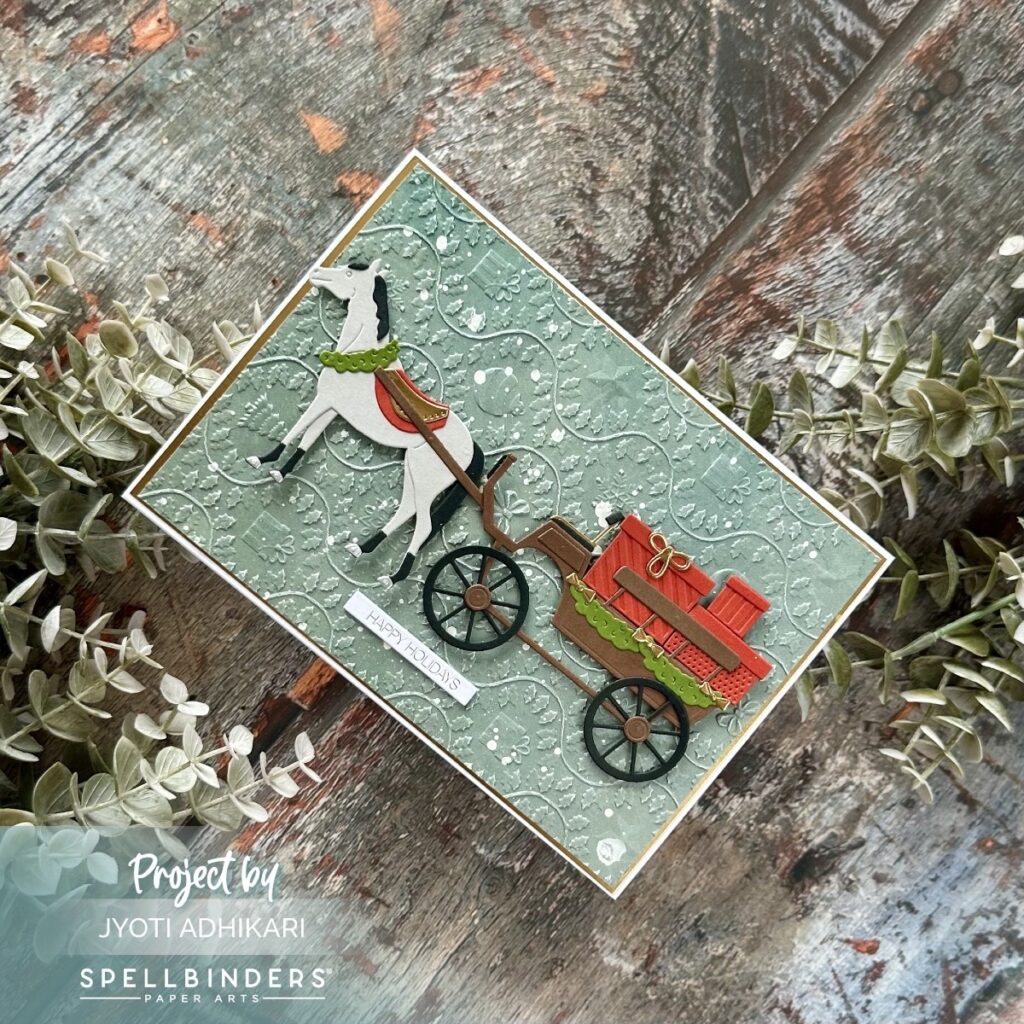
Designing the Snowy Setting
As with the other cards, I embossed a patterned green background using the Country Christmas 3D Embossing Folder and splattered white gouache across it to suggest a gentle snowfall. I used foam tape to layer the scene, letting the wagon slightly extend off the panel edge for a dynamic look.
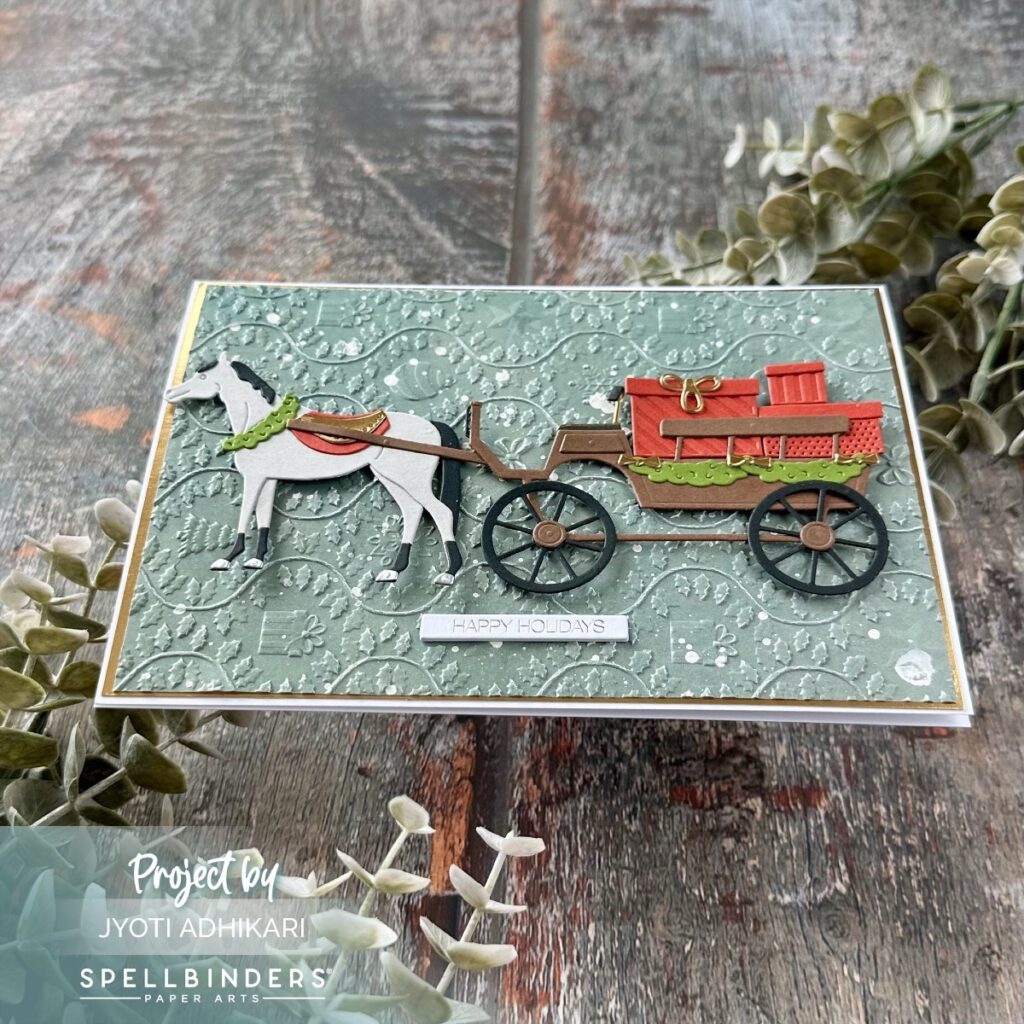
Adding the Final Touches
I finished the card with a “Happy Holidays” sentiment from the foil greeting tabs, placed beneath the horse to anchor the composition. The finished result feels like a vintage holiday postcard brought to life with paper.
These 5×7 cards were a delightful way to showcase the detailed dies in the Country Christmas Collection by Annie Williams. The larger format allowed me to create full scenes without feeling cramped, and the cohesive use of patterned paper, gold matting, textured backgrounds, and simple sentiments brought everything together beautifully. If you’re looking to try a new card size or want to build layered, storybook-like Christmas scenes, I highly recommend giving this collection a try!
Hugs,
Jyoti
Christmas Rocking Chair Etched Dies Shop at: SB |
Country Christmas Barn Etched Dies Shop at: SB |
Christmas Horse-Drawn Wagon Etched Dies Shop at: SB |
Country Snowman Etched Dies Shop at: SB |
Country Christmas 3D Embossing Folder Shop at: SB |


