Hello friends!
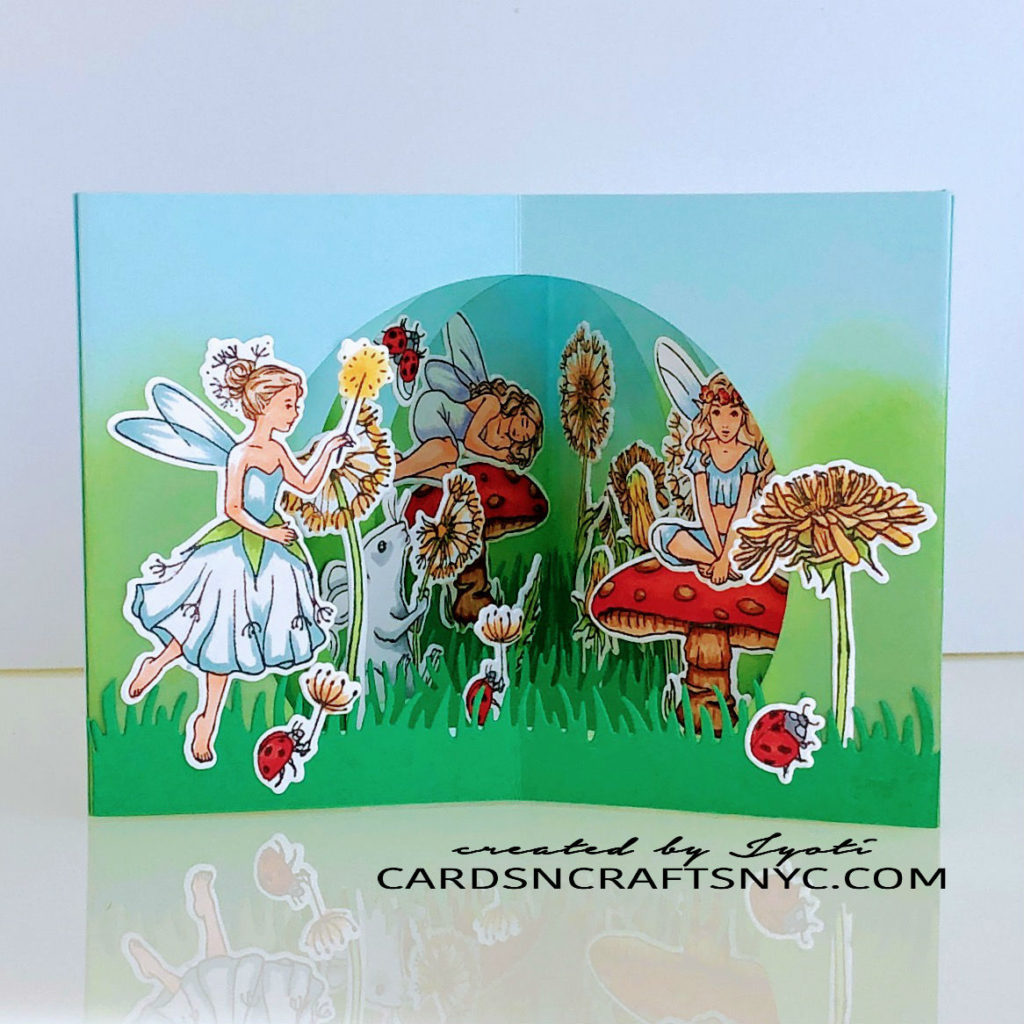
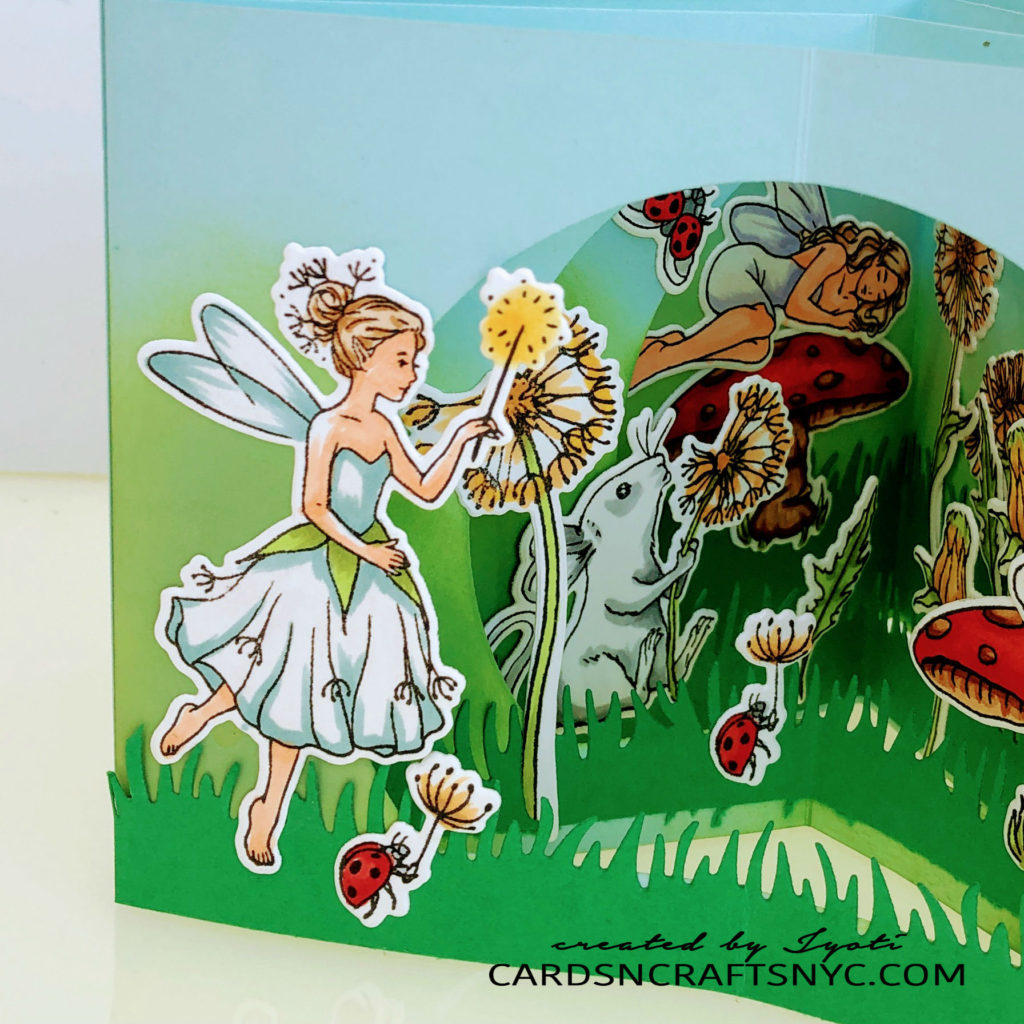
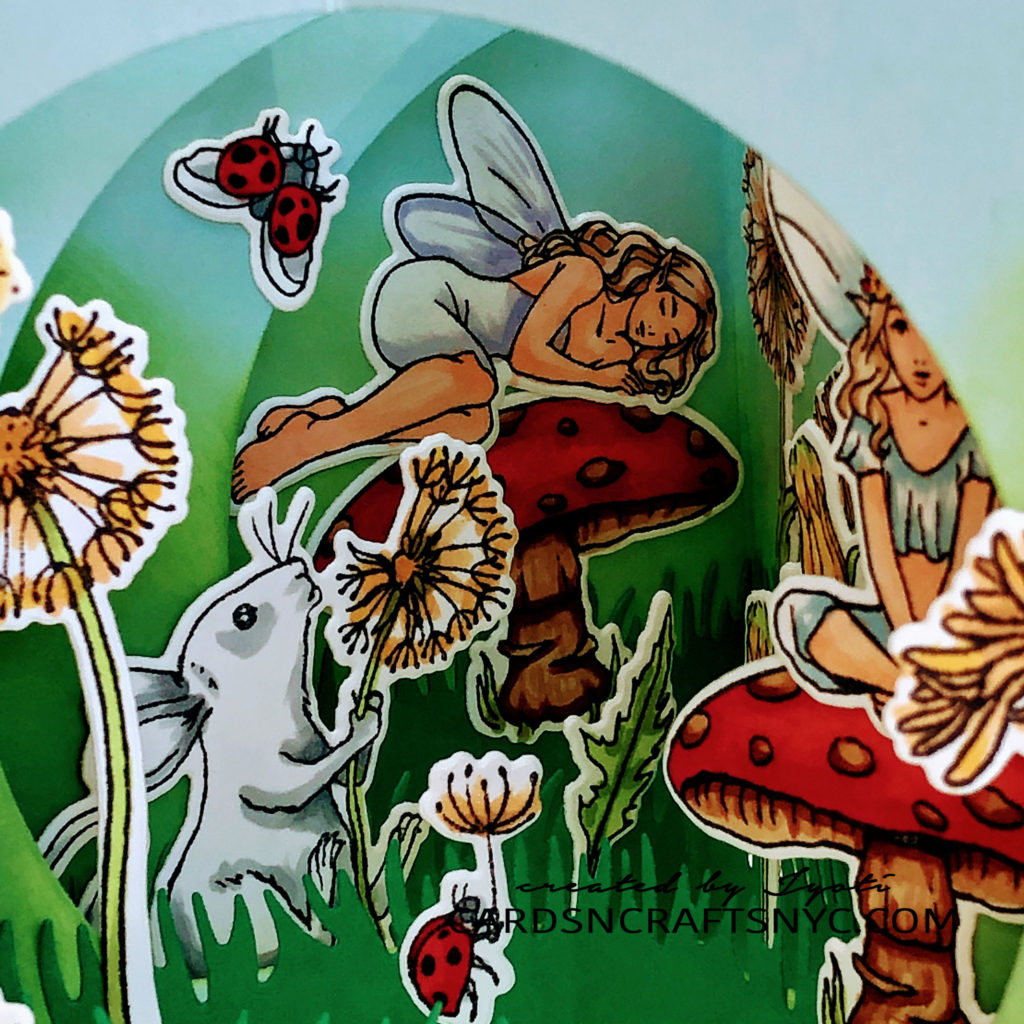
Today I have a very fun card to share with you. I have been a member of the Hero Arts Monthly Kit and I have loved each one of the subscription I have been receiving each month in my mail box. It is the My Monthly Hero Kit of December 2018 that I am featuring today. This is a large 6″ by 8″ stamp set with beautiful images of fairies and dandelion. As soon as I found out what images are in the upcoming stamp in my subscription I had this idea in my head. I wanted to create a card that looks like a scene but in layers.
The Elements:
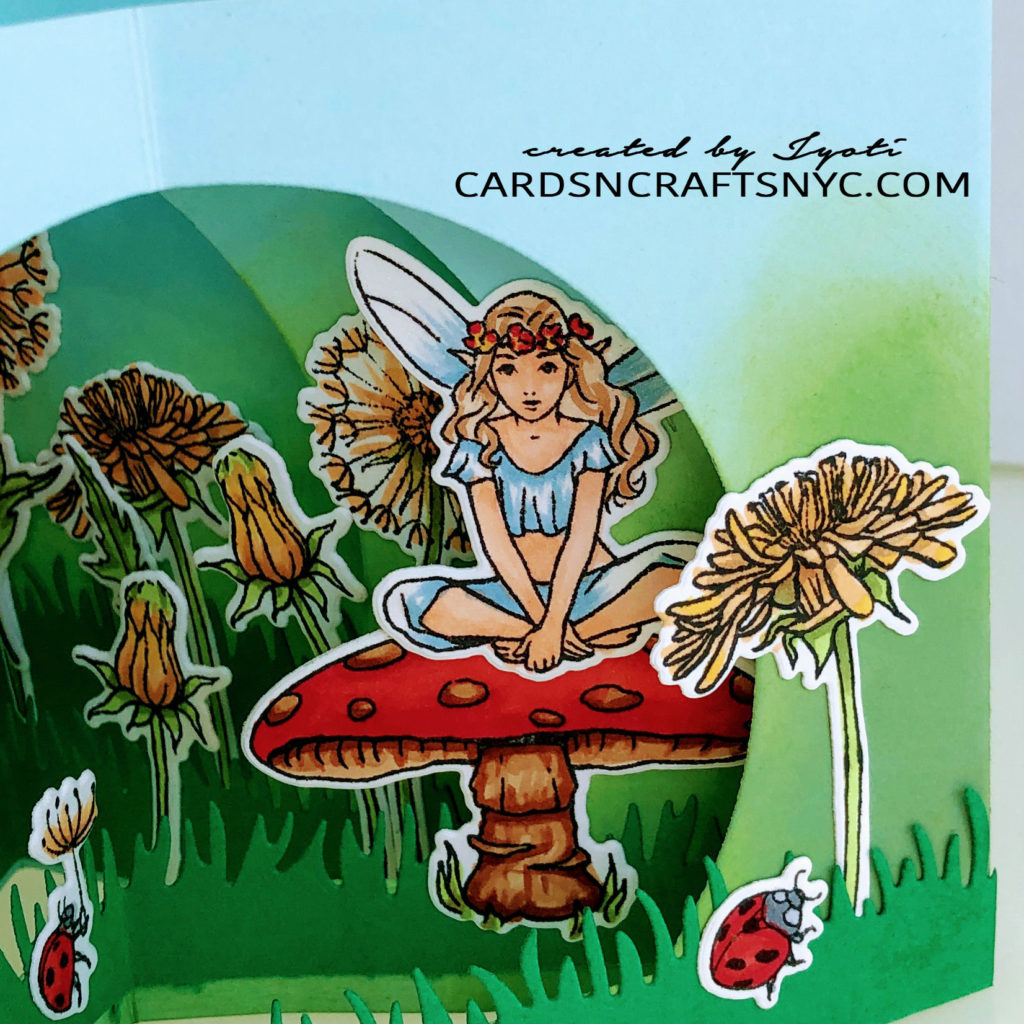
So I created this fun card with layers of scenes using all of the images in the stamp set. The stamped images are colored using Copic Markers, and I usually bring the stamped images to work. Whenever I get a little bit of free time I color them. Took them home and die cut using the coordinating dies that came in the kit.
The Layers of The Card:
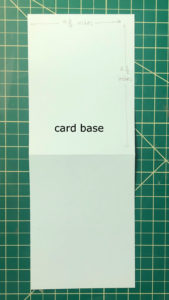
I started cutting out the layers of card stock. Instead of blending blue and green I picked a light blue card stock so that it would look like a sky and I could ink blend the bottom half with Mowed Lawn Distressed Oxide Ink.
I used the Grassy Border die from My Favorite Things to cut a grass from dark green Card stock.
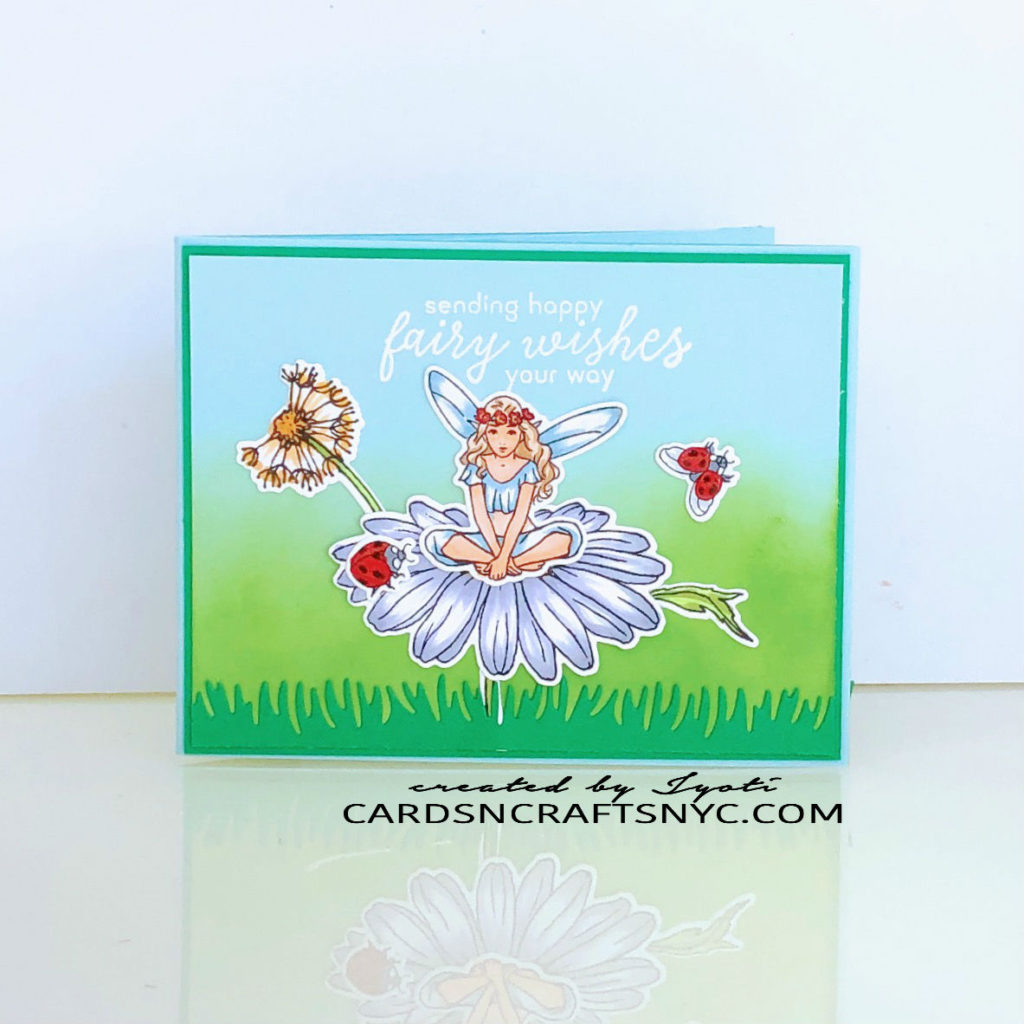
This card is 4 and a quarter inches tall and 5 and a half inches wide. It is a landscape side folding card.
Here are the sizes of the layers of card stock:
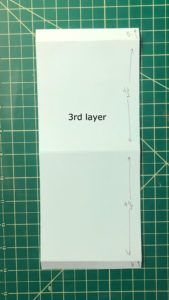
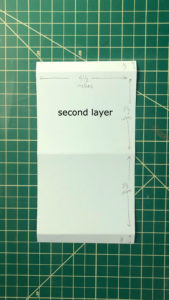
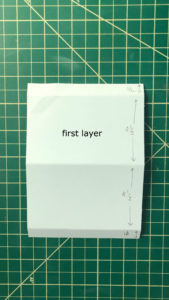
There are three layers in the inside with arched windows cut in the middle using the largest die of the Arched Circle Stacked Die from My Favorite Things.
Front of the Card:
Front of the card is another panel of slightly smaller card stock again ink blended and decorated with the images.
The Sentiment:
The sentiment is from the same stamp set, stamped in Versamark Ink and embossed in Hero Arts White Detail Embossing Powder.
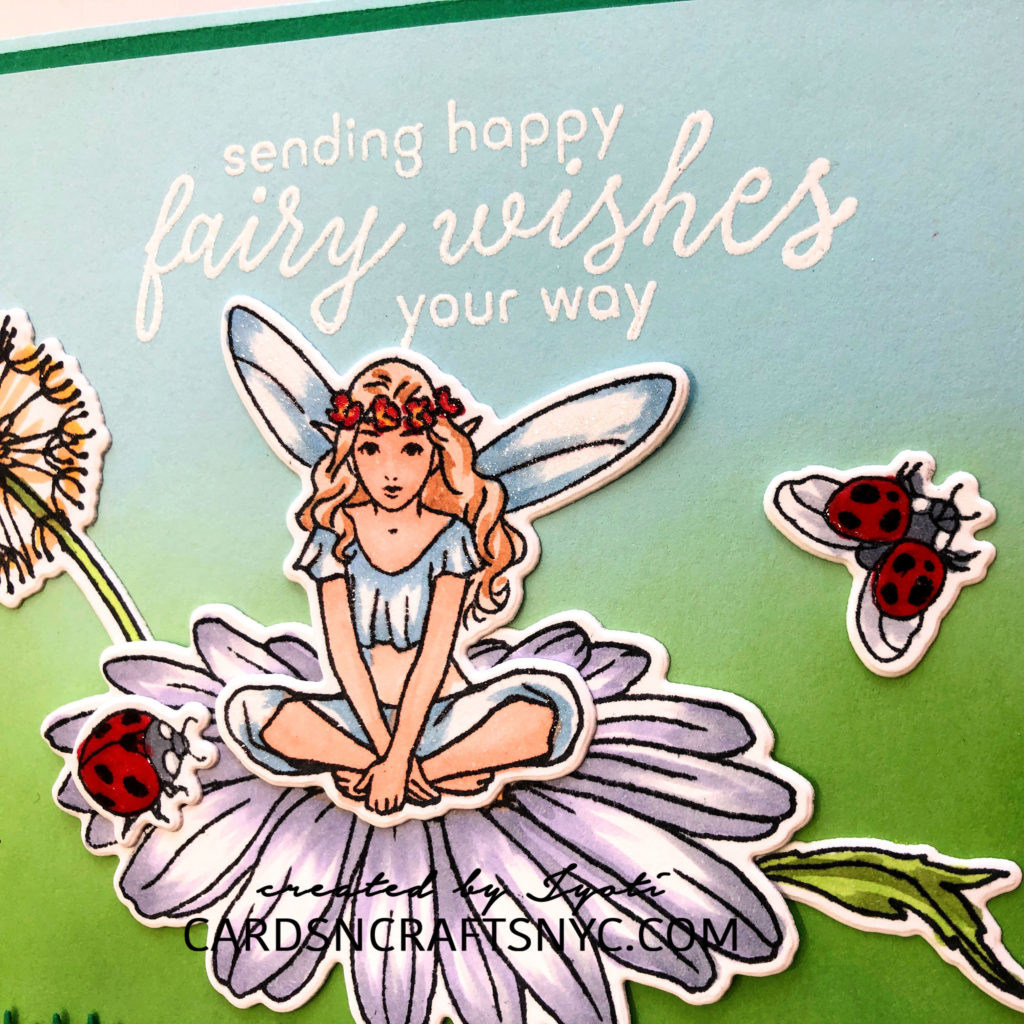
For the final touch I added Wink of stella glitter pen on the clothes of fairies and the dandelion. on the lady bug images I added some glossy accent.
I think this card turned out amazingly dreamy and beautiful. Hope you guys will give this technique a try. This is a vey easy card that looks like a stage with all these images added in those layers.
Let me know what you guys think in the comments down below. Can’t tell you how much I love reading comments. If you create something similar please do tag me on social media.
Hugs
Jyoti.
Supplies I used :
Thank you for all the steps, can’t wait to give it a go
One of the cutest cards I’ve seen. Absolutely love it. Hope I can recreate something similar.
Thank you Machele.
Your card is just wonderful. Well done!!!
Thank you Leslie .
What a wonderful card. I am going to try and follow and see if I can make one. Love Hero Arts kits.
Yes Pat I love Hero Arts Kit too. This card is easy to make. I am sure you can.