Embark on a journey of creativity and elegance as we unveil three enchanting cards featuring the mesmerizing Nordic Spectacular Butterfly die set. Join me as I share the step-by-step process behind each creation, from die-cutting to foiling and embellishing. Let’s dive into the artistry of card making and discover the magic of transforming simple materials into works of art!
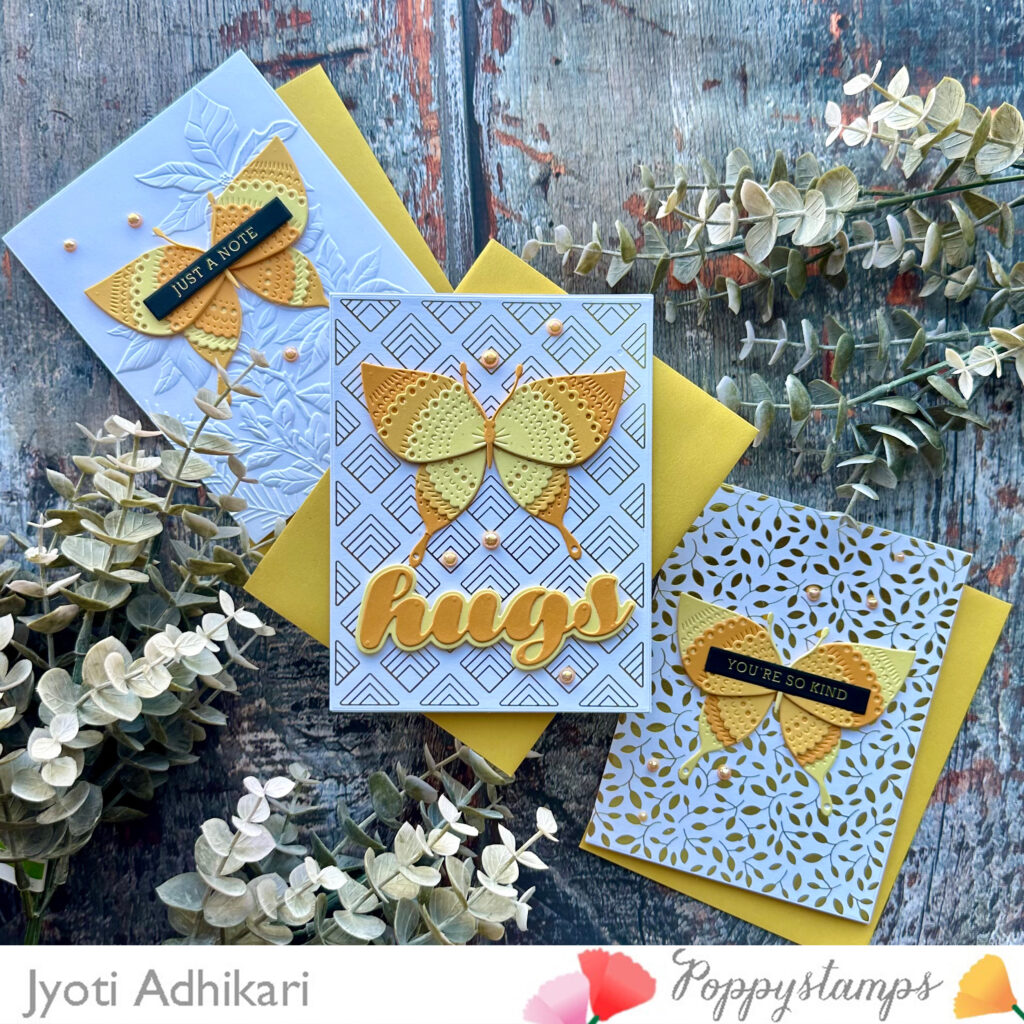
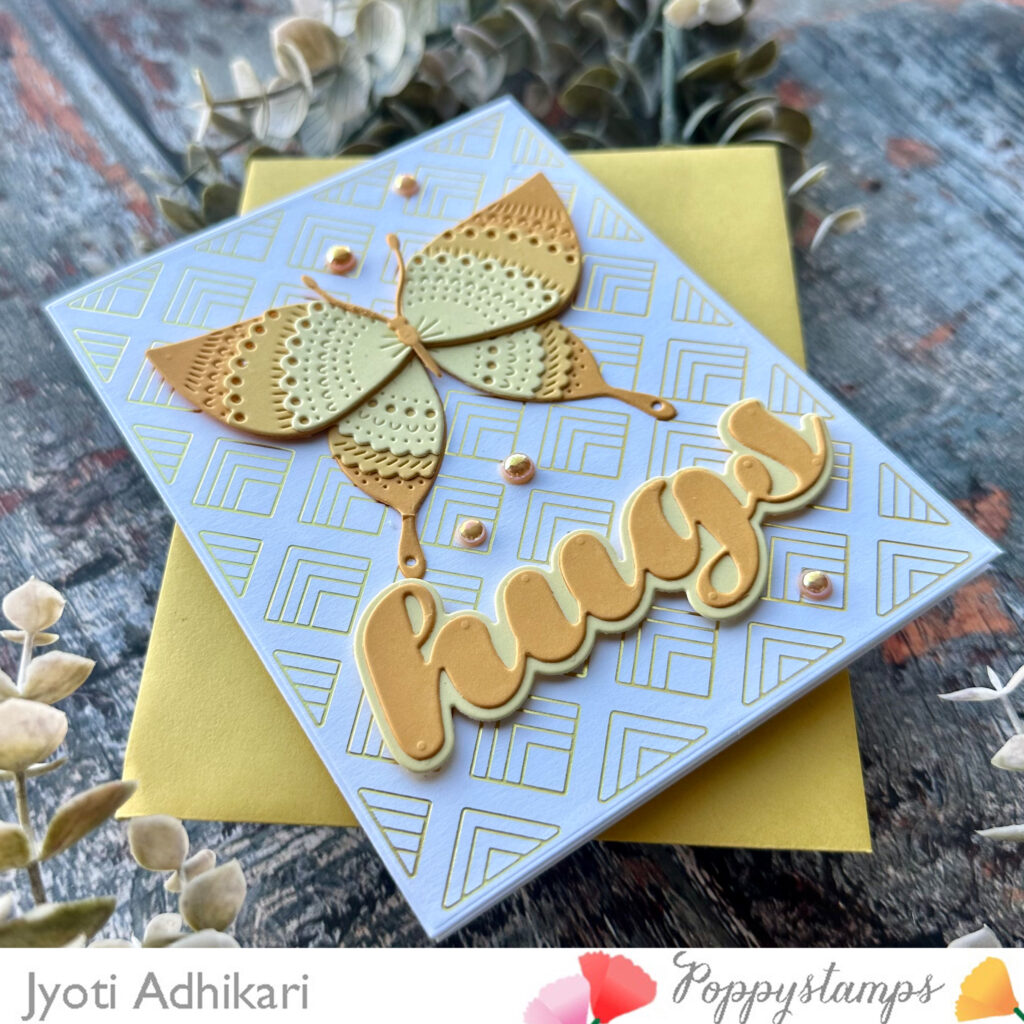
Gilded Opulence
Creating the Butterfly
The first step was die-cutting three shades of yellow cardstock using the Nordic Spectacular Butterfly die set. The cardstock I picked is Sunrise 6*6 Pack from Memory Box. I carefully alternated the colors to achieve a layered effect that adds depth to the butterfly.
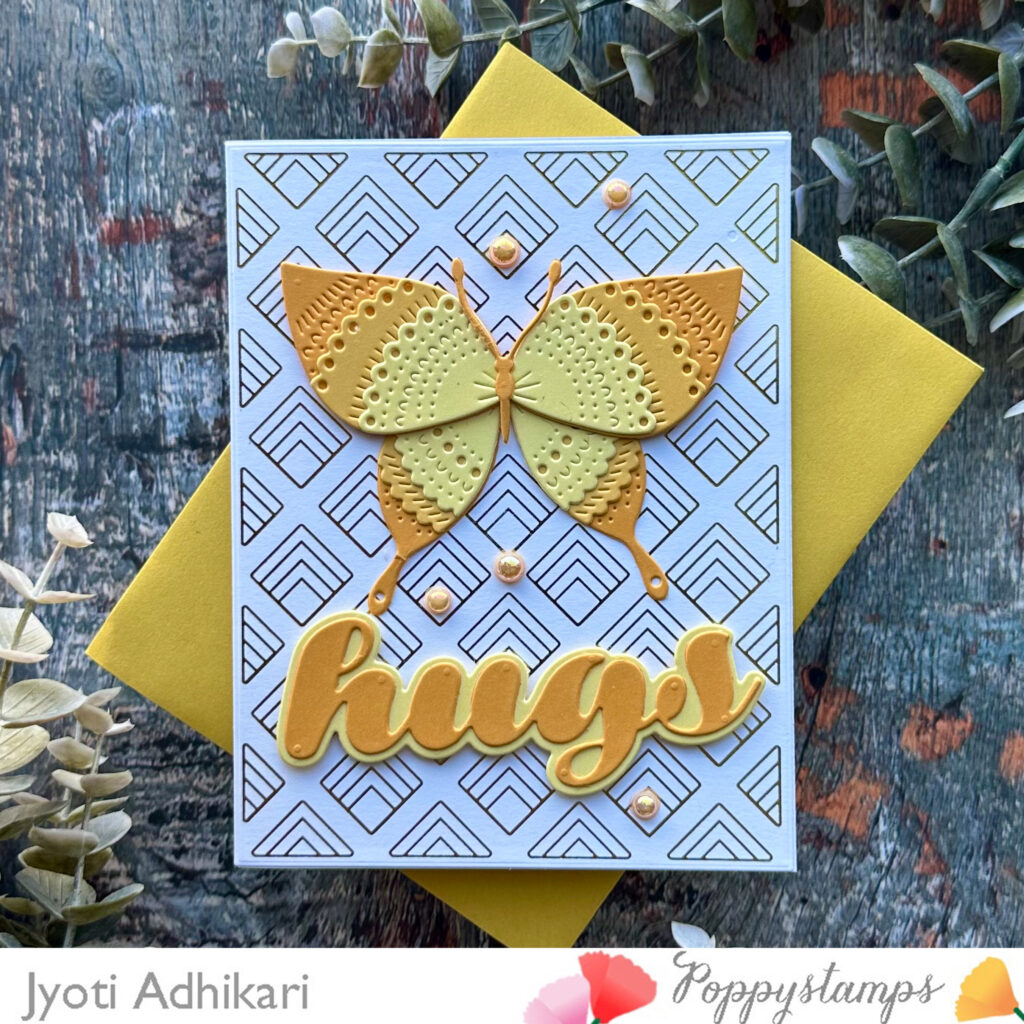
Foil Background
To infuse the card with opulence, I used the Deco Diamond Hot Foil Plate to foil a dazzling pattern onto a white cardstock panel. The gold foil creates a luxurious backdrop that sets the stage for the butterfly centerpiece.
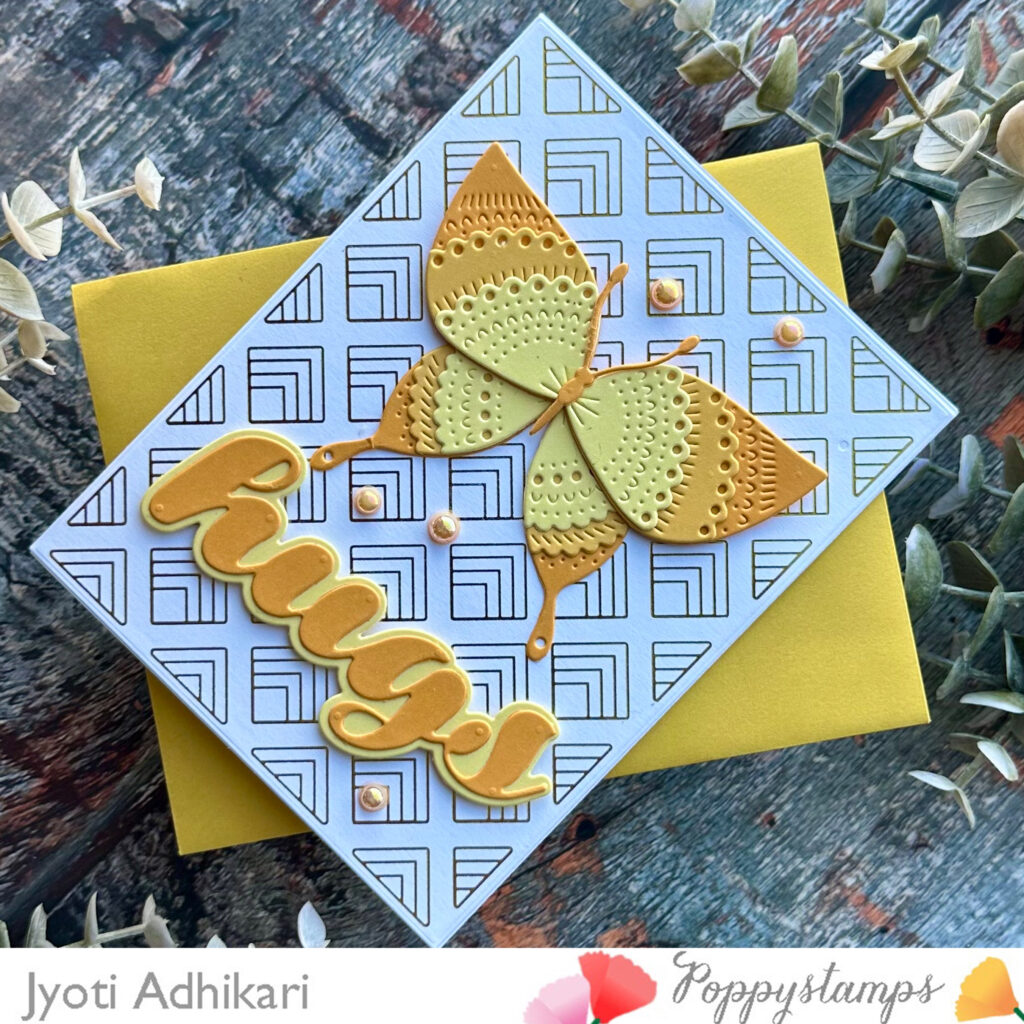
Assembly and Sentiment
After adhering the foiled background to an A2 card front, I positioned the butterfly in the top center for maximum impact. To convey warmth and affection, I added the sentiment luscious “Hugs” beneath the butterfly, die-cut from two shades of yellow cardstock.
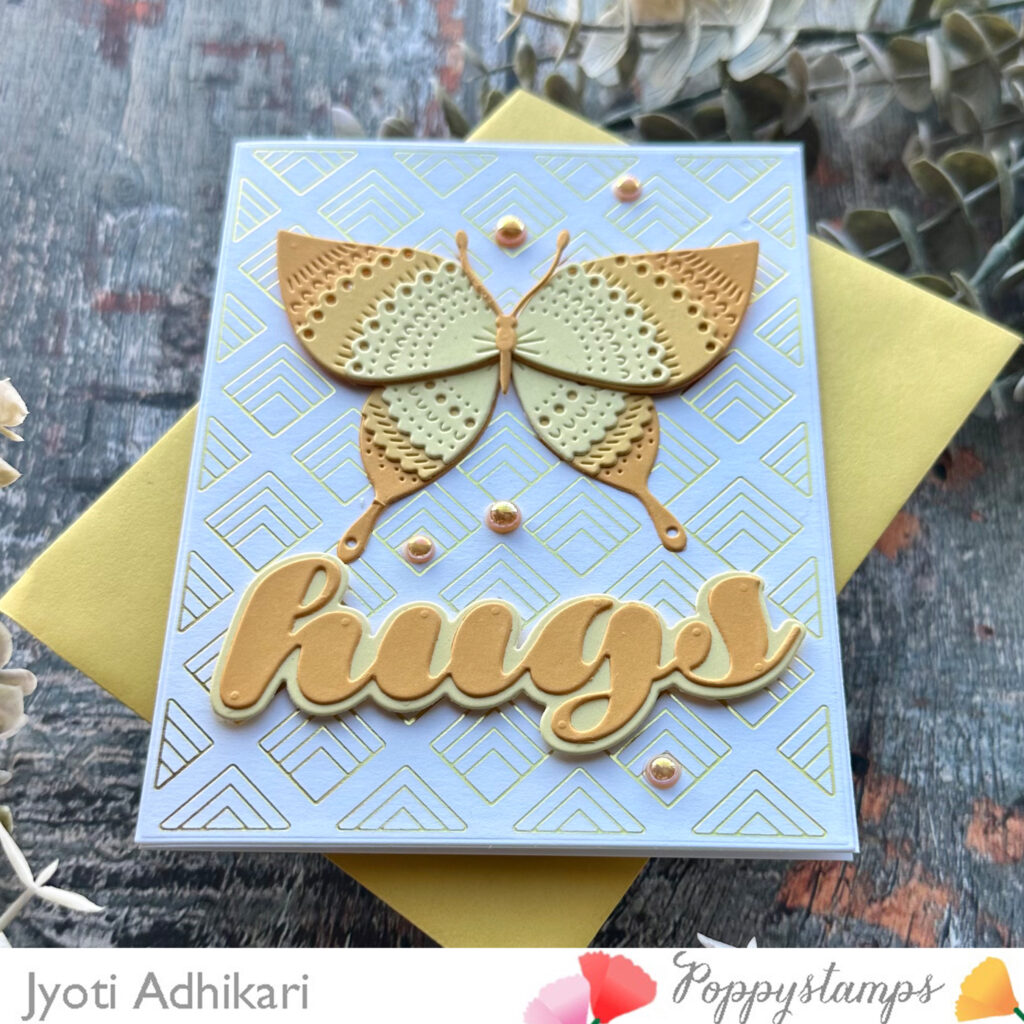
Final Flourish
To elevate the card’s elegance, I embellished it with yellow pearls of varying sizes, strategically placed to enhance its refinement and allure.
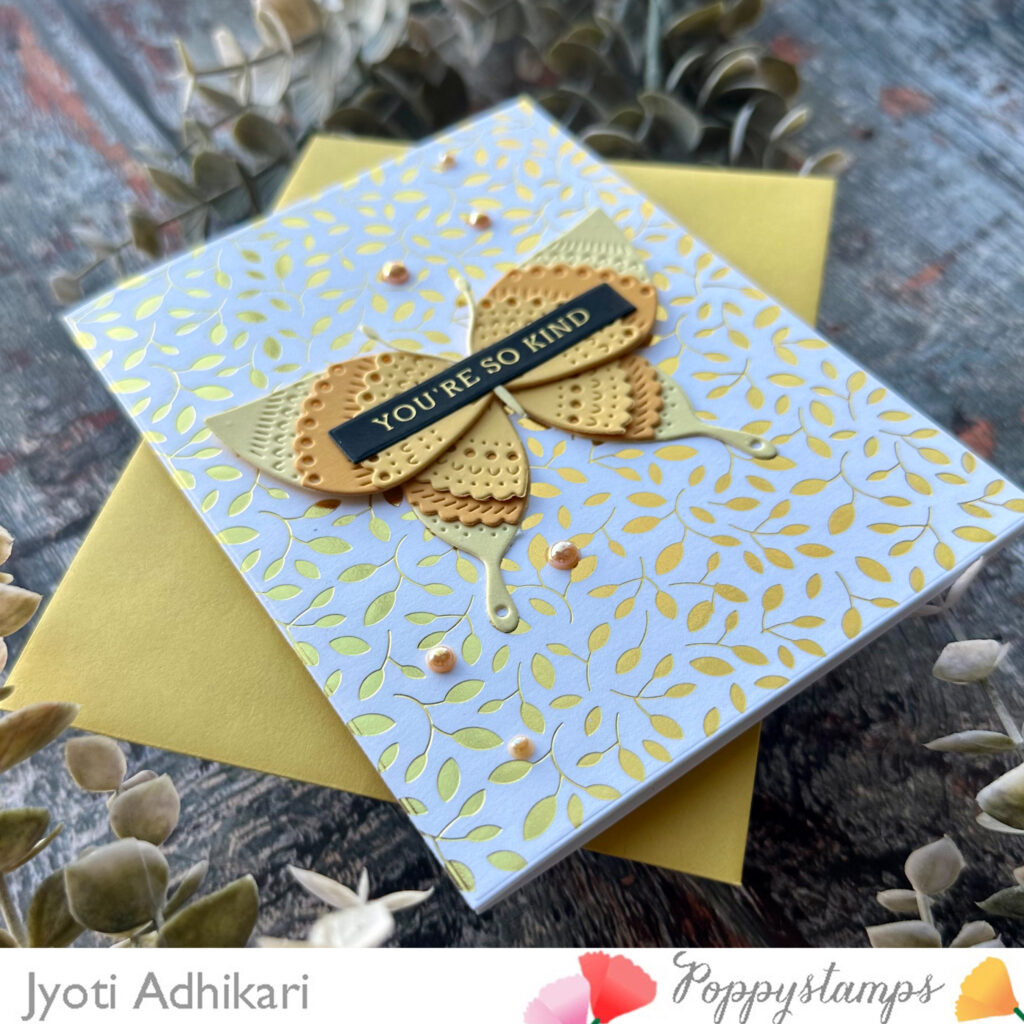
Radiant Kindness
Crafting the Foil Background
I started by creating a radiant background using the Leaf And Tendril Hot Foil Plate on white cardstock. The intricate design, foiled in gold, imbues the card with a sense of warmth and sophistication.
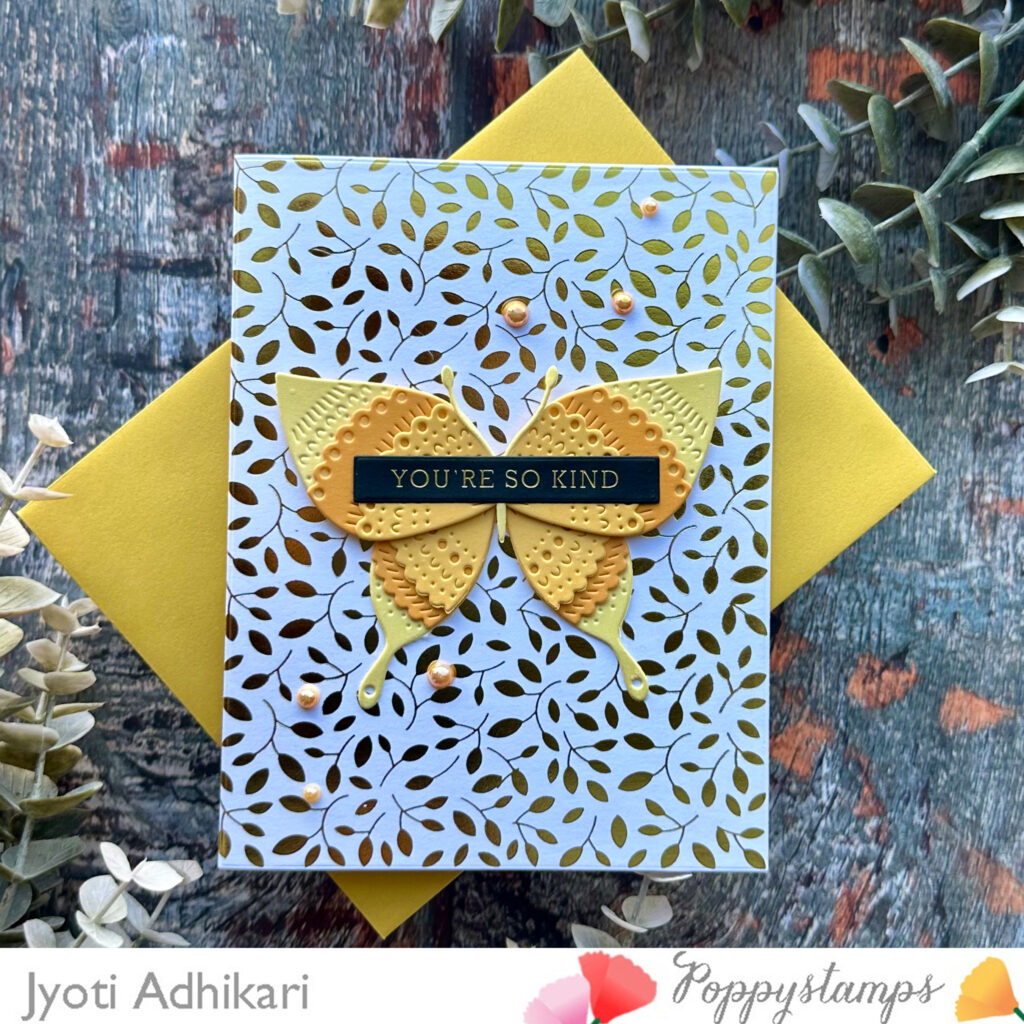
Butterfly Placement
Placing the Nordic Spectacular Butterfly atop the foiled background was a pivotal moment. Its graceful silhouette against the golden backdrop exudes elegance and charm.
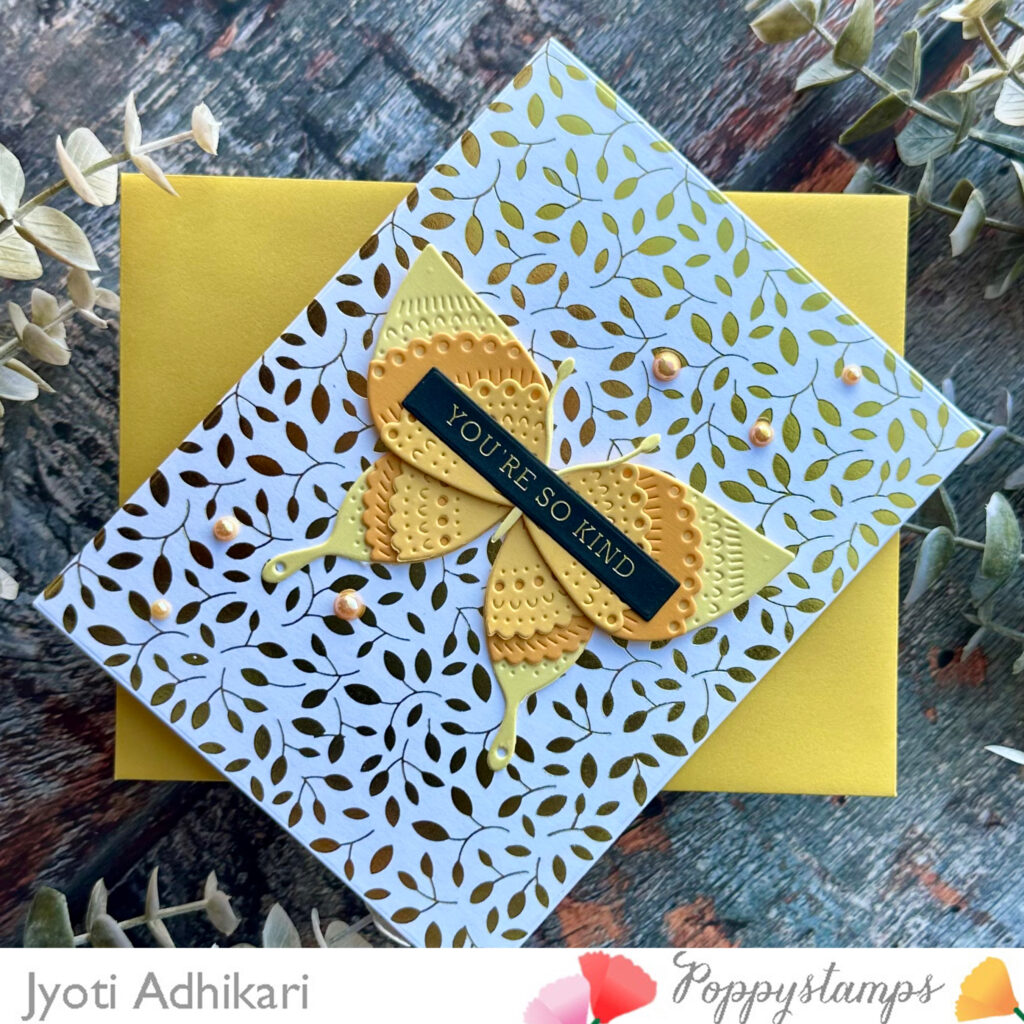
Adding Sentimental Touch
To convey heartfelt appreciation, I foiled the sentiment “You Are So Kind” onto black cardstock using the Modest Greetings 2 set. The sentiment strip was then delicately positioned atop the butterfly, completing the card with a message of gratitude.
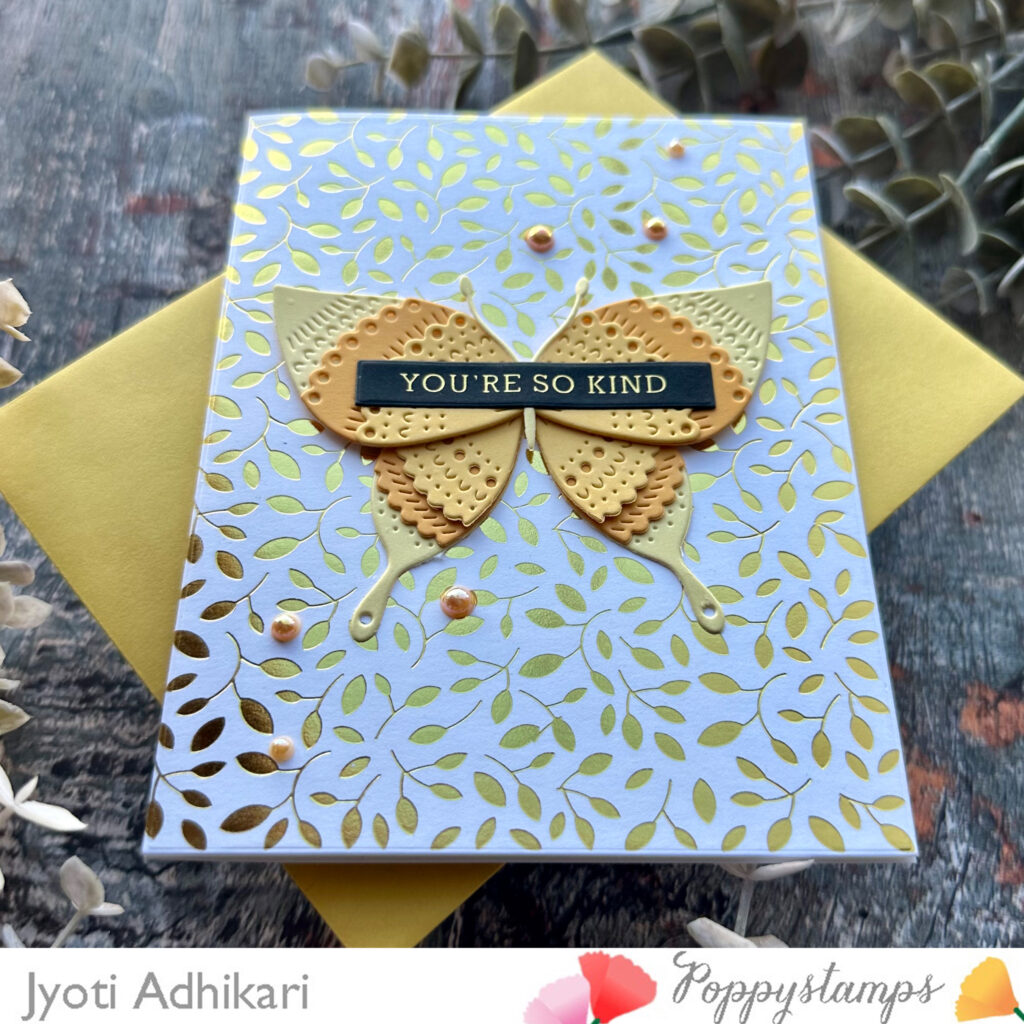
Final Touches
A scattering of yellow pearls adds the perfect finishing touch, enhancing the card’s radiance and adding a playful element to the design.
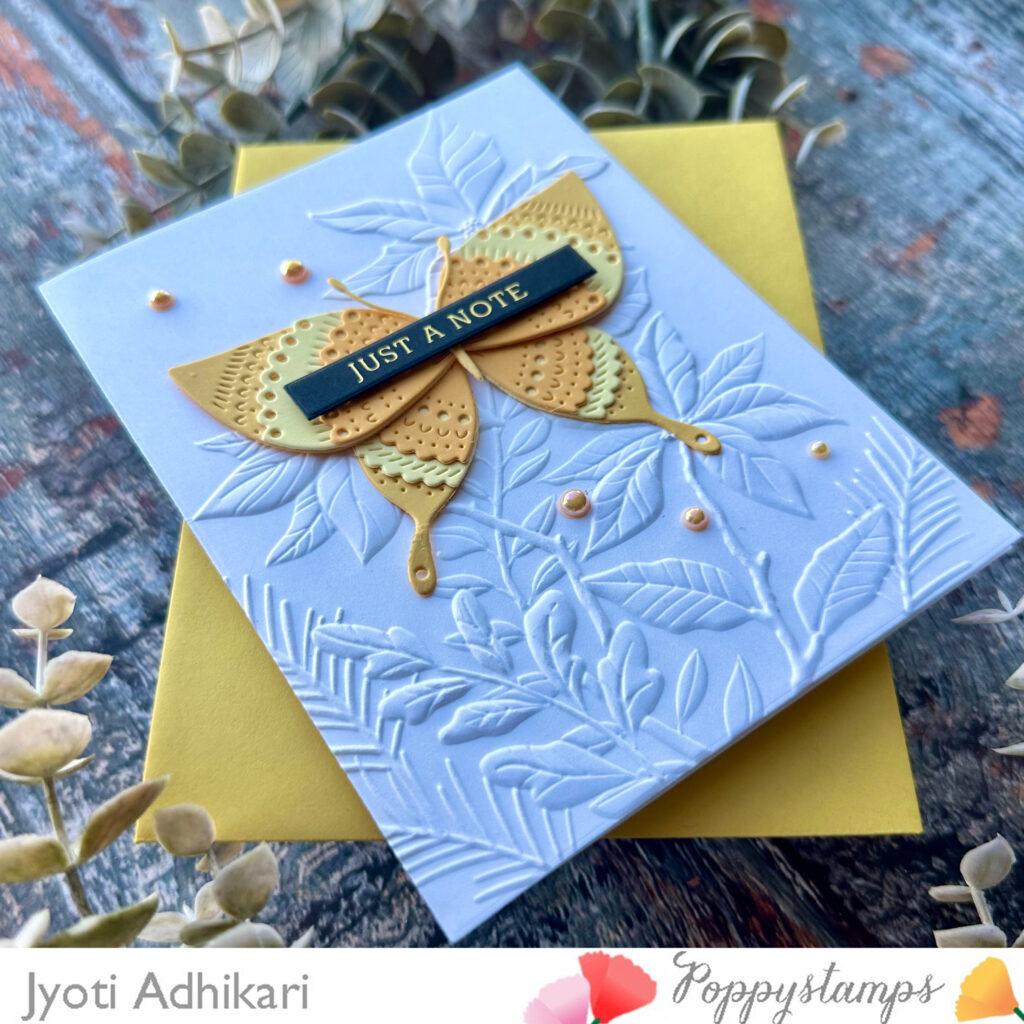
Whimsical Charm
Creating Texture with Embossing
Seeking a whimsical backdrop, I turned to the Perfect Poinsettias 3D Embossing Folder and white cardstock. The delicate pattern created through embossing adds texture and charm to the card’s design.
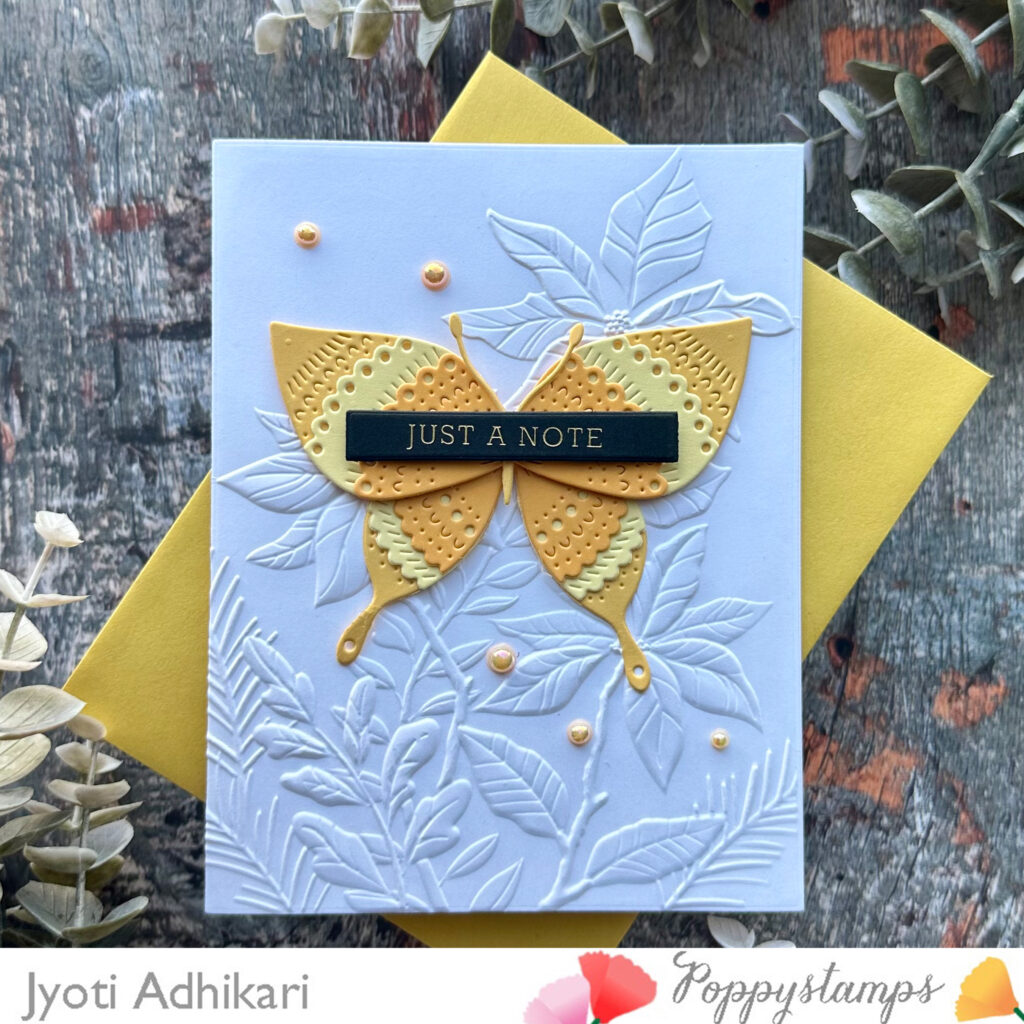
Highlighting the Butterfly
Placing the final Nordic Spectacular Butterfly at the center of the embossed background was a delightful choice. Its vibrant hues against the intricate texture create a captivating focal point.
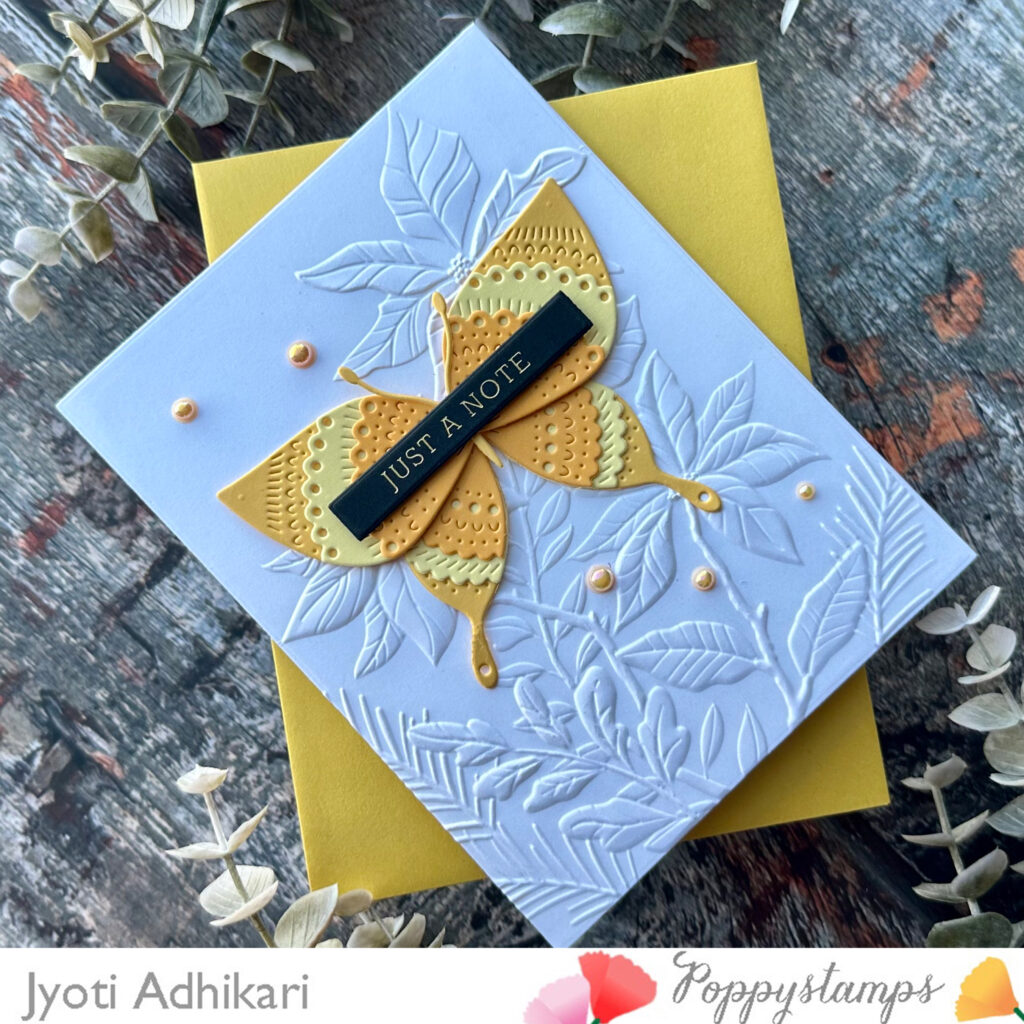
Incorporating Sentiment
To add a heartfelt touch, I foiled the sentiment “Just a Note” from the Modest Greetings 1 set onto a strip of cardstock. The sentiment was then carefully placed below the butterfly, offering a heartfelt message to the recipient.
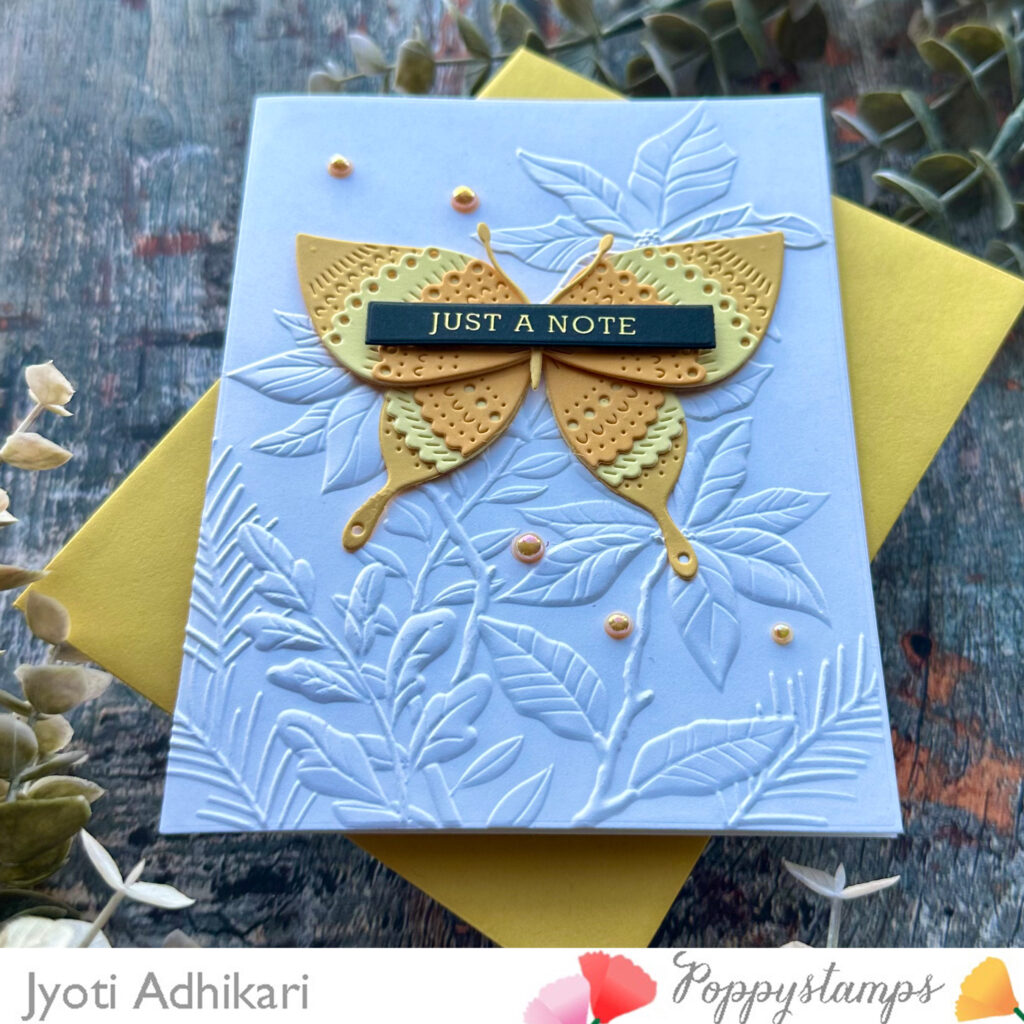
Finishing Flourishes
The addition of yellow pearls completes the card’s whimsical charm, adding a playful yet elegant flourish that ties the design together.
Which Captured Your Heart?
Three cards, each crafted with love and attention to detail. Now, I invite you to share your thoughts. Which of these creations captured your heart? Let me know in the comments below, and stay tuned for more crafting inspiration!
Hugs,

Beautiful cards!!! Specially loved how you used shades of yellow.
Thank you so much Aditi