Fleas Market Finds is a collection of clear stamps, paper packs, embellishments and new deep etched dies from Spellbinders. Deep etched dies are those you can use to cut several layers of papers and other materials. This release is all about Christmas. It’s perfect for a festive holiday projects.
Hello everyone,
I am here with a bunch of inspirations for you featuring this new release by Spellbinders for September 22.
Vintage Handcrafted Basket
My first project features the VINTAGE HANDCRAFTED HEXAGON BASE AND SIDE BOWL DEEP ETCHED DIES and some of the pretty papers from CHRISTMAS VELVET 6 X 9-INCH PAPER PAD
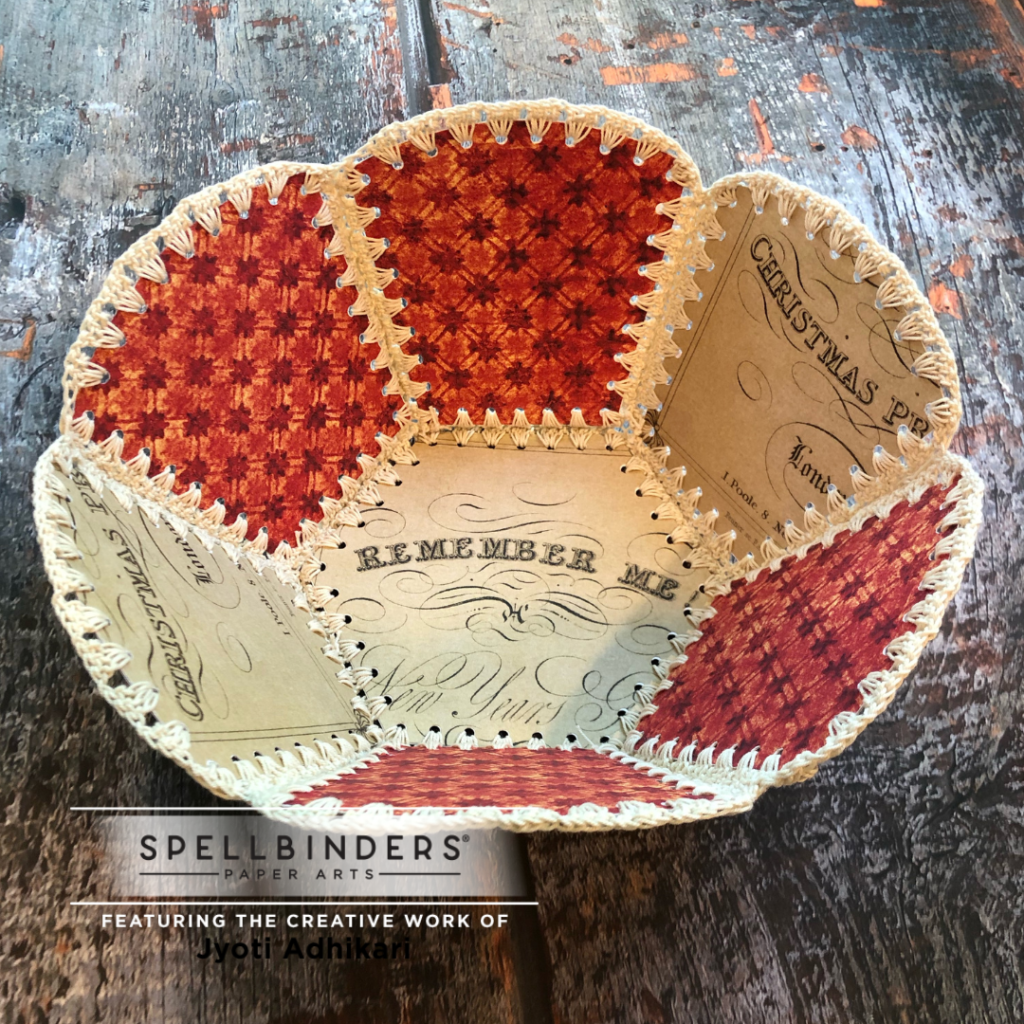
I cut out the base and the six sides of this basket with the dies in the set. For extra sturdiness I also cut out these with heavyweight white card-stock. Then I glued the pretty pattern paper on both sides of the white die cuts. That way it is thicker and sturdier but also pretty on both sides.
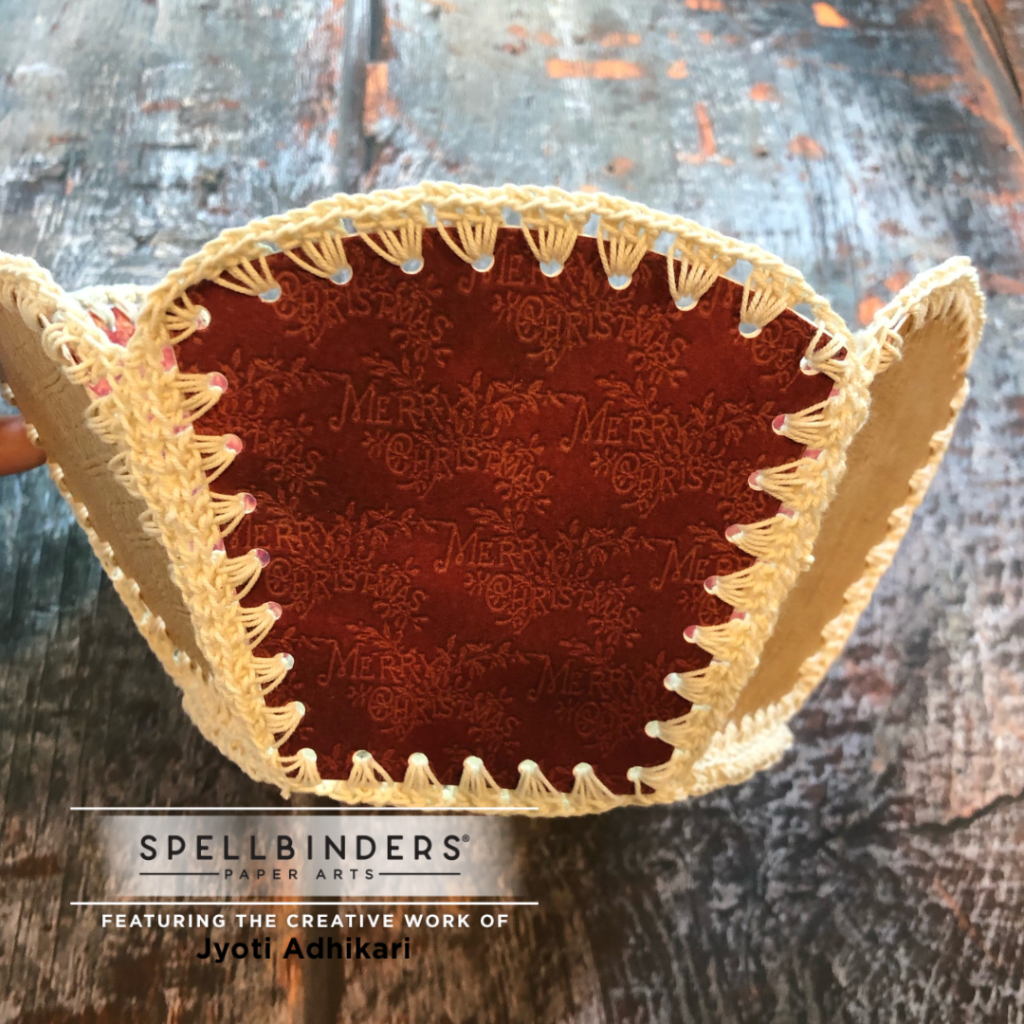
In order to attach these pieces together to create the basket, I used a small crochet needle and some cotton cream thread. Through each holes I did three double crochet and one chain in between the three double crochets. So I crocheted around each of the pieces and then sewed them together with a thick yarn needle.
I can use this basket to keep candies in it during the holidays for customers at my work.
Small Handcrafted Vintage Basket
I crated this basket with the help of VINTAGE HANDCRAFTED SQUARE BASE AND SIDES BOWL DEEP ETCHED DIES and HOME FOR THE HOLIDAYS 6 X 9-INCH PAPER PAD
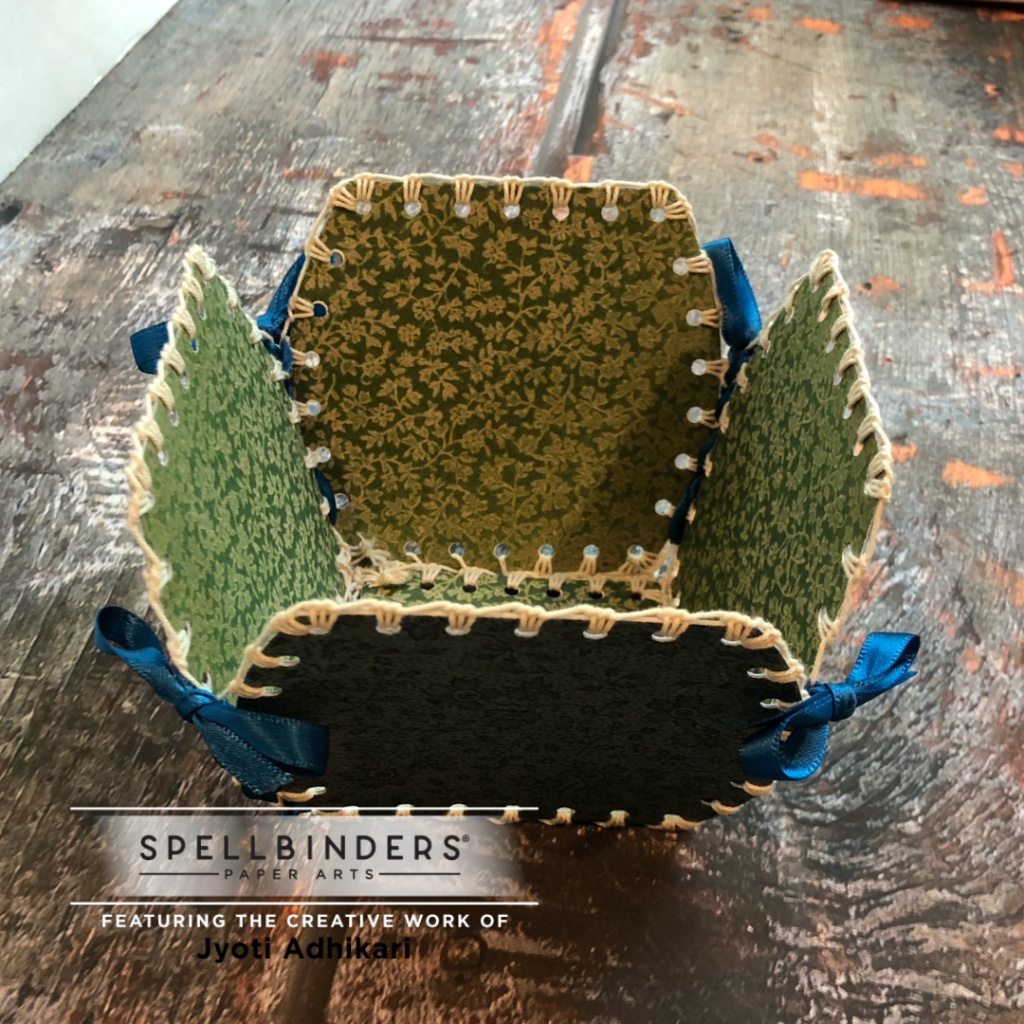
Same like before I cut out the base and the sides of this basket with pretty pattern papers and also white heavyweight card-stock. Glued each one together sandwiching the white with both pretty patterns on each sides.
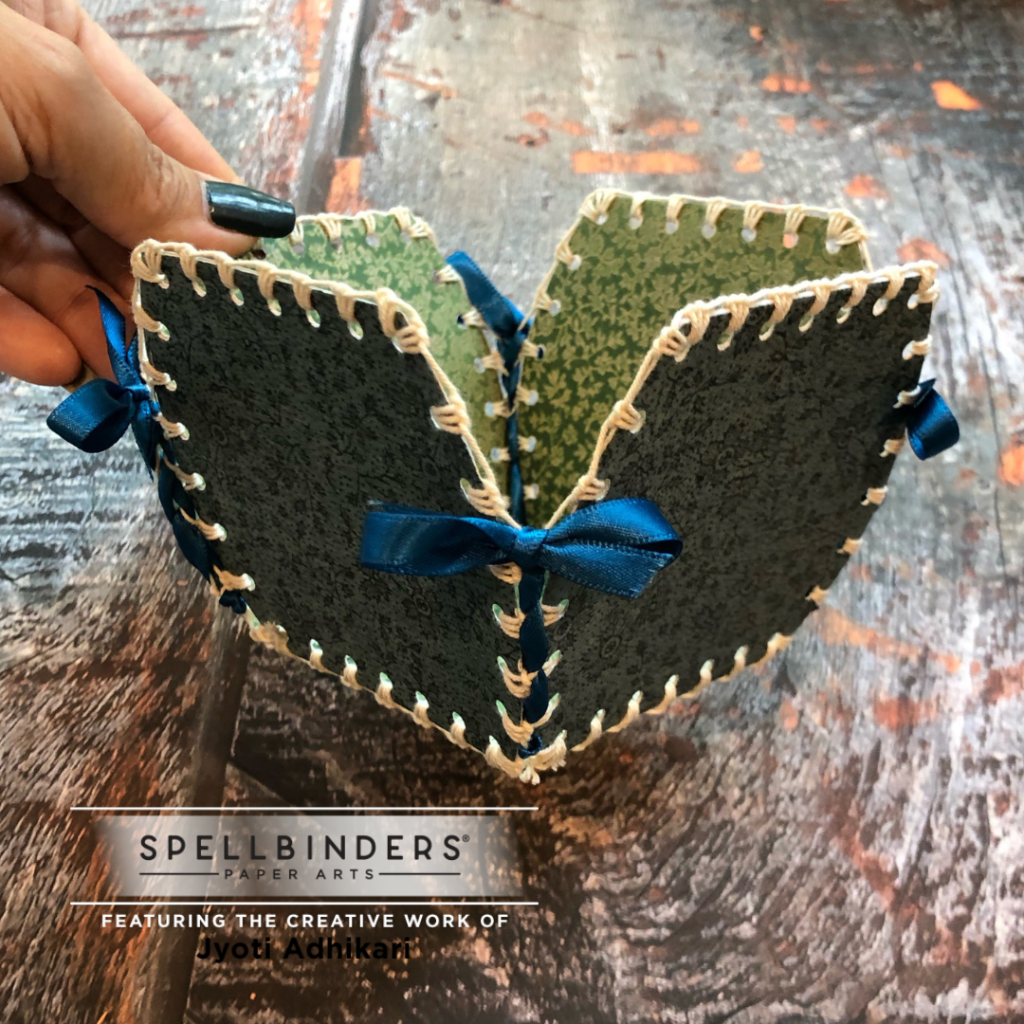
The only difference is the technique in attaching these together. I used blanket stitch around the pieces and joined them with ribbons on the sides tying a little bow on the top. In each holes I did three blanket stitches.
Vintage Christmas Cards
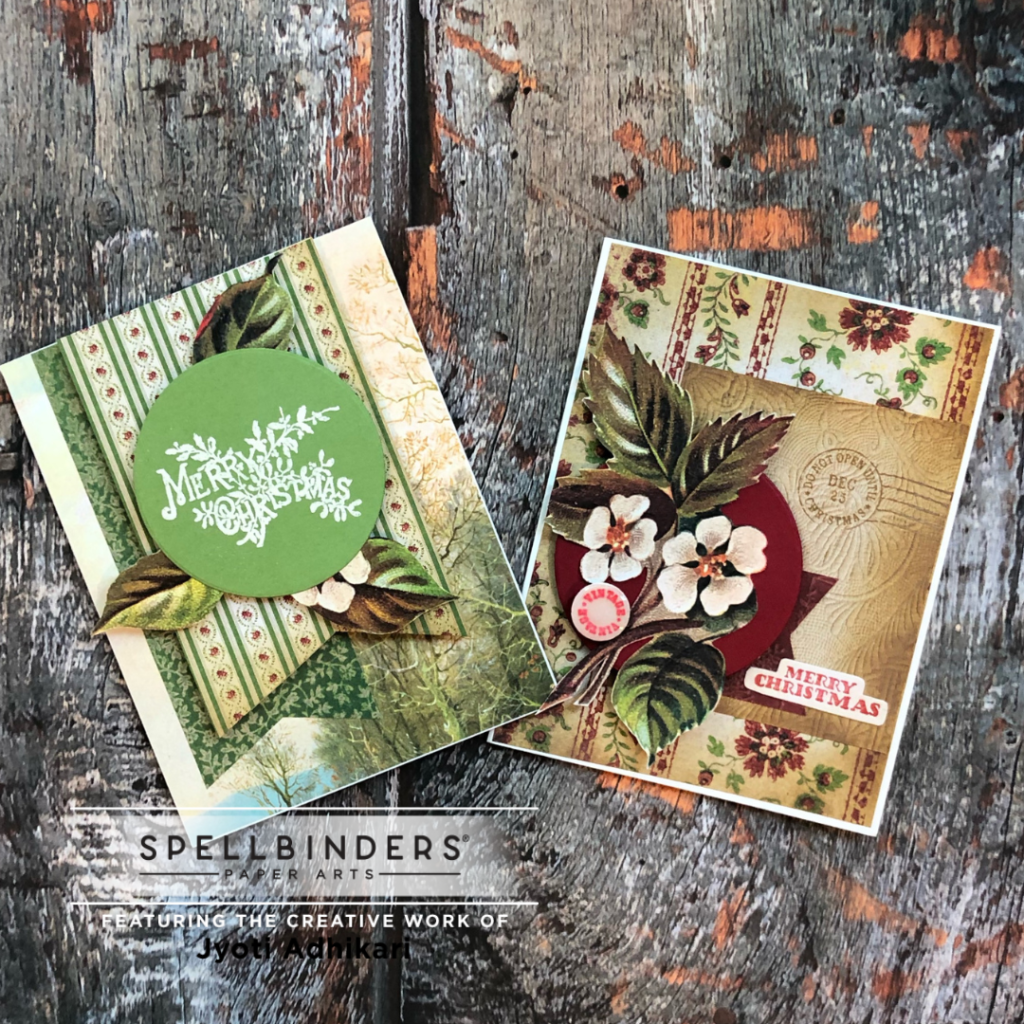
I created two cards with the pretty pattern paper pads. I just mixed at matched pattern paper from HOME FOR THE HOLIDAYS 6 X 9-INCH PAPER PAD and CHRISTMAS VELVET 6 X 9-INCH PAPER PAD
The floral elements are also from the patter paper pack. But I had to add another layer of white card-stock behind it before I fussy cut those out with my scissors. As these pattern papers are rather thinner.
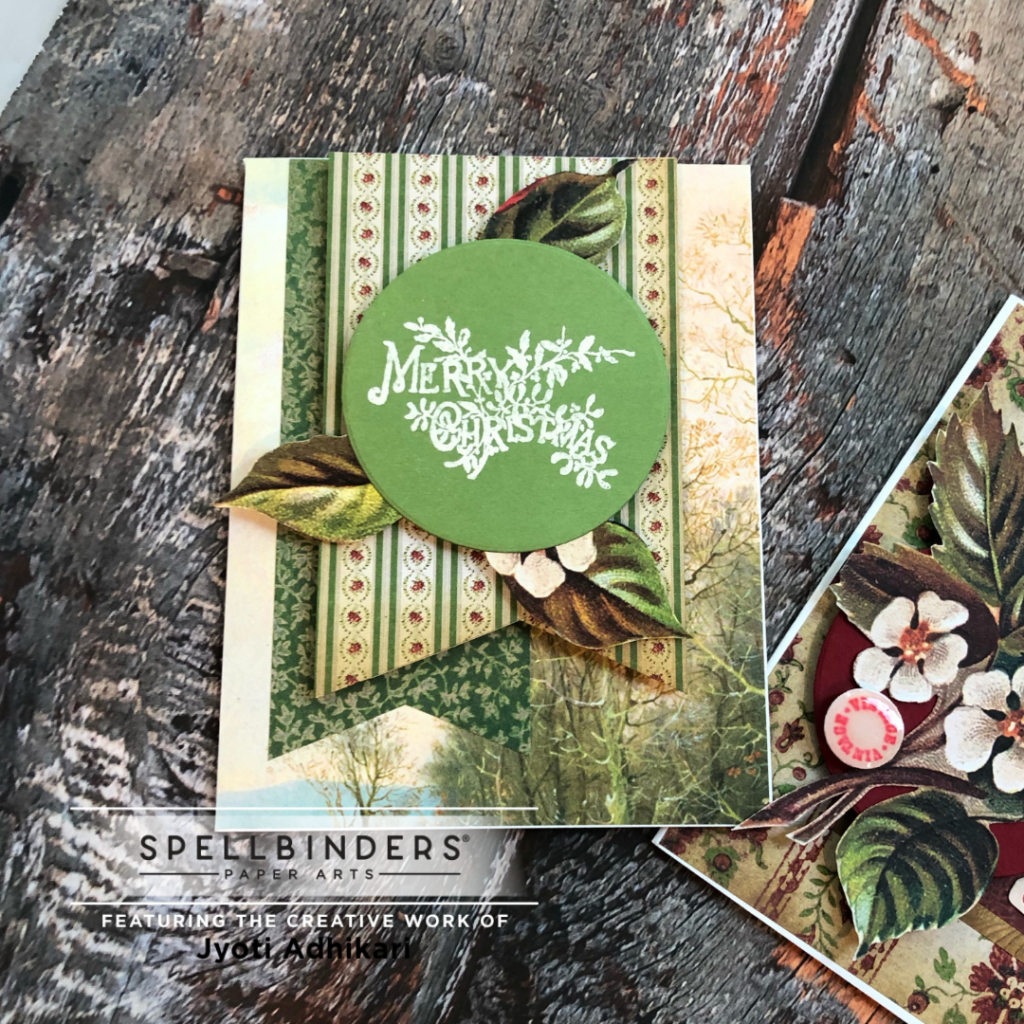
The sentiments I have on these cards are from COMPLIMENTS OF THE SEASON CLEAR STAMPS and HAND MADE HOLIDAYS CLEAR STAMPS
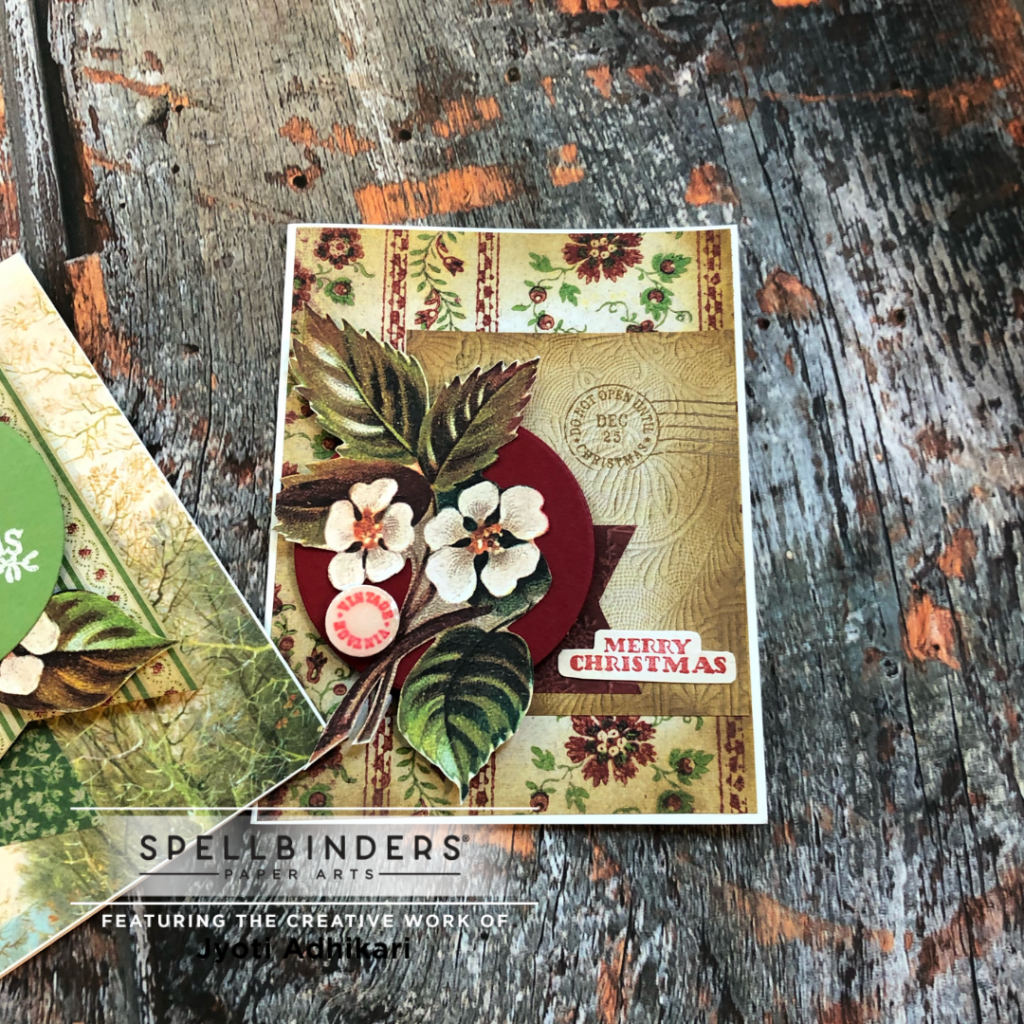
I created one of a vintage button like embellishment on my red card by stamping the small image from HAND MADE HOLIDAYS CLEAR STAMPS , then cutting it out with a tiny red circle die. To make it look like a button I added glossy accent over it.
Vintage Post Cards
These pattern papers are just too pretty by themselves. So I decided to add some of these on Craft Card-stocks and create some post cards with just a simple Christmas Sentiments stamped in the front.
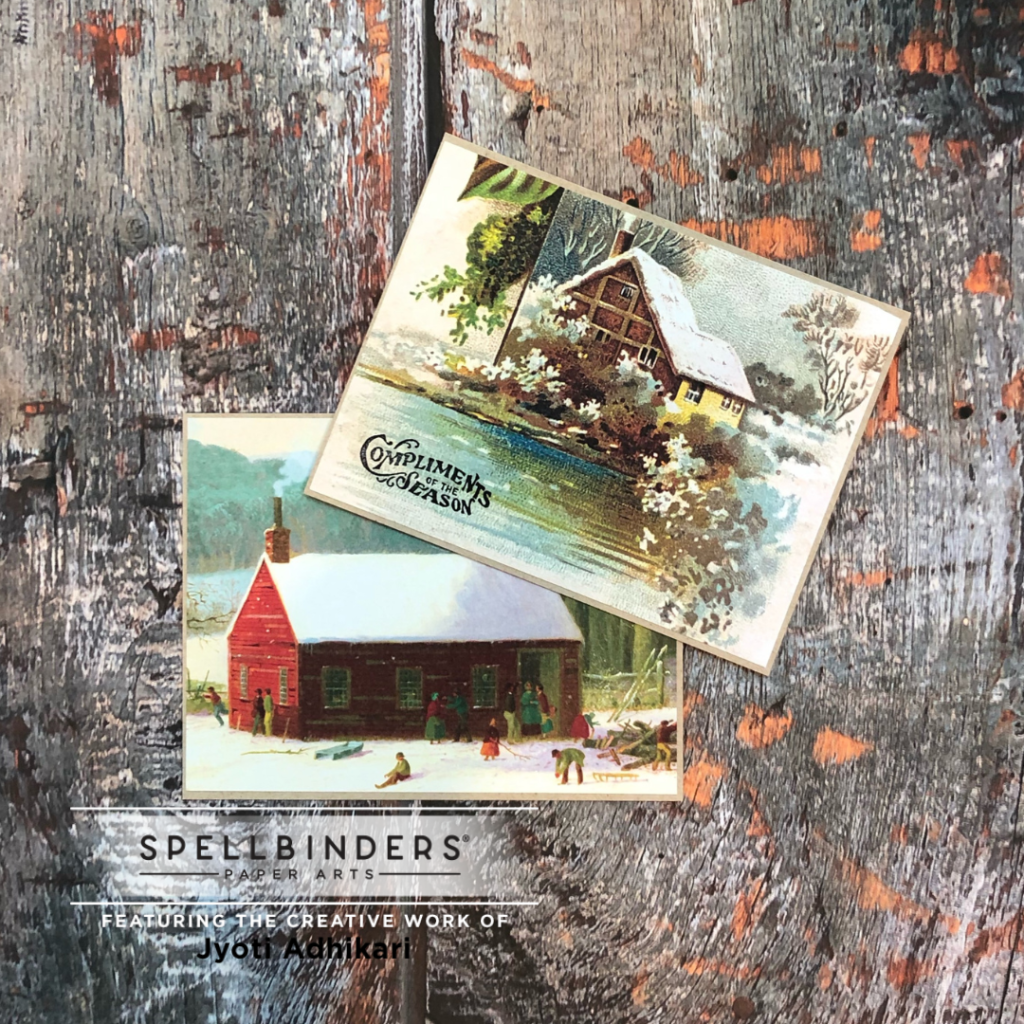
Aren’t these beautiful? On the back of these post-cards, I stamped “Post Card” from COMPLIMENTS OF THE SEASON CLEAR STAMPS on the top center and the little image to indicate where the postage stamp goes, on the right top corner.
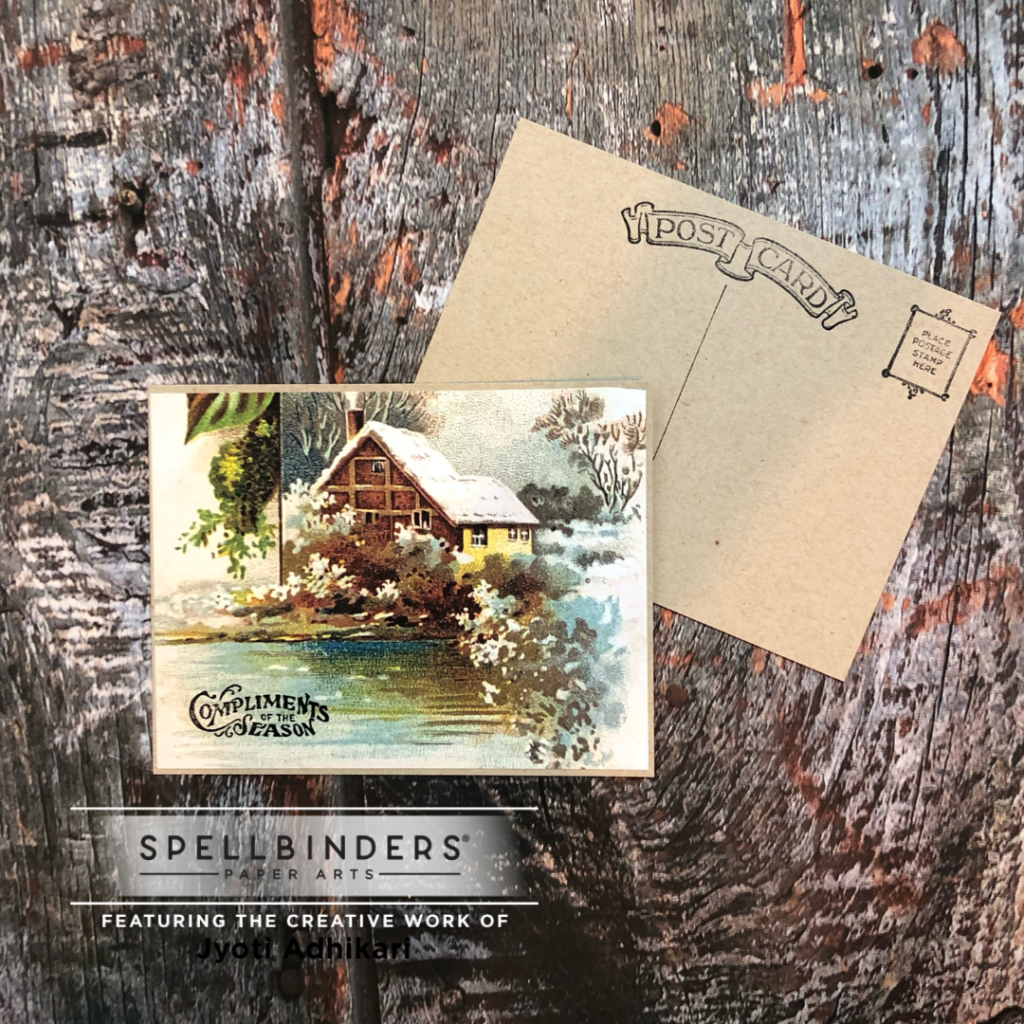
I also drew a line in the center with Micron pen and a ruler.
Vintage Holiday Tags
Tags can be very useful during the holidays as decorative elements for your gift giving. I created two tags, one in red and one in green.
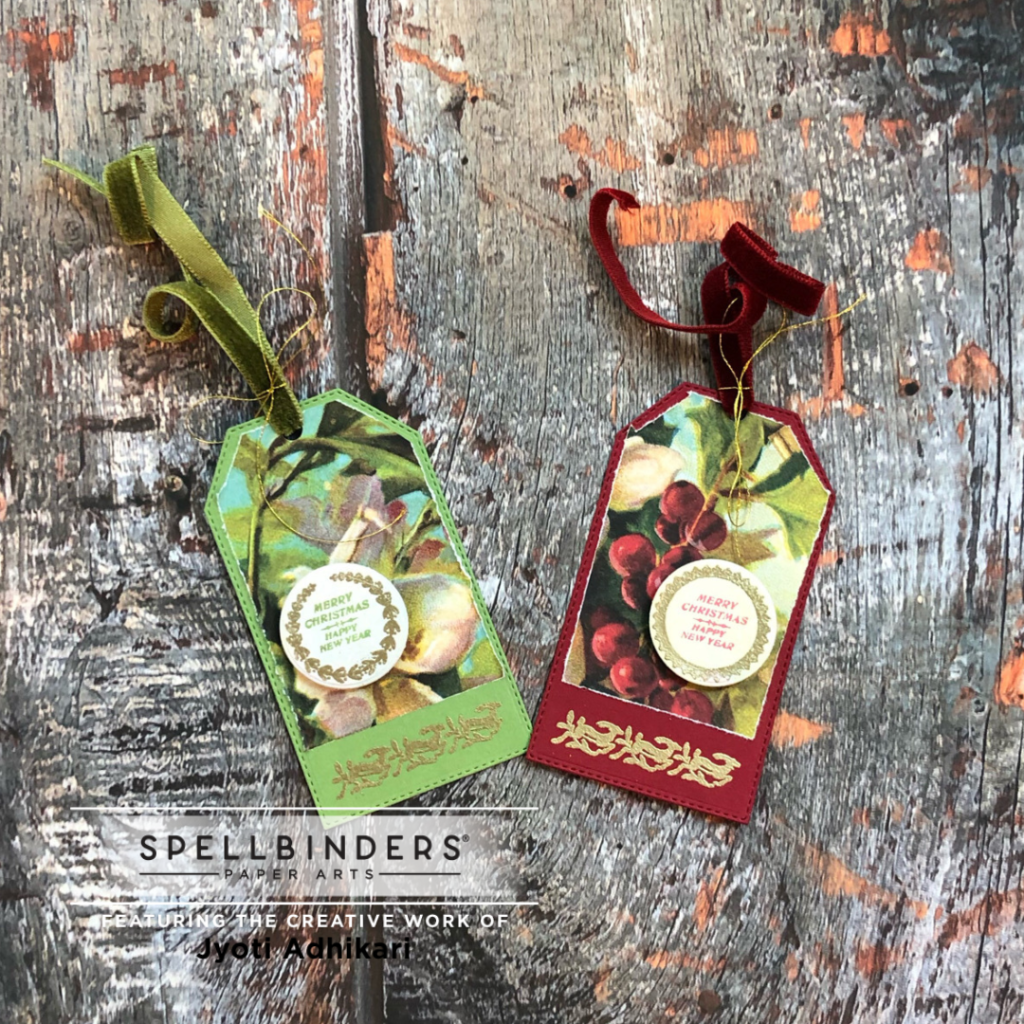
I simply cut out two tags with stitched tags die set from my stash. Then stamped the reindeer border image from HAND MADE HOLIDAYS CLEAR STAMPS with Versamark ink and embossed using gold embossing powder.

I then picked some matching pattern paper from the same two paper pads and tore it along the edges. It doesn’t have to be perfect when you tear it, that way it will give it more vintage feel.
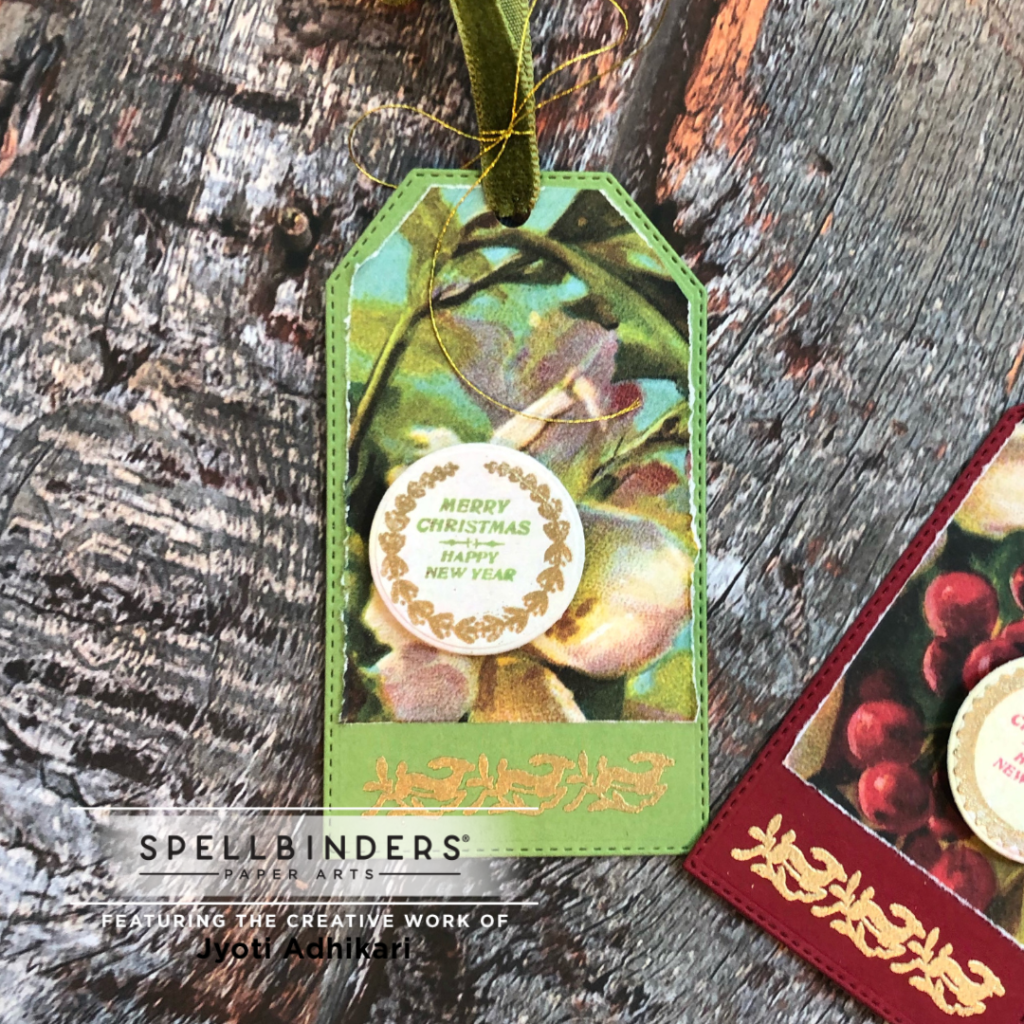
Created two circle sentiment die cuts stamped and embossed in coordinating color combos then added with foam tapes. Just a piece of ribbon trough the holes of the tags tied with gold twine in a bow and my tags are done. As simple as they are so easy to create and looks beautiful at the same time.
I thank you for visiting and sticking with me through this long post. Hope you find it inspiring. I have shared the list of products I have used down below.
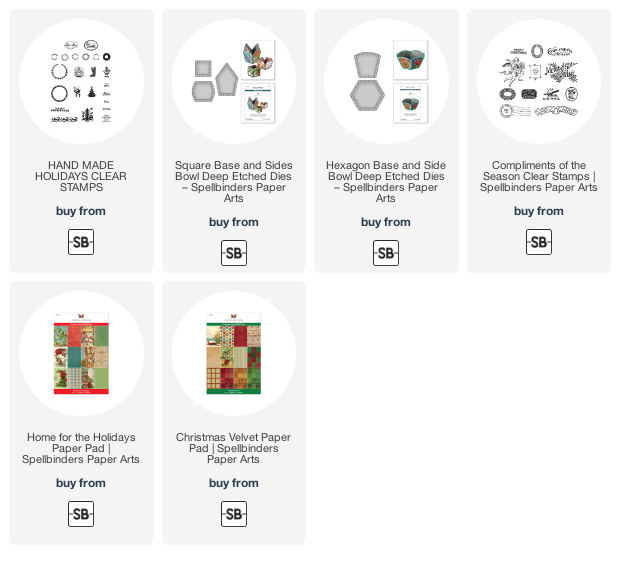
SUPPLIES FEATURED:
Hugs,
