Are you ready to add a dash of whimsy and holiday cheer to your card-making this Christmas season? If so, you’re in for a treat! In this blog post, I’ll take you through the steps of creating a delightful and interactive Christmas card featuring the adorable DANCING AND GIFTING MOUSE from Spellbinders’ DANCING CHRISTMAS COLLECTION.
Here’s what you’ll need:
- Dancing and Gifting Mouse Die Set
- White, Light Pink, Gray, Red, Green, and Gold Card-stock
- White Gel Pen
- Monoline Stars Embossing Folder
- Christmas Glimmer Sentiments Die Set
- Foam Tape
- Glue
- A2 Card Base
Step 1: Die Cutting the Mouse and Gift
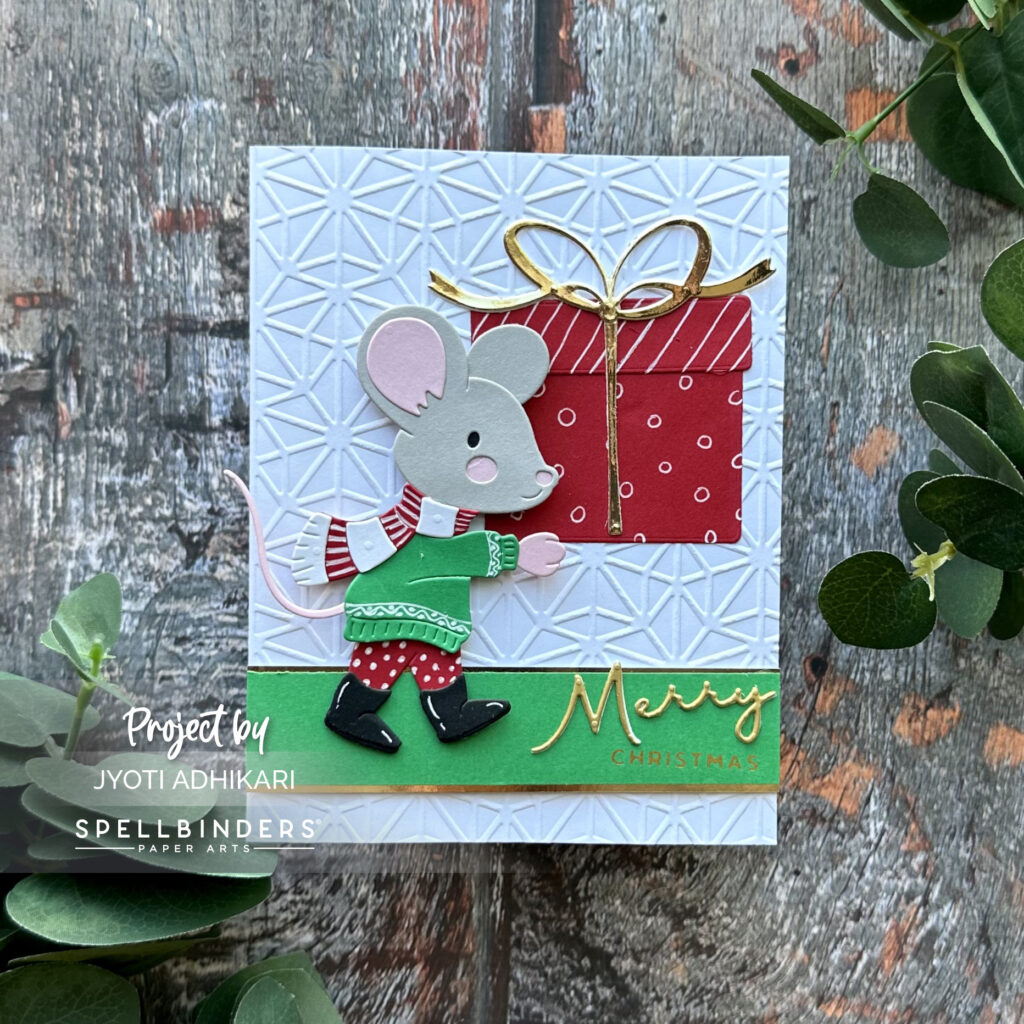
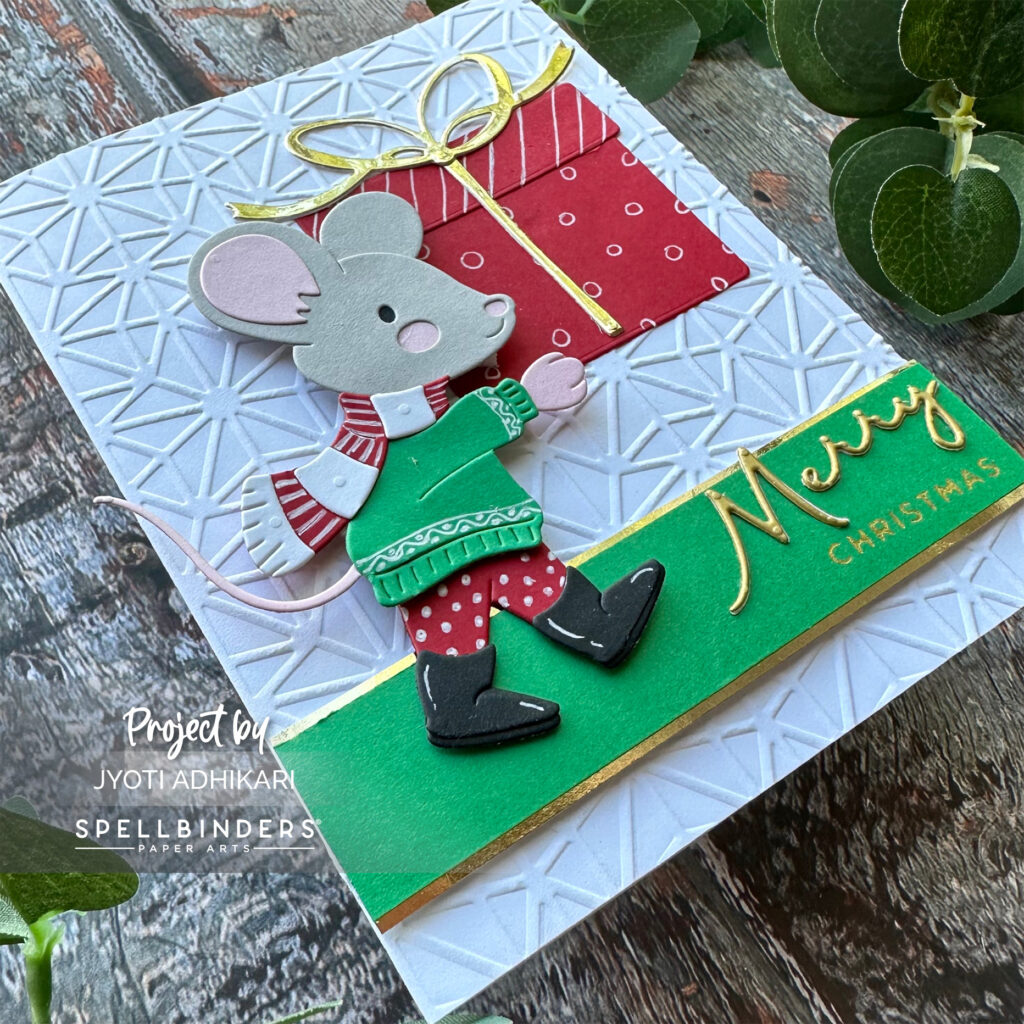
Begin by selecting your card-stock colors. I used light pink for the mouse, gray for the body, and red and green for the mouse’s clothes. The gift box is cut from red card-stock, with a gold ribbon. Die cut all the pieces, and you’re ready to start assembling the mouse.
Step 2: Adding Details
Give your mouse some character by adding details to its clothing. I used a white gel pen to create dots, stripes, and patterns on the sweater. These little touches will make your mouse come to life. You can also use pattern paper for the clothes and the gift box if you prefer that.
Step 3: Assembling the Mouse
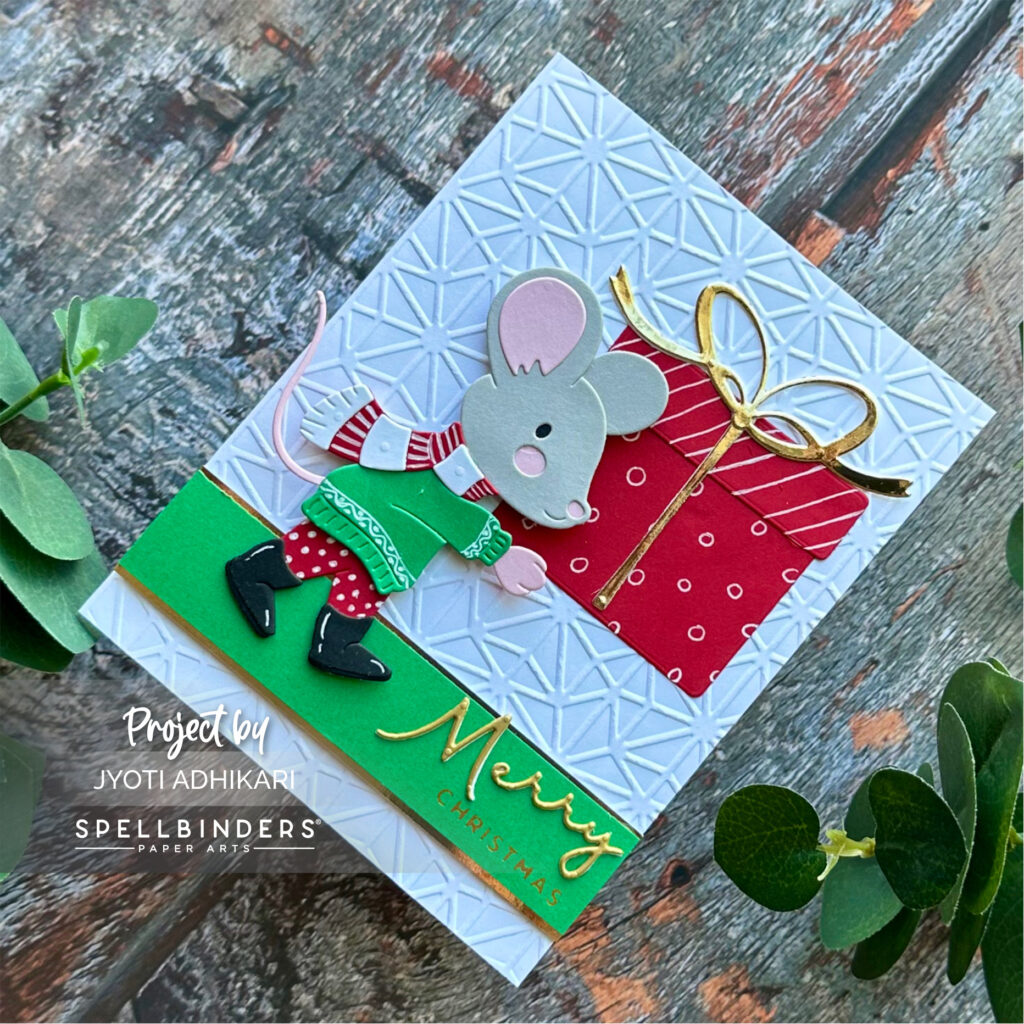
The magic of this die set lies in the dancing feature. Assemble the mouse, ensuring that the legs move as intended. This interactive element adds a playful twist to your card.
Step 4: Creating the Background
To create a festive backdrop, emboss a white panel with the Monoline Stars Embossing Folder. This panel should fit nicely on an A2 card front and will provide a charming, textured background.
Step 5: Crafting the Sentiment
For the sentiment, use the Christmas Glimmer Sentiments Die Set. Cut the word “merry” from gold card-stock and foil the word “Christmas” onto a green strip of card-stock. Add an elegant touch by matting the green strip with gold card-stock.

Step 6: Assembling the Card
Now comes the fun part – assembling your card! Place the green sentiment strip along the bottom of the card so that “Christmas” is on the right side. Adhere the die-cut “Merry” just above “Christmas” to create the message “Merry Christmas.”
Next, add the star of the show – your dancing mouse. Use foam tape to attach it to the card, allowing the legs to move back and forth when the card is gently shaken. Finally, position the gift box in the mouse’s hand and secure it directly onto the embossed background.
Step 7: Admire Your Creation
With everything in place, take a step back and admire your festive masterpiece. The combination of the dancing mouse, embossed stars, and elegant sentiment creates a card that’s sure to bring joy to anyone who receives it.
This Dancing and Gifting Mouse Christmas card is not only a joy to create but also a delight to share with loved ones during the holiday season. Its interactive design and charming details make it a standout addition to your handmade card collection. So, gather your crafting supplies, and let’s spread some holiday cheer, one card at a time!
Hugs,
