Whenever I see those beautiful dimensional floral cards created with Prima Flowers on Pinterest, I get mesmerized. Dimension in card-making can take your projects to a whole new level. It is now possible to create similar dimensional flowers for your cards with the Spellbinders’ collection of dies that SUSAN TIERNEY-COCKBURN designed.
Hello Everyone!
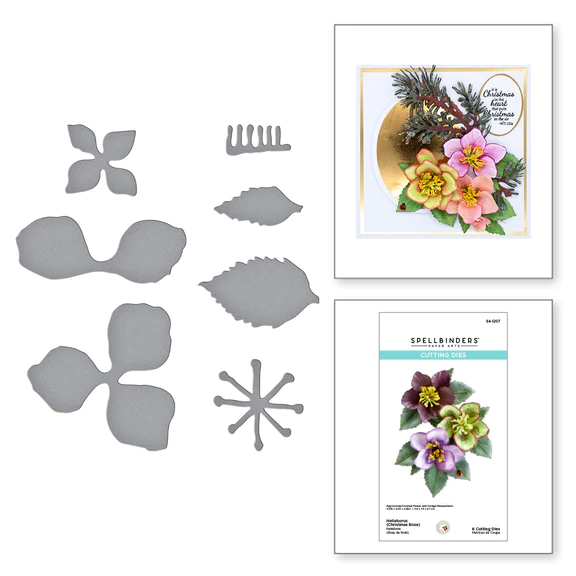
Today I am sharing two cards I have created using the latest release THE WINTER GARDEN
Helleborous Birthday Card
My first card features the HELLEBORUS (CHRISTMAS ROSE) ETCHED DIES FROM THE WINTER GARDEN COLLECTION BY SUSAN TIERNEY-COCKBURN
Here is my card:
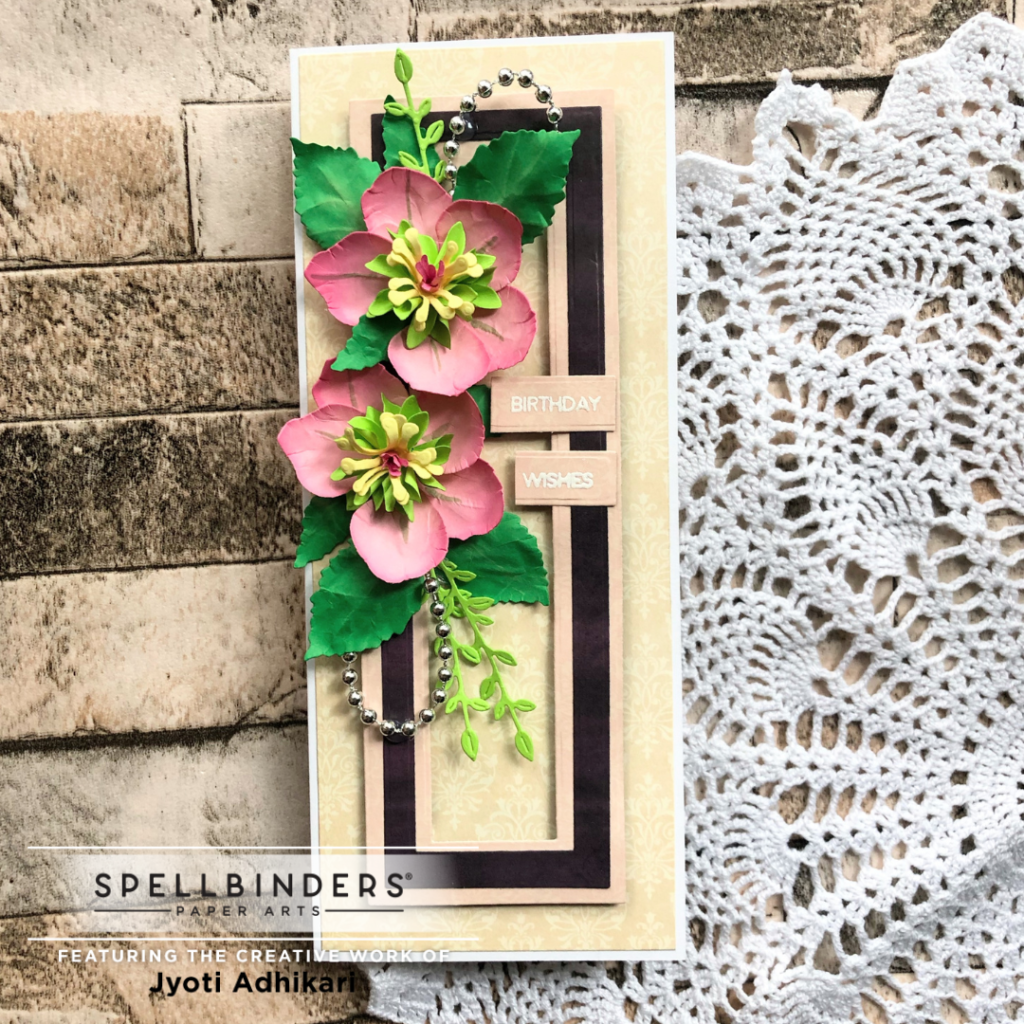
Focal Image
The main focus of this card are the flowers. I created these Helebrous flowers with the help of the HELLEBORUS (CHRISTMAS ROSE) ETCHED DIES FROM THE WINTER GARDEN COLLECTION BY SUSAN TIERNEY-COCKBURN.
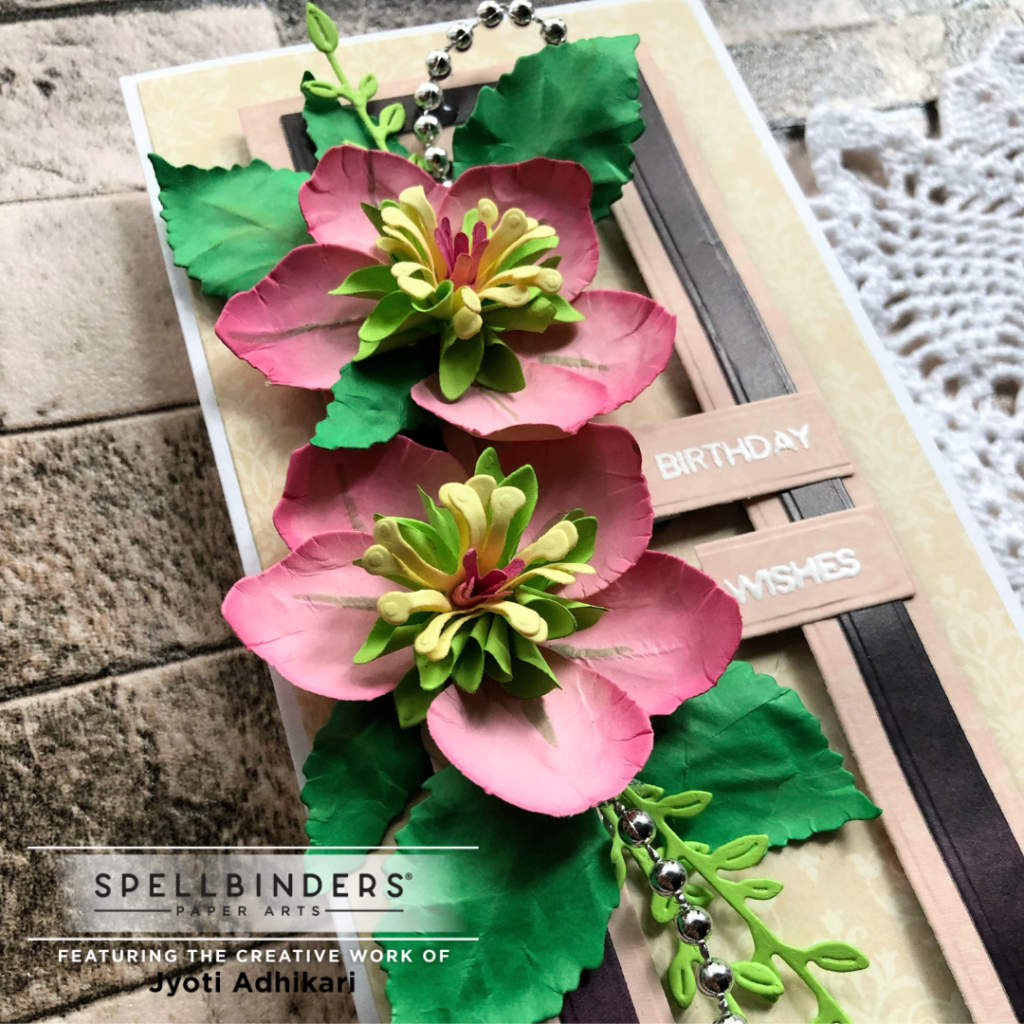
I used light pink card-stock to cut out the petals, yellow for the stamen and two shades of greens for the leaves and the tiny petals between the five petals and the stamen. Those are called petals too right? Then, I added some Picked Raspberry Distressed Oxide ink around the edges to create visual dimension. After that, I shaped the flower petals with medium ball point stylus and the tiny petals with the handle of a small paint brush. I added the layers of the petals and stamens with Hot Glue Gun. The liquid glue wasn’t able to hold the petals in shape firmly.
The Background
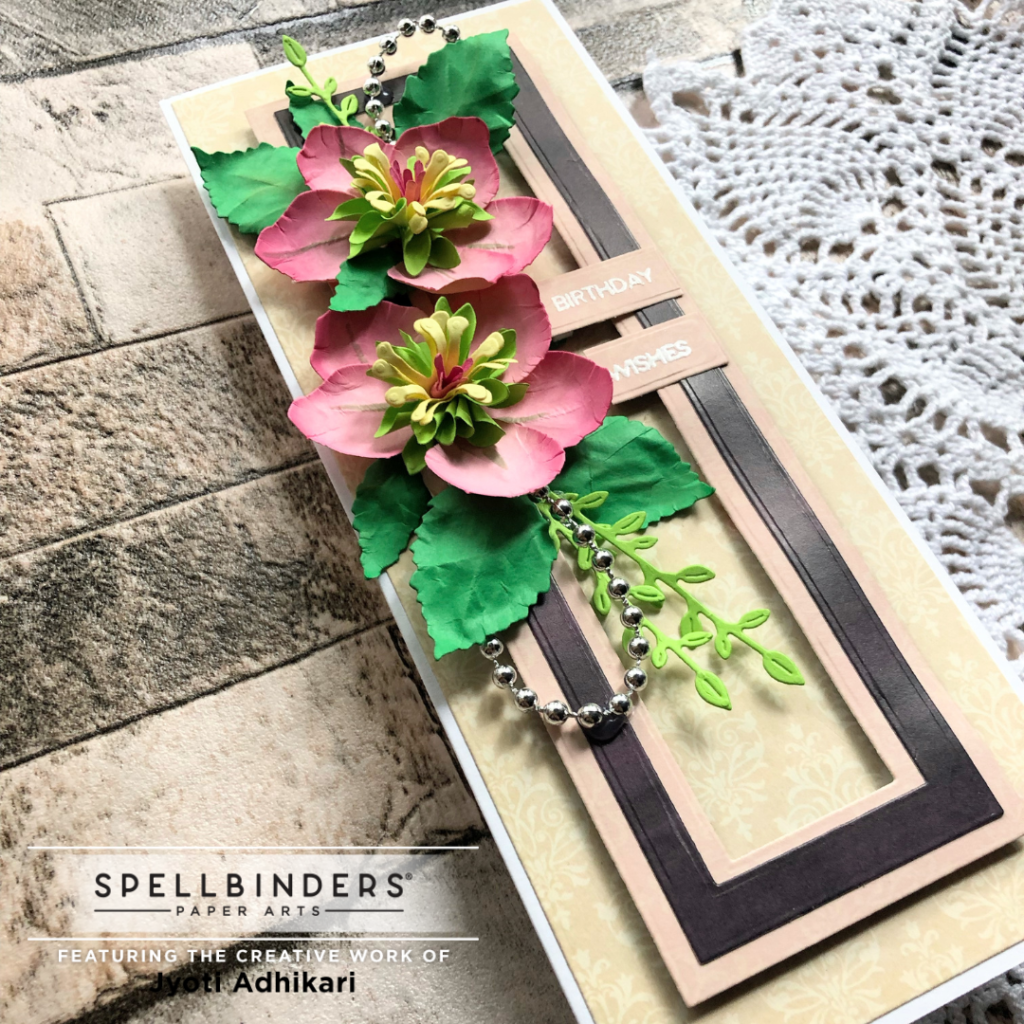
My card here is a slimline card measuring 3 and a half inches by 8 and a half inches. At first, I cut out a piece of beige pattern paper for the background one quarter of inch smaller than my card base. I used Slimline layers die from Gina Marie to cut out rectangle borders, the wider one in pink and the thinner one in dark burgundy pattern papers. After that, I added the borders on foam tape in the center of the card front.
Sentiment
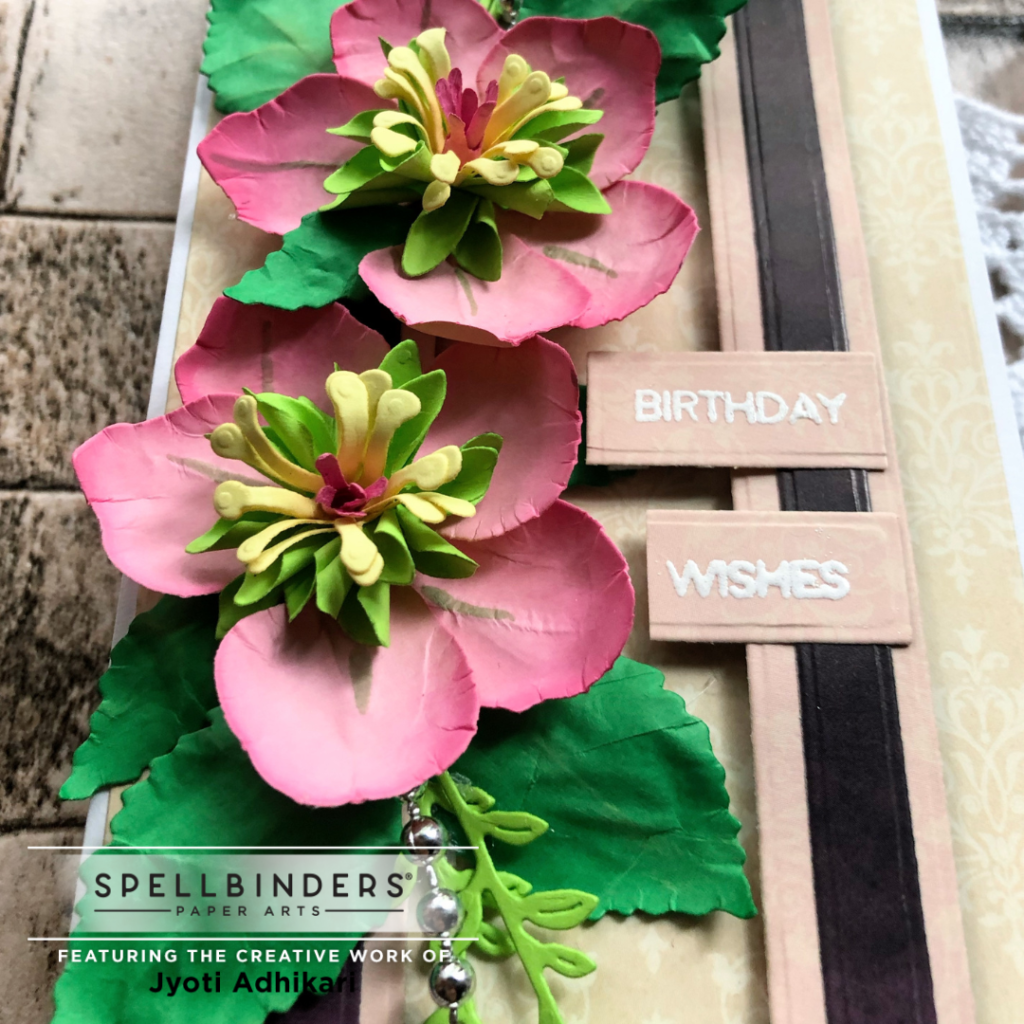
For the sentiment I stamped Birthday and Wishes in two separate strips of pink pattern papers. I used clear embossing ink to stamp and white embossing powder to emboss the sentiment. Then, I arranged them on one side of the rectangle border.
Embellishment
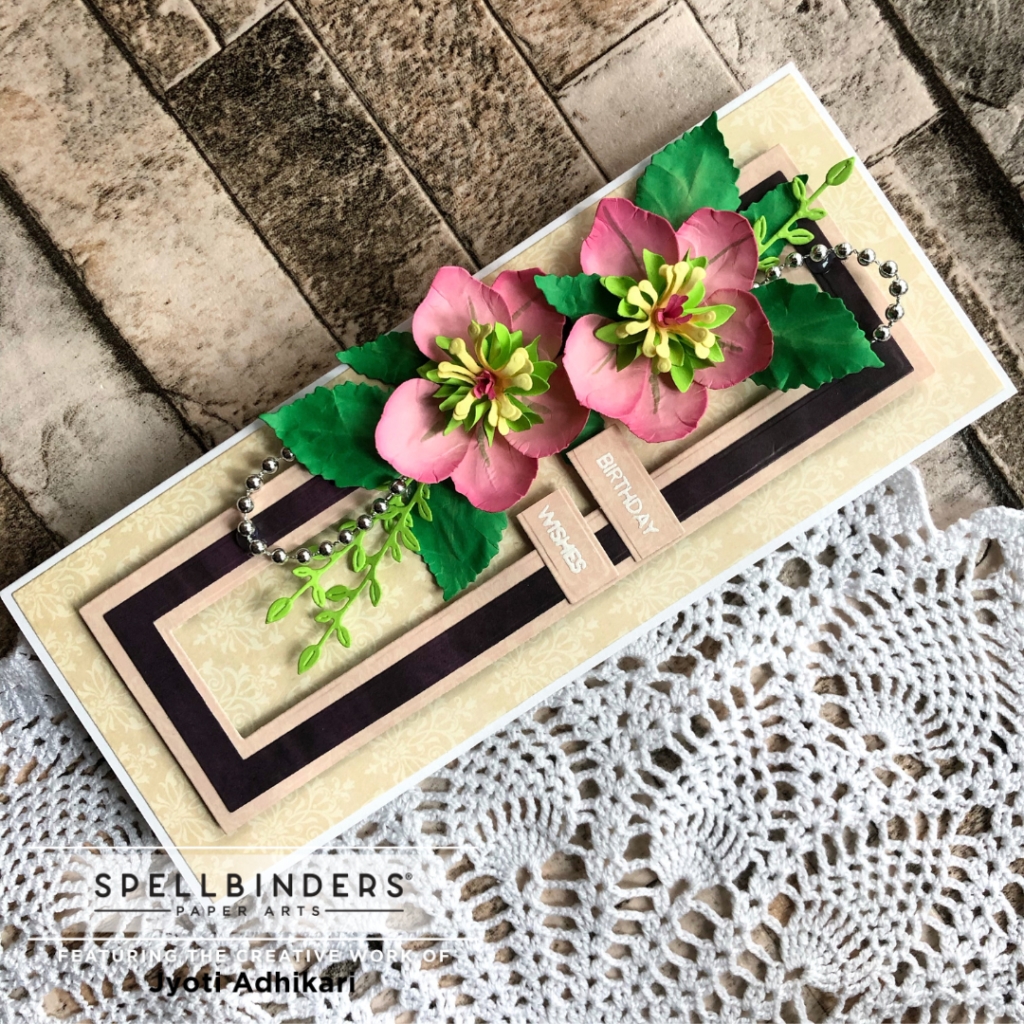
After I arranged the flowers and leaves on the left side of the card I used two small pieces of silver balls garland in a loop added with glue gun as an embellishment on my project.
My card is ready. What do you think of this dimensional floral card? Isn’t is as good as those prima cards on Pinterest?
Jasmine Christmas Card
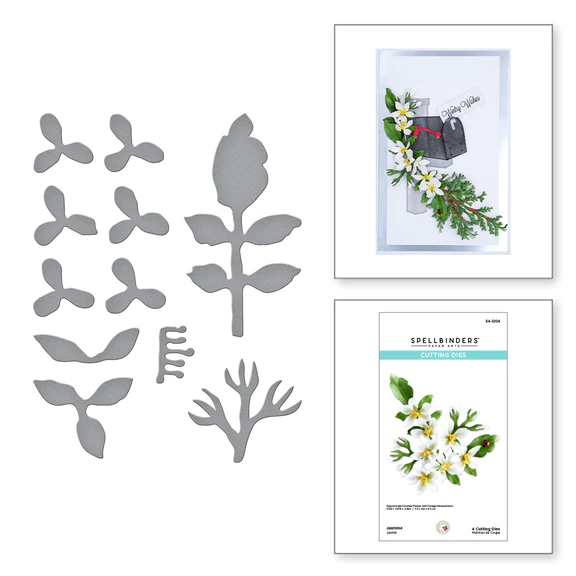
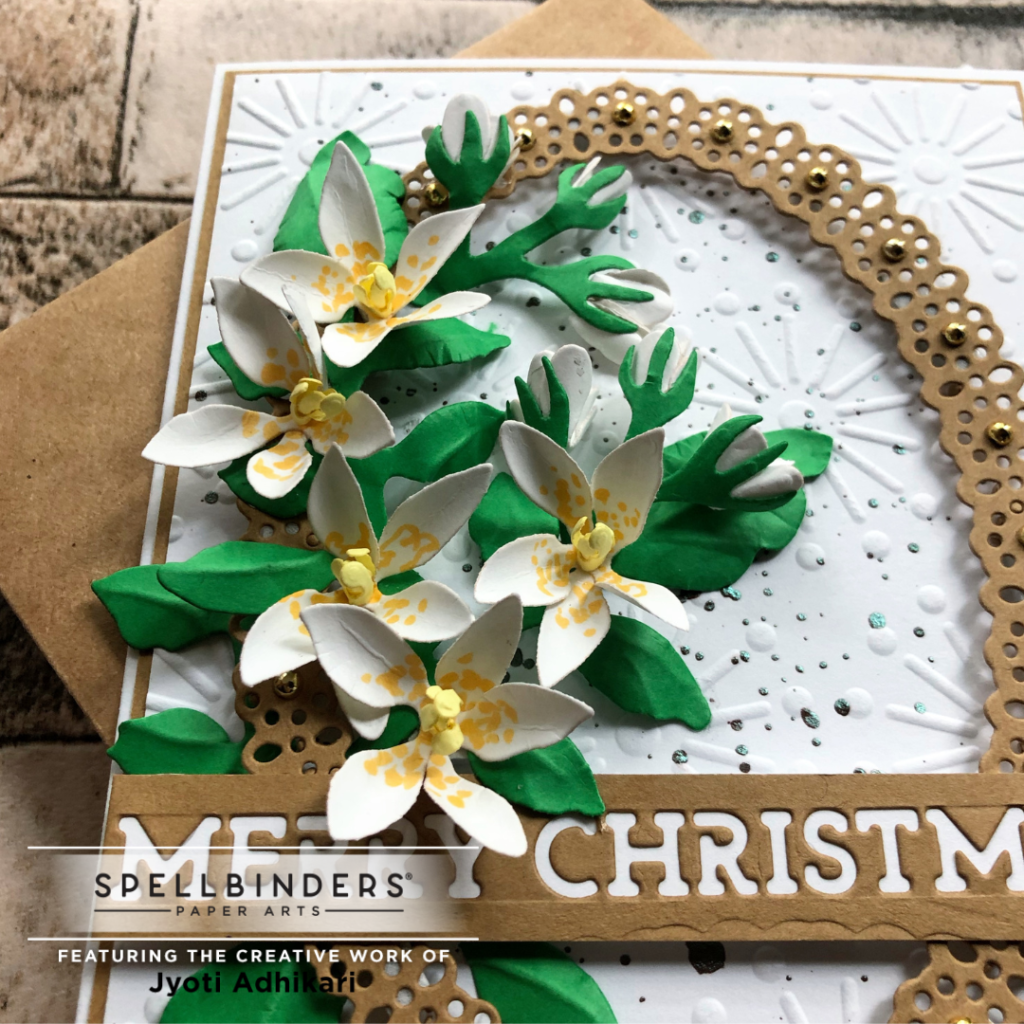
Now my second card features the JASMINE ETCHED DIES FROM THE WINTER GARDEN COLLECTION BY SUSAN TIERNEY-COCKBURN
This is how I used this die set.
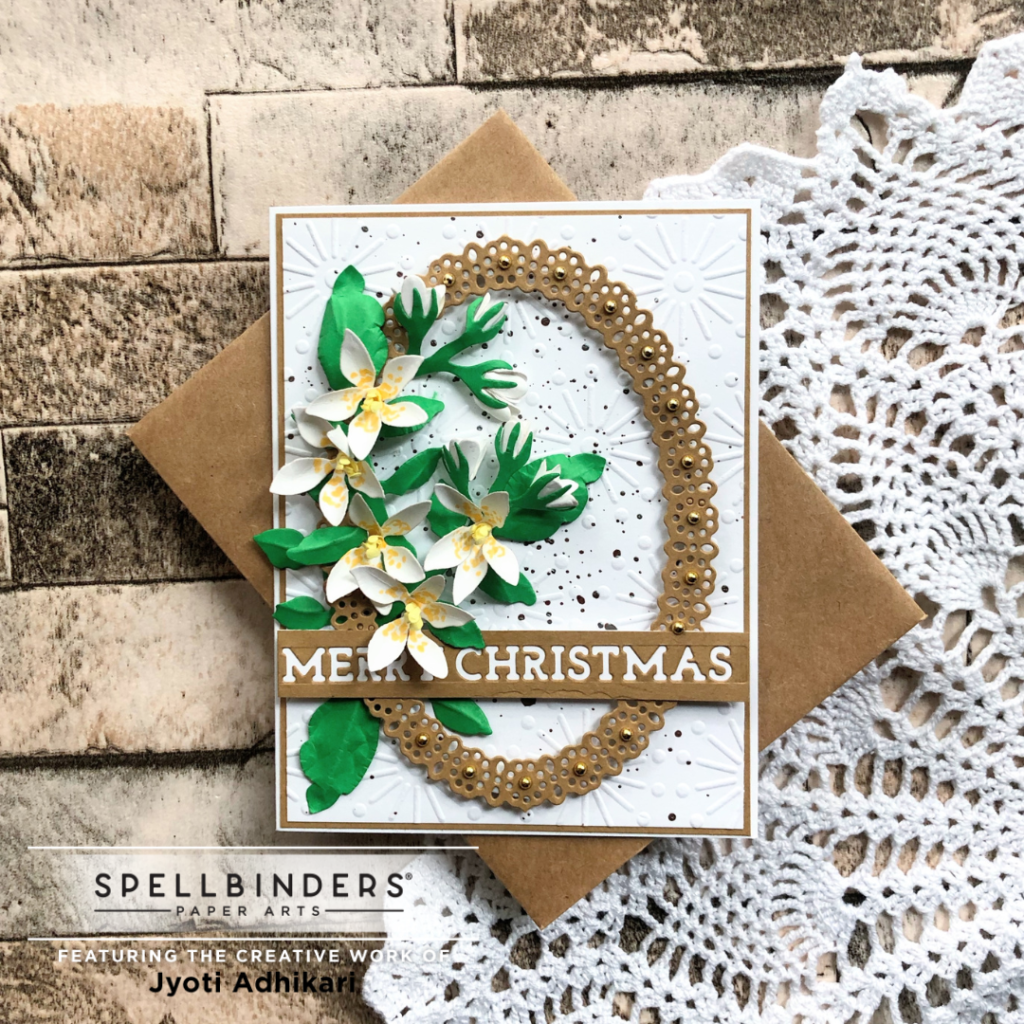
Initially, I started by die cutting the flower and bud pieces with white and the leaves with green card-stock. Then, I added some dots around the center of the larger petal with Copic marker in Y04. I looked up jasmine photos on Google and noticed that they had yellow speckles in them.
Background
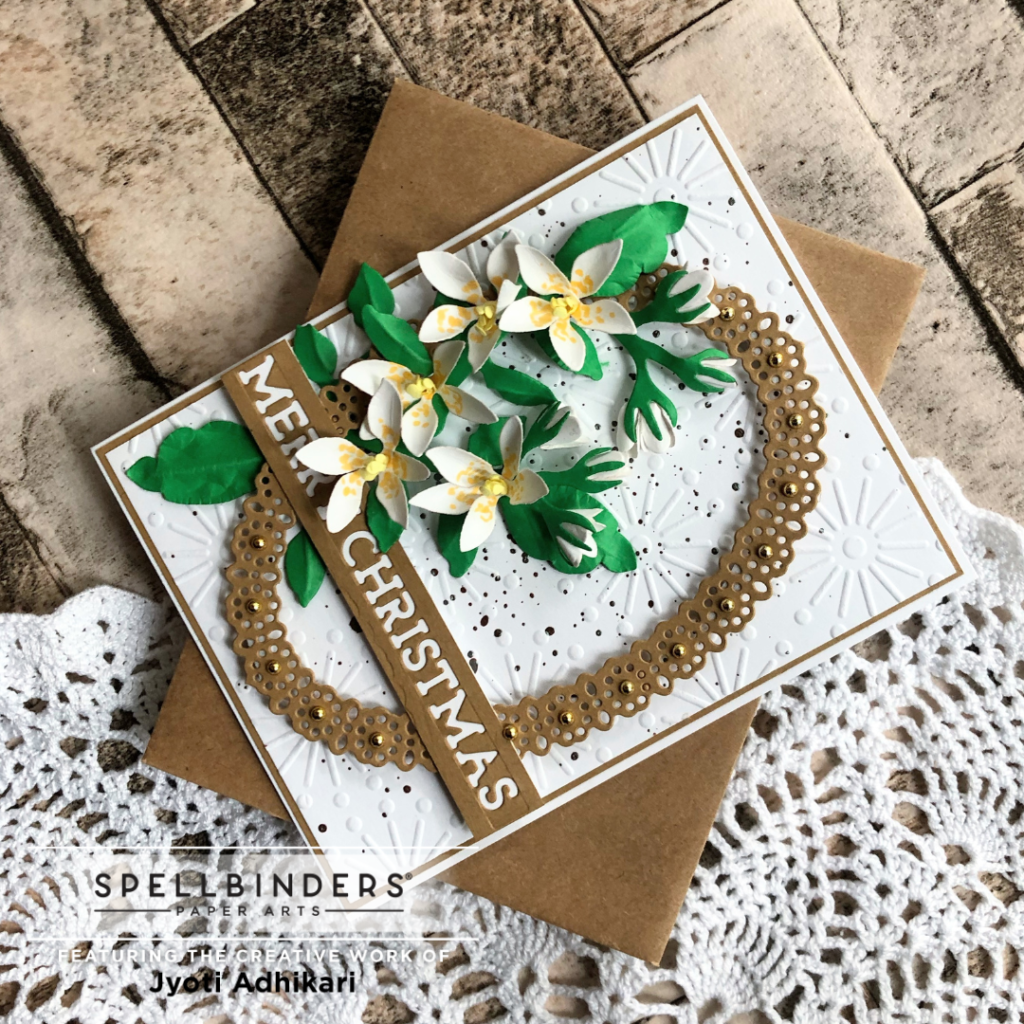
For an interesting background, I used a white embossed panel, splattered some pearlescent green paint on it, then layered a craft card-stock. Furthermore, I cut out a fancy floral oval border with the help of the OVAL STITCH & BORDER- SMALL DIE OF THE MONTH. I added the border with foam tape on the embossed panel.
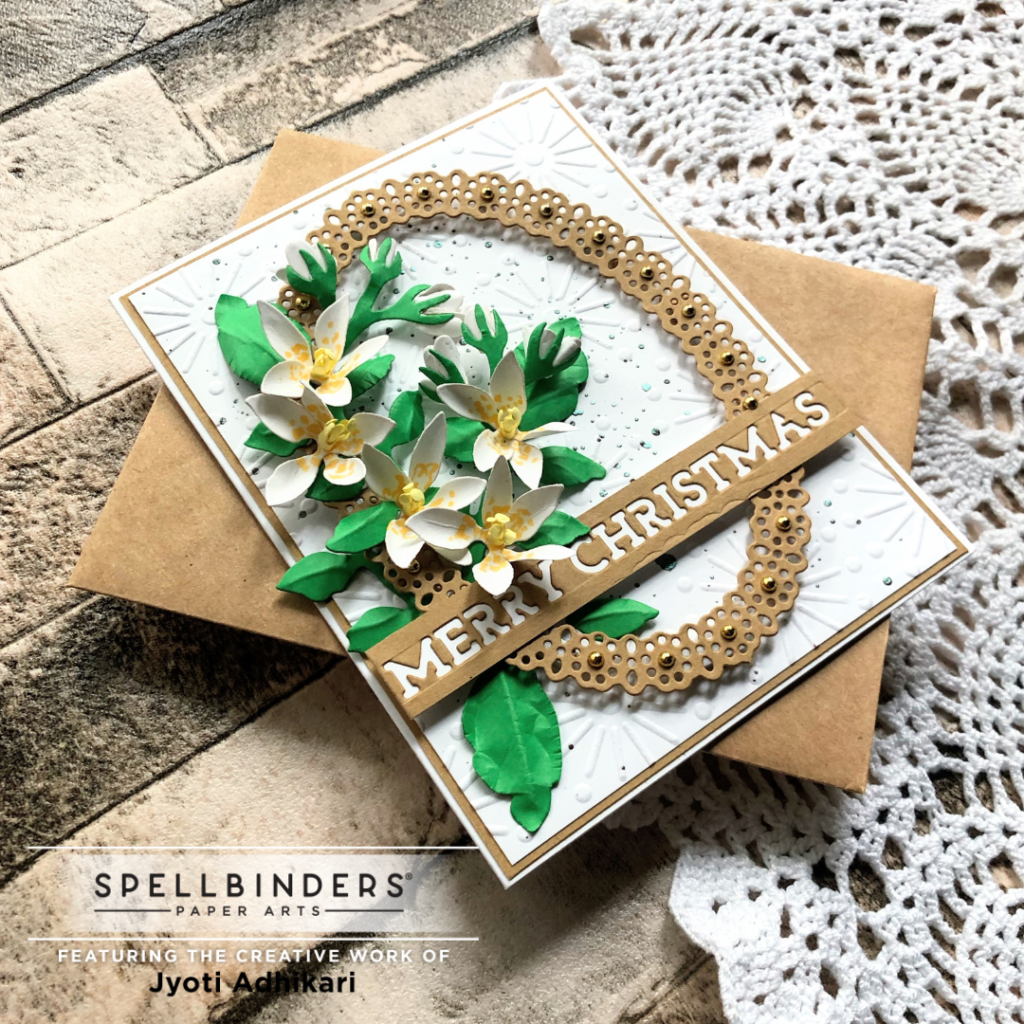
I started arranging the jasmine flowers on the left side of the oval. Bigger flowers towards the middle of the cluster and the buds and leaves towards the edges.
Sentiment
For the sentiment of this card I used the craft card-stock sentiment die cut from the SANTA’S FIREPLACE – LARGE DIE OF THE MONTH. The sentiment reads Merry Christmas.
Embellishment
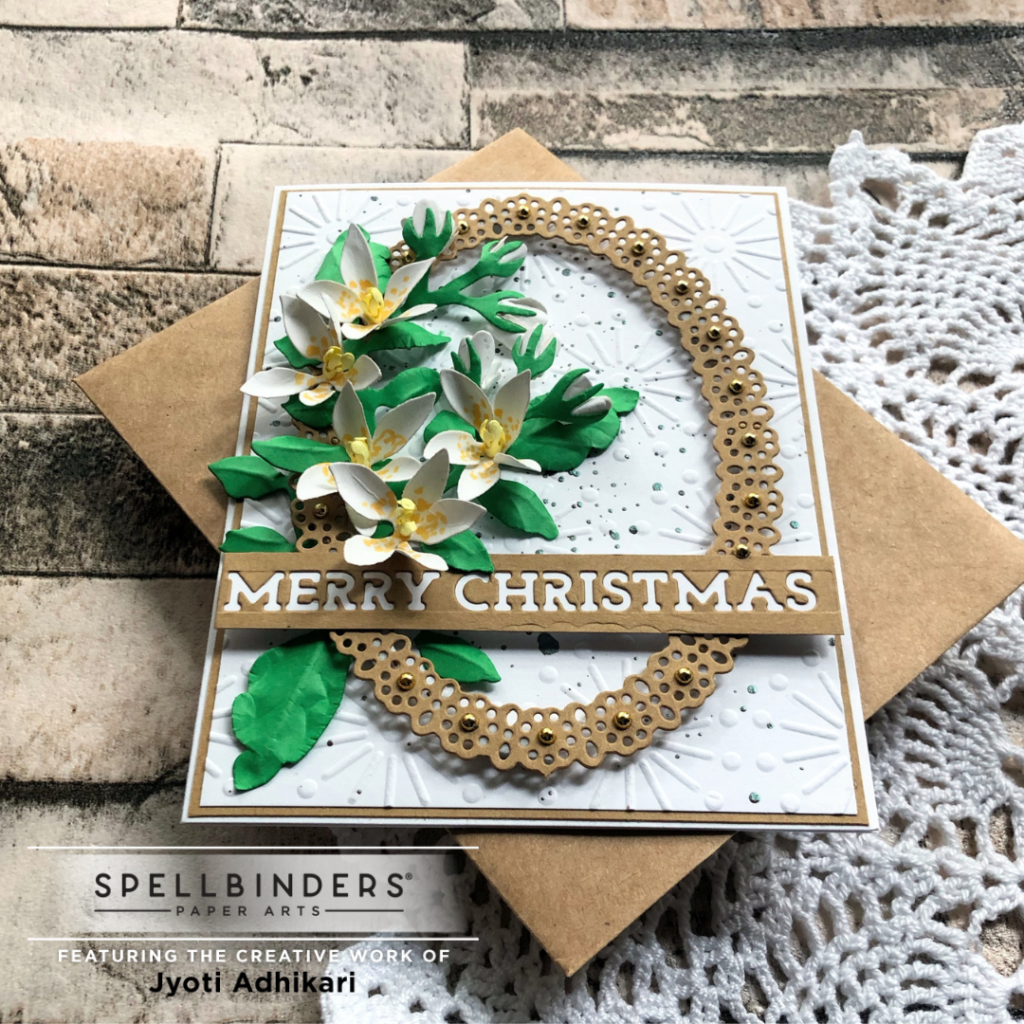
To embellish my card I added some gold pearls on the center of the flowers in the border. Strategically, I was also able to hide the tiny foam tape pieces behind the shiny gold pearls.
Hope you found my post inspiring. Thank you for stopping by.
Hugs,
