Hey there, fellow crafting enthusiasts! I’m excited to take you behind the scenes of a card-making adventure that’s as enjoyable as it is rewarding. Join me as I walk you through the step-by-step process of creating a mesmerizing handmade card using none other than Spellbinders’ ENVELOPE OF WONDER COLLECTION. Together, we’ll explore the magic of die-cutting, layering, assembling, and adding those final personal touches that turn ordinary materials into extraordinary works of art. Let’s dive in and unleash our creative prowess!
Die-cutting Delights
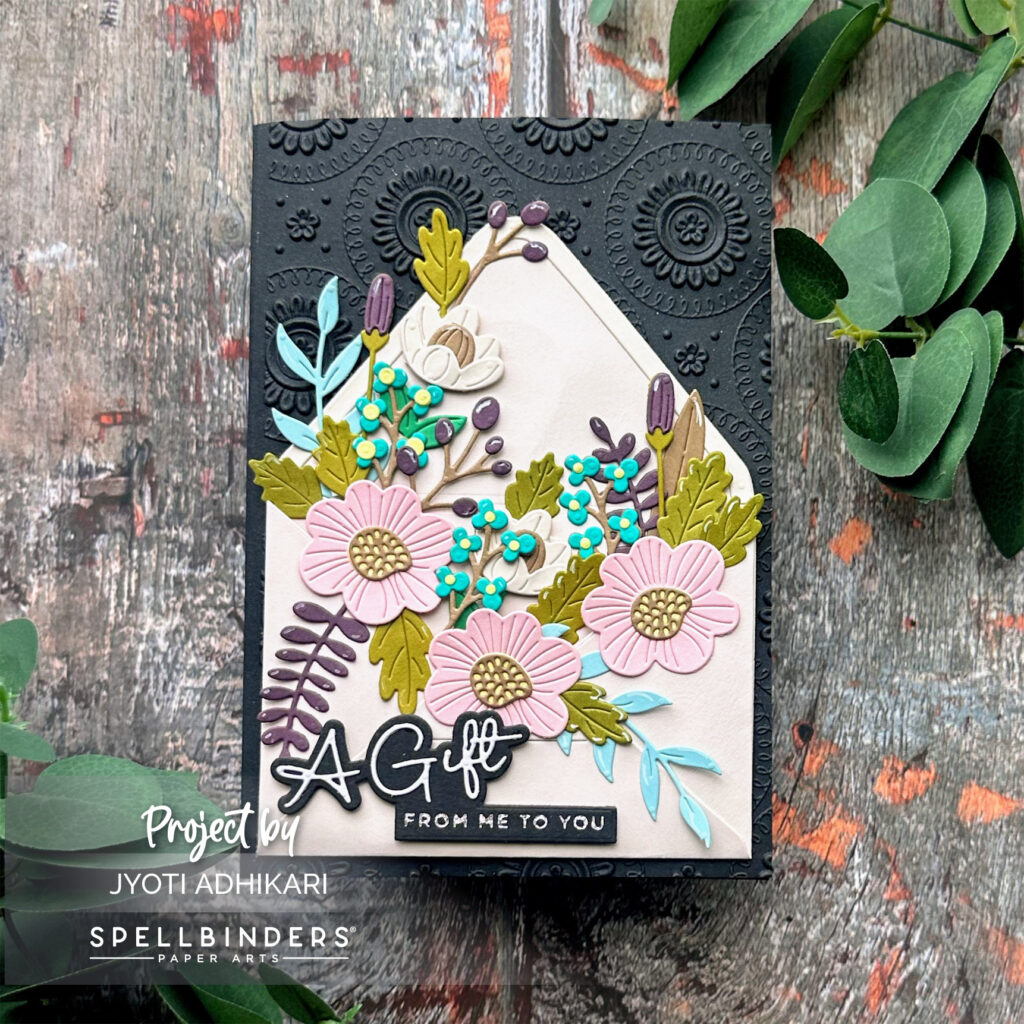
First things first, let’s talk about the heart of this project—the Spellbinders ENVELOPE OF WONDER DIE set and the AUTUMN WONDER DIE add-on. With these amazing dies in hand, I set out to craft intricate floral designs that would bring a touch of elegance to my card. Opting for a slightly muted color palette for the flowers and leaves, I started by die-cutting and assembling a lot of them. Trust me, there’s something incredibly satisfying about watching the pieces come to life!
Layering Beauty
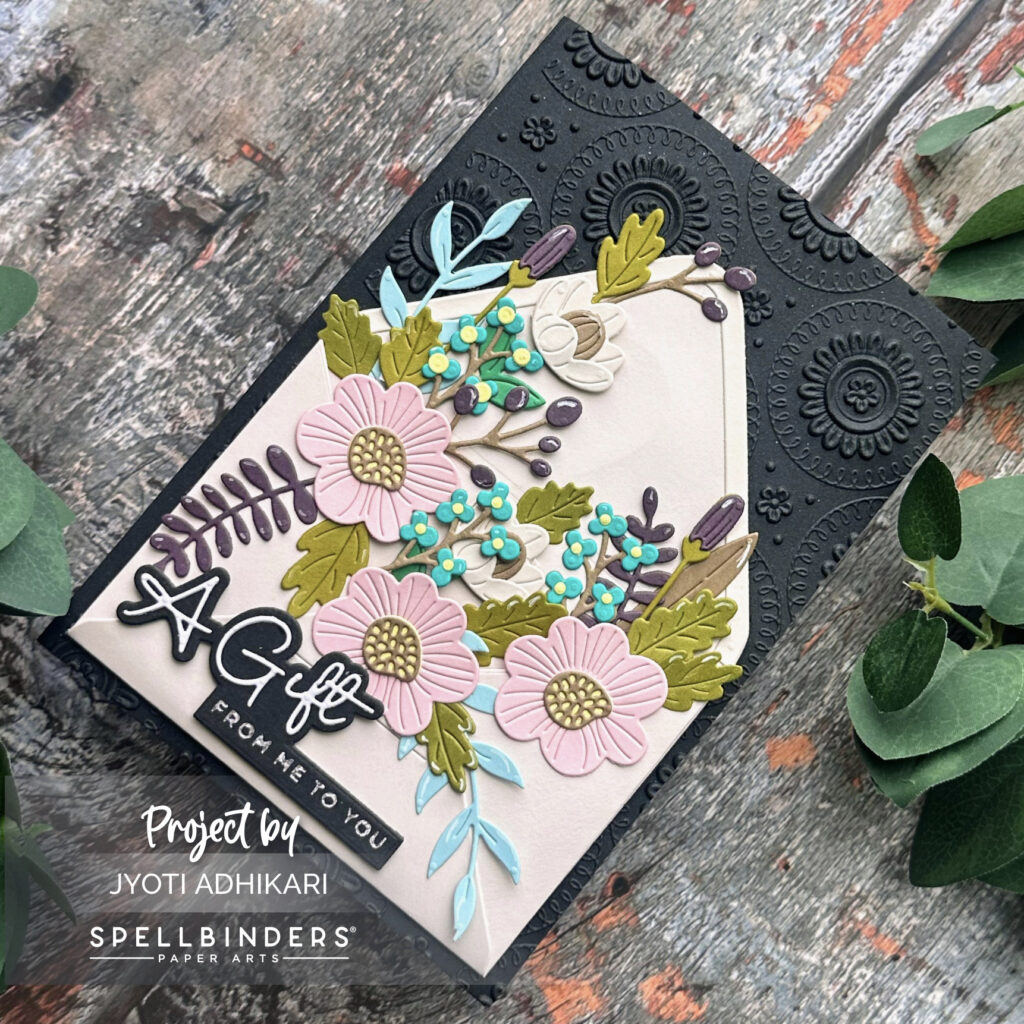
Now, it’s time to let our creativity bloom—literally! by carefully stacking and arranging the delicate flowers and leaves. The goal? Achieving a wonderfully dimensional effect that adds depth and charm to the design. Mixing and matching various sizes and shapes, I played with the arrangement until I found the perfect balance. Pro tip: don’t hesitate to experiment with color combinations for an extra dash of visual appeal.
Constructing the Floral Envelope
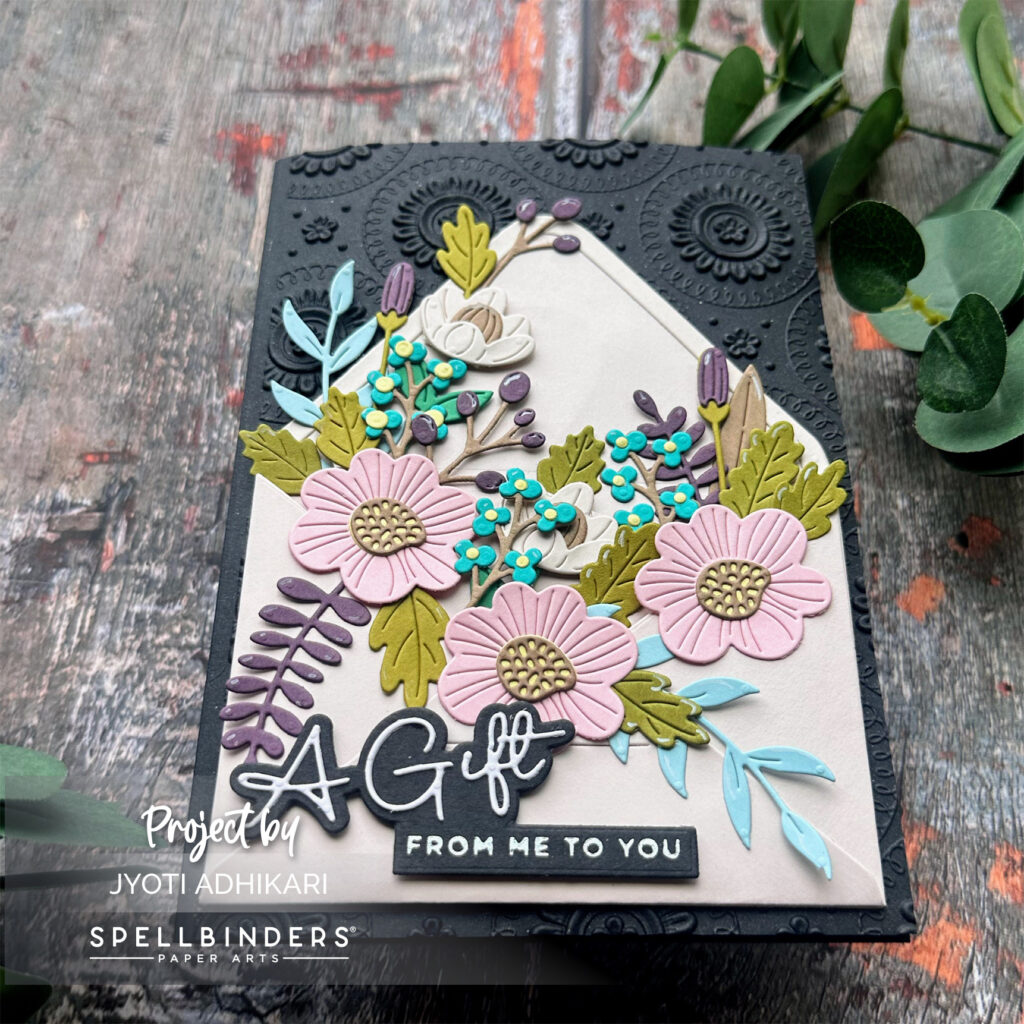
One of the highlights of this project was crafting the enchanting envelope that would house our floral masterpiece. Using cream cardstock and the envelope parts from the die set, I meticulously assembled the components. Picture this: the envelope would serve as the canvas, and the flowers would seem to gracefully emerge from within. Talk about a captivating illusion!
Embossed Backgrounds and Sentiment
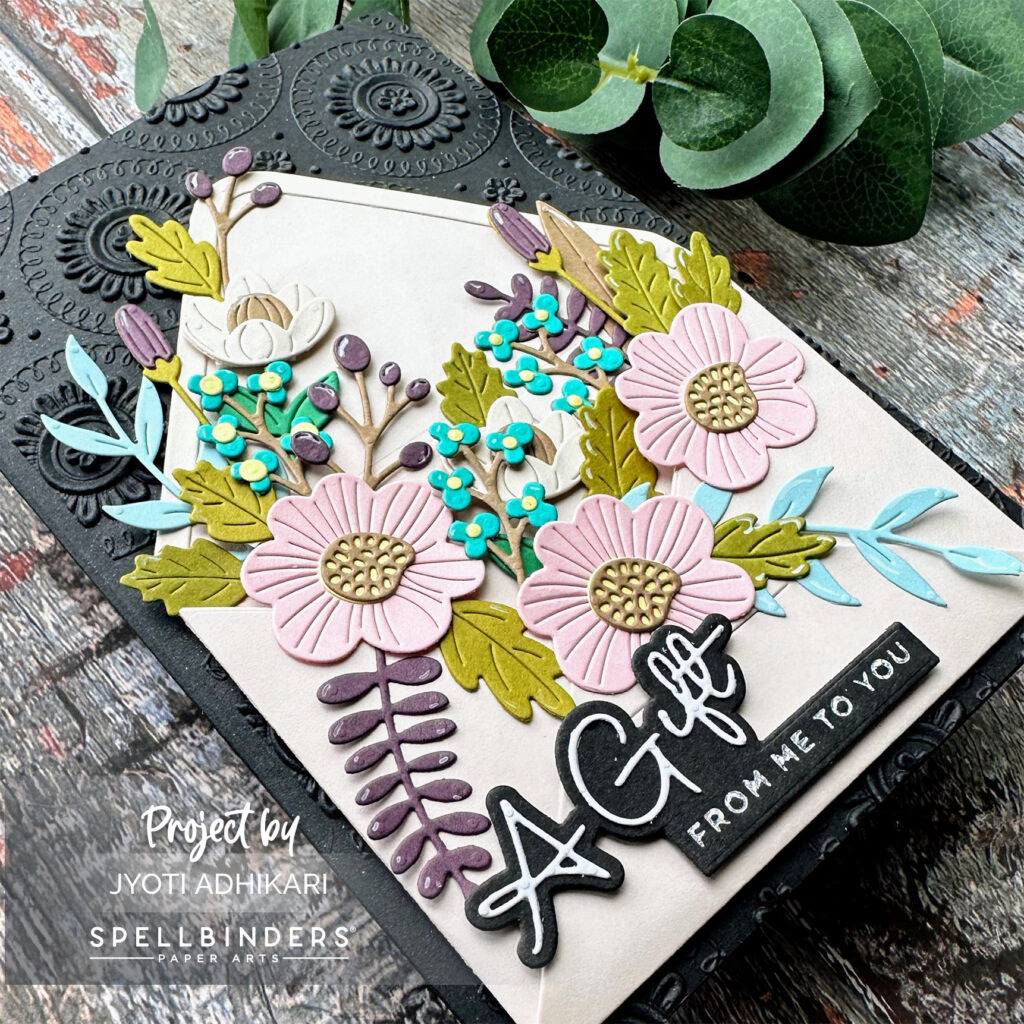
For an added touch of sophistication, I chose a shimmery black cardstock as the base. And guess what? Embossing came into play! Using MANDALA BLOOM 3D EMBOSSING FOLDER, I added a textured background that truly brought the card to life. Attaching the floral envelope securely to the card base was the next step, and let’s not forget the sentiment. “A Gift From Me to You,” a sentiment die from Spellbinders CHRISTMAS DIE AND SENTIMENTS, conveyed my heartfelt message perfectly.
Last but not least, I added a touch of whimsy by highlighting the flowers and leaves with a white gel pen. This small detail brought a sense of realism and dimension that I absolutely adore. And just like that, my enchanting card was complete—a delightful blend of nature’s beauty and creative imagination. So, there you have it, a journey through the creation of a truly unique and heartfelt card. Until next time, keep crafting and keep sharing the magic!
Hugs,
