If you love Glimmer Hot Foiling, Spellbinders GLIMMER CARDFRONT SENTIMENTS COLLECTION is here. This Collection has so many fun bold Glimmer Sentiment that fills almost the whole A2 card-fronts. There are glimmer sentiments, geometric glimmer cover plate and a beautiful floral die set that comes with it’s coordinating stencil. With the stencil and die together you can easily create floral cluster in different color combination ready to go on your cards.
Hello Everyone!
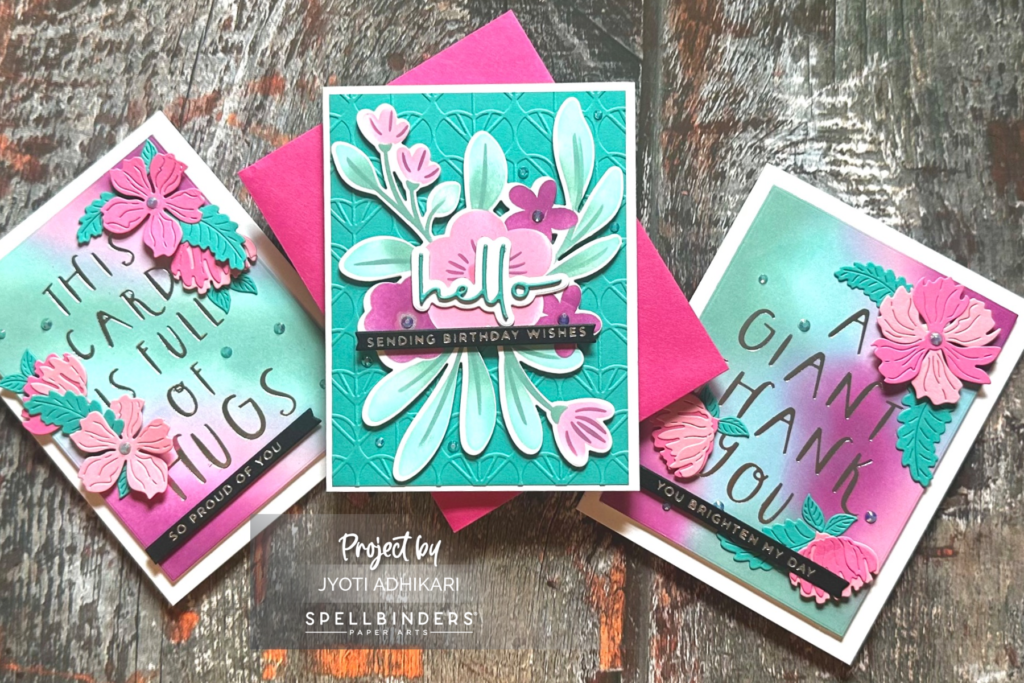
Welcome back. Today I have three cards to share with you featuring three products from this release. I have limited myself to just one color combination for all three cards. So without further ado, let’s get into the cards.
First Card
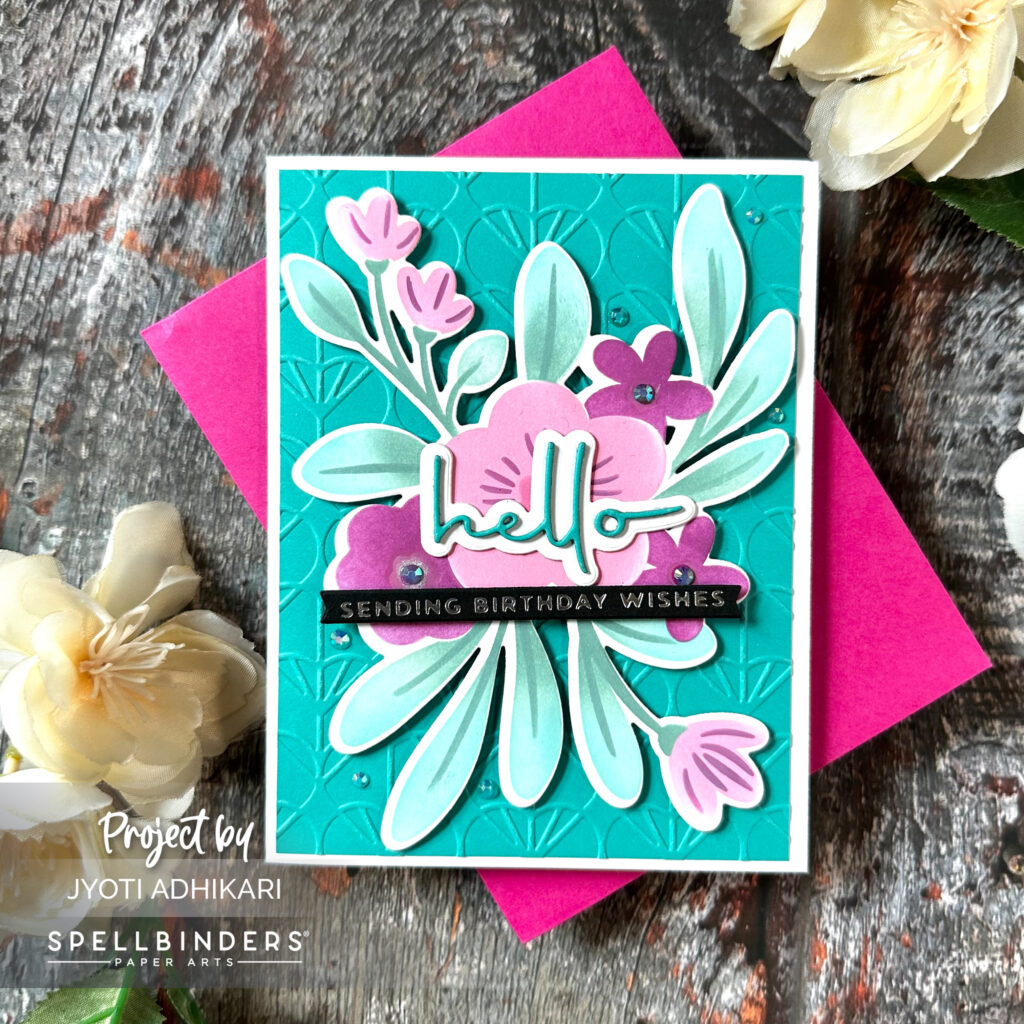
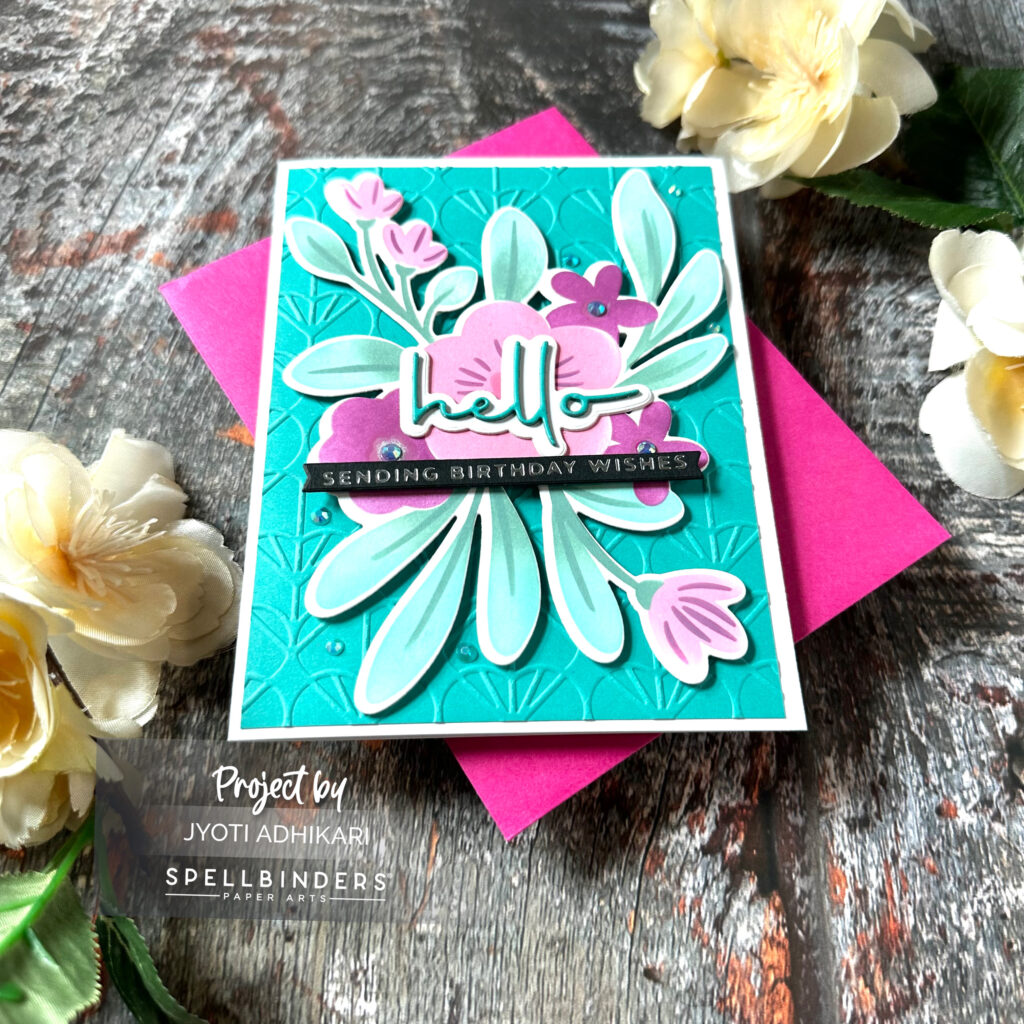
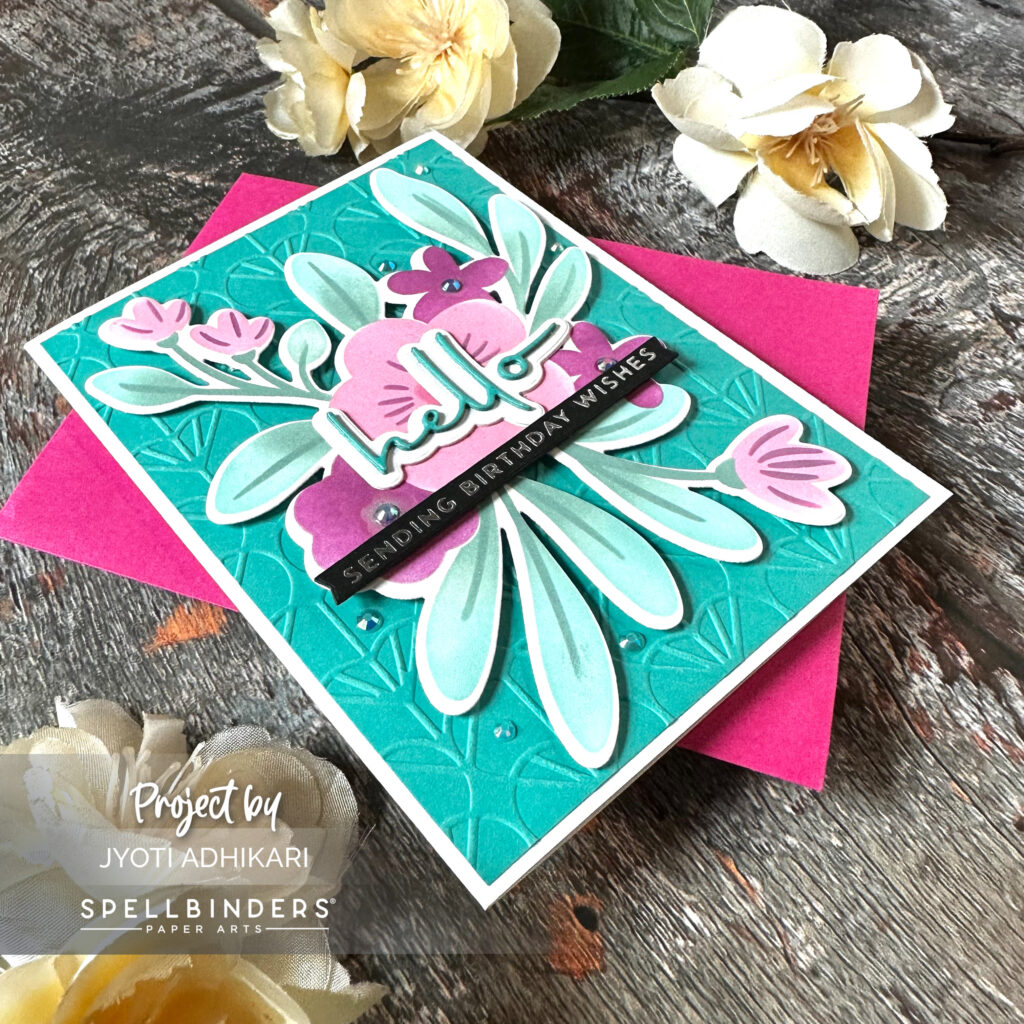
In my first card I am focusing on the HELLO BLOOMS STENCIL AND DIE BUNDLE . As soon as I started working on this collection I fell in love with this floral stencil and die set. This stencil creates a floral cluster that covers the whole cardfront. You can either stencil directly on the cardfront or cut out the cluster using the die and add it to any project.
Focus
I started creating this stenciled floral cluster by taping a white piece of card-stock on to my craft mat then aligned the HELLO BLOOMS STENCIL towards the middle. This stencil has four different layers. You can pick what color you want for each layer. There are dots on each layer of the stencil to make it easier to align. I used Kitsch Flamingo, Picked Raspberry, Salvaged Patina and Evergreen Bough Distress oxide inks. Once the inks were fairly dry I die cut the image using the coordinating die.

Background
As I had a limited color palette in mind and I didn’t want to introduce another color to my project, I picked a piece of LAGOON COLOR ESSENTIAL CARD-STOCK which was a perfect match to my ink blended leaves. Of course you can add just a plain piece of card-stock but I like adding something extra. Adding dry embossing is an easy way turn you card into simple to sophisticated. I used Spellbinder HEART BLOOMS EMBOSSING FOLDER.
Sentiment
This HELLO BLOOM STENCIL AND DIE BUDLE contains a “Hello” sentiment die and it’s shadow die. I love this font, it is so graceful. I die cut the ‘hello’ with LAGOON COLOR ESSENTIAL CARD-STOCK and the shadow with white three times and layered them for dimension. Then I added the “hello’ right in the center of my floral die cut. Since I love adding strip sentiments on my card I created a bunch of sentiments using the MINI EVERYDAY GLIMMER SENTIMENTS and SILVER GLIMMER HOT FOIL ROLL. I picked one that said”Sending Birthday Wishes”. So now my sentiment read “Hello, sending birthday wishes!!”
Embellishment
After adhering the embossed panel, the floral die cut and the sentiments on my card I thought it still needed something. So I went through my drawer of sequins and jewels and I did a little happy dance when I found this iridescent jewel in matching color.
This competed my first card and I loved how this turned out. Now let’s move on to my second card.
Second Card
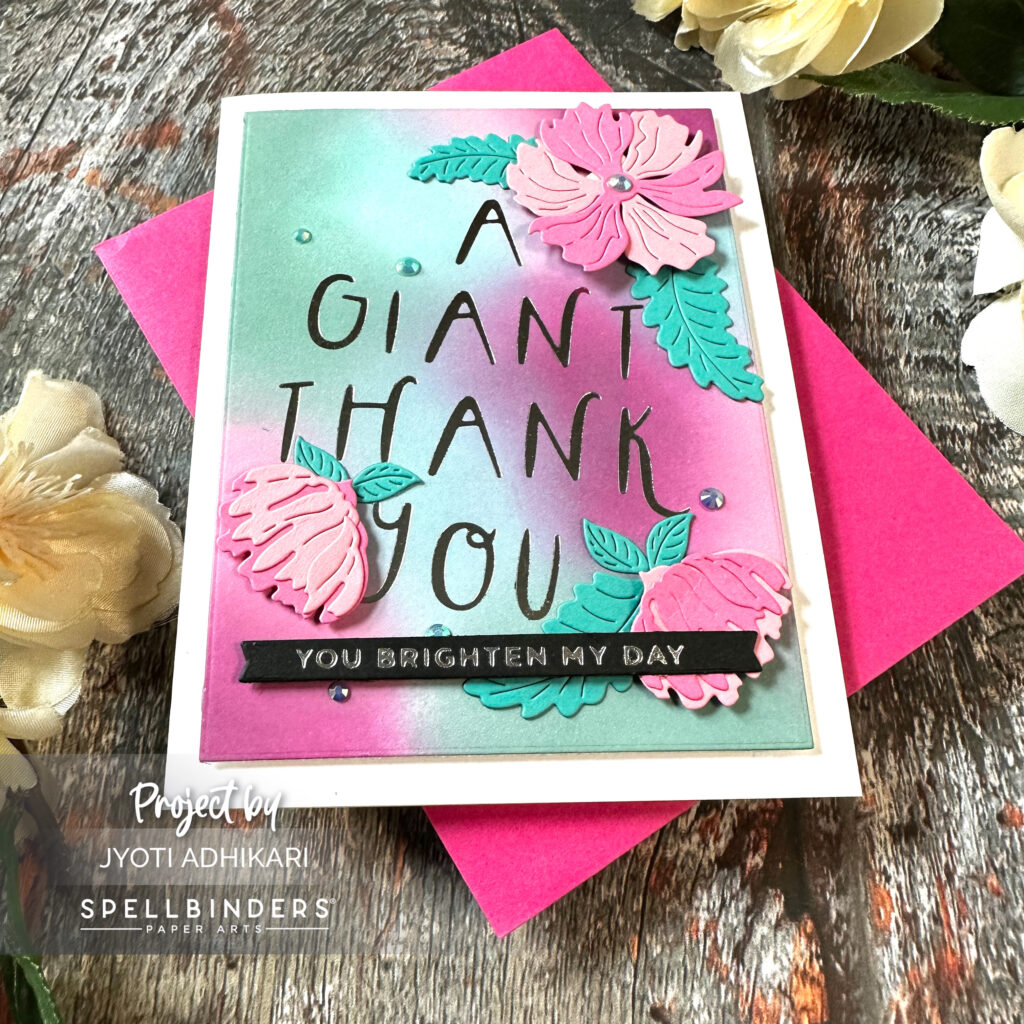
My next card features the GIANT THANK YOU GLIMMER HOT FOIL PLATE. The whimsical font and size of this sentiment fills your A2 cardfront.
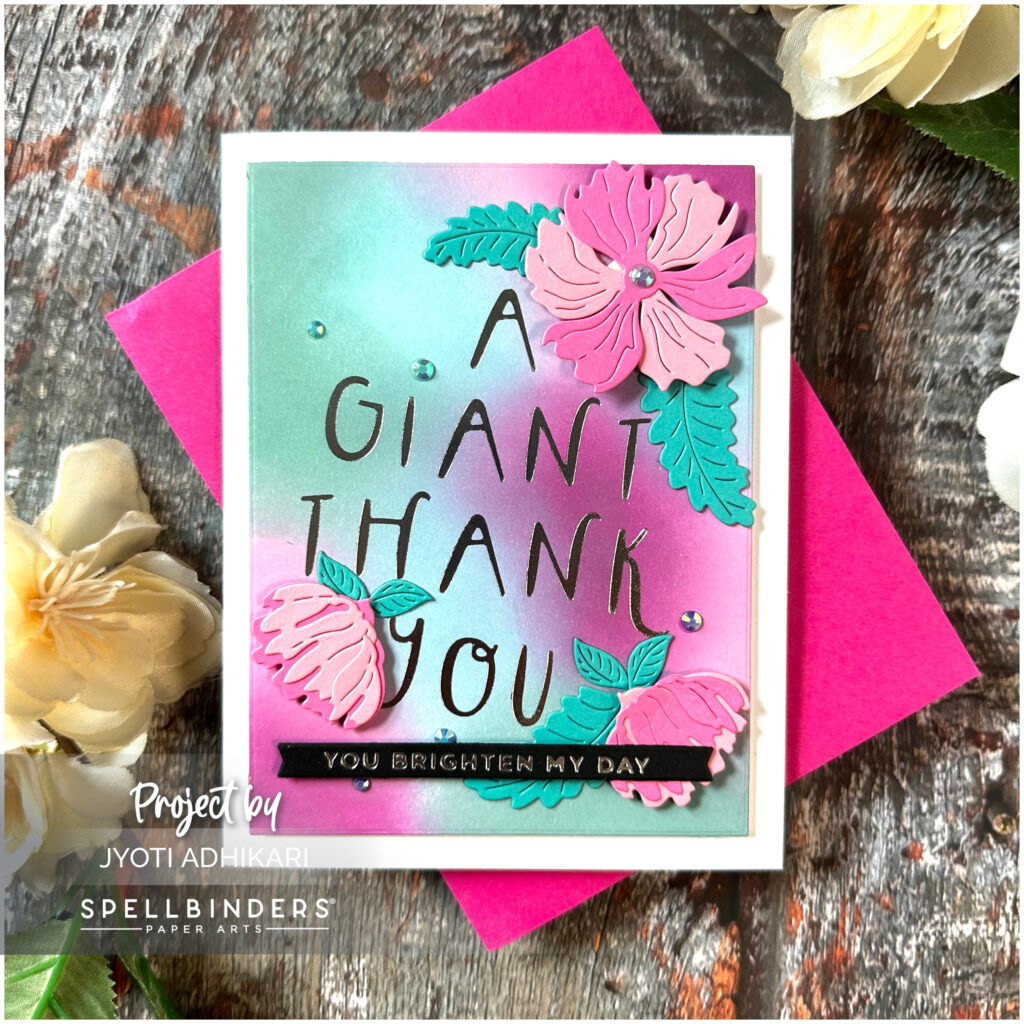
Background
I started this card by creating the background first. In order to stay within my color palette, I ink blended a piece of white card-stock with Kitsch Flamingo, Picked Raspberry, Salvaged Patina and Evergreen Bough Distress oxide inks. Once the inks were dry I used the GIANT THANK YOU GLIMMER HOT FOIL PLATE and SILVER GLIMMER HOT FOIL ROLL to foil the sentiment on the ink blended panel. Then I cut it to be a quarter inch smaller on all sides of my A2 card-base.
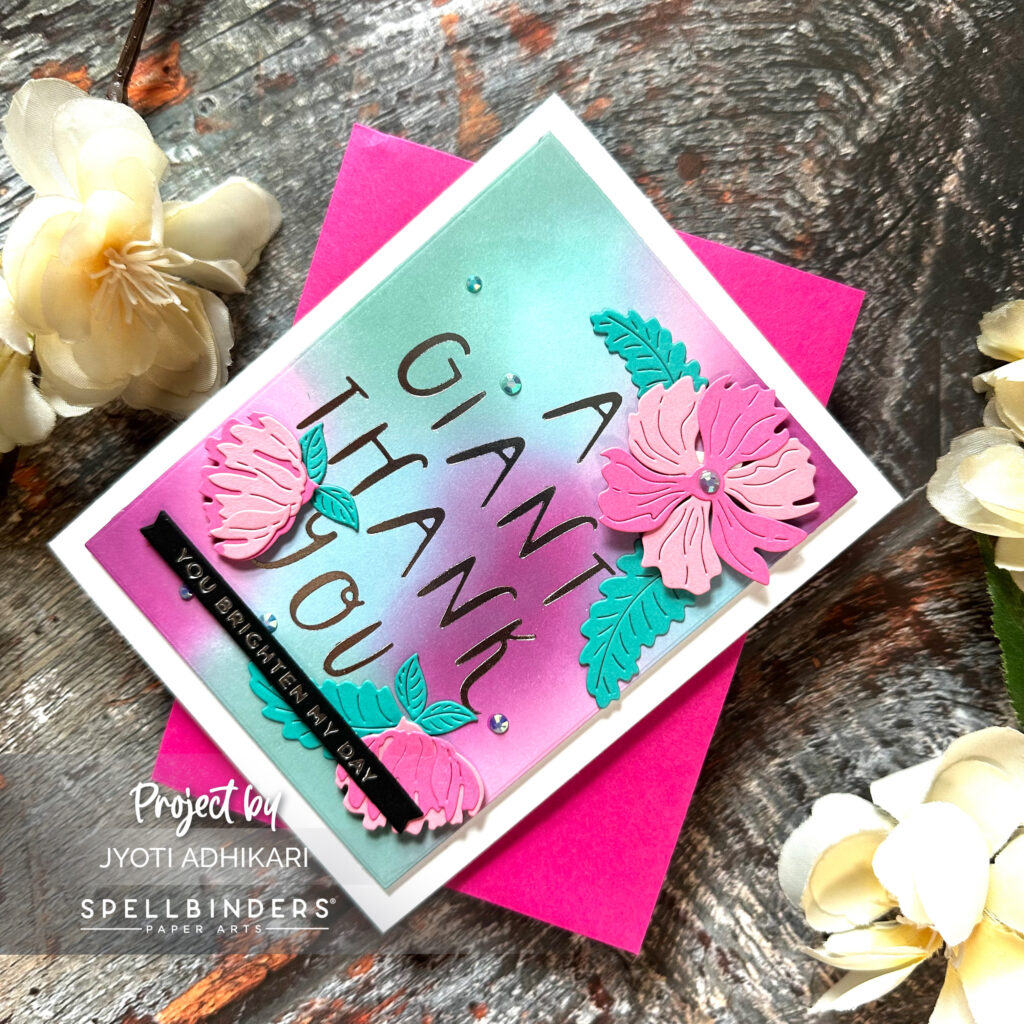
Decorations
This card looked finished already but I still added some flowers I created using the STYLISH OVALS HELLO YOU FLORAL DIES in the shades of pinks that match the distressed oxide colors I used. After assembling the layers of the flowers I added them wherever looks appropriate.
Sentiment
The background itself is a sentiment. I also added a strip of foiled sentiment to go along with it. The giant thank needs to be for something right? So I added “you brighten my day”. So now the card means thank you for brightening my day.
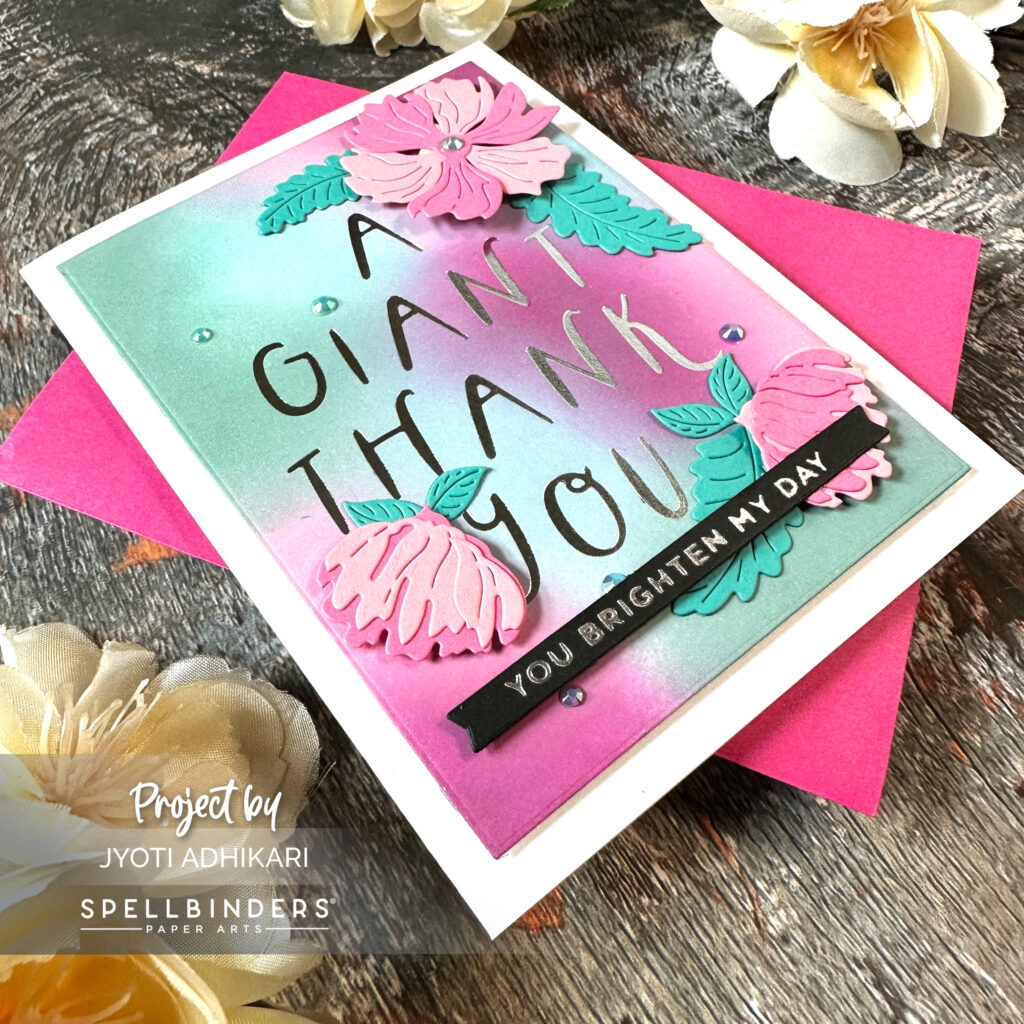
Embellishment
As the final touch I added some jewels in the center of the flowers and some scattered around the background.
This completed my card.
Third Card
My third card is similar to my second one in design except I changed the background a little bit and featured THIS CARD IS FULL OF HUGS GLIMMER HOT FOIL PLATE.
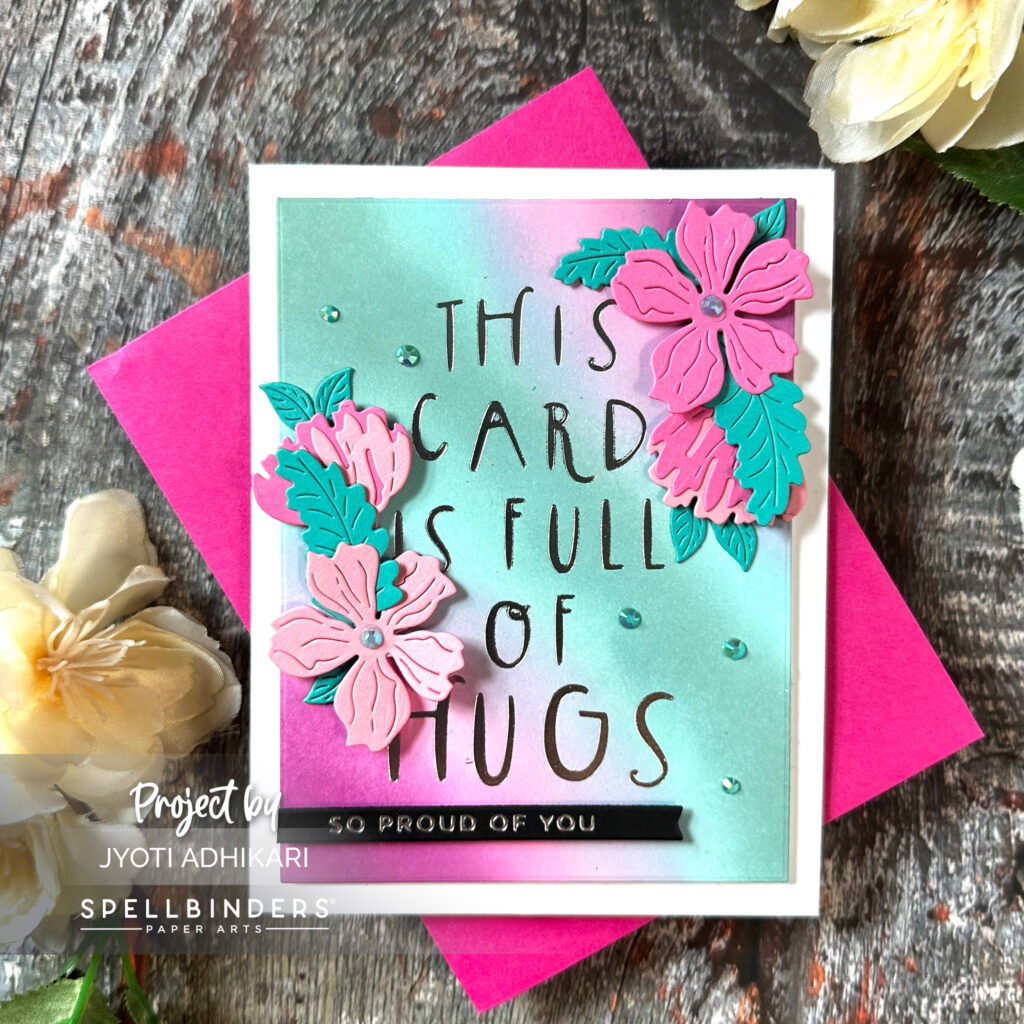
Background
As the background is the main focus of this card I used THIS CARD IS FULL OF HUGS GLIMMER HOT FOIL PLATE AND SILVER GLIMMER HOT FOIL ROLL. I ink blended in somewhat diagonal fashion.
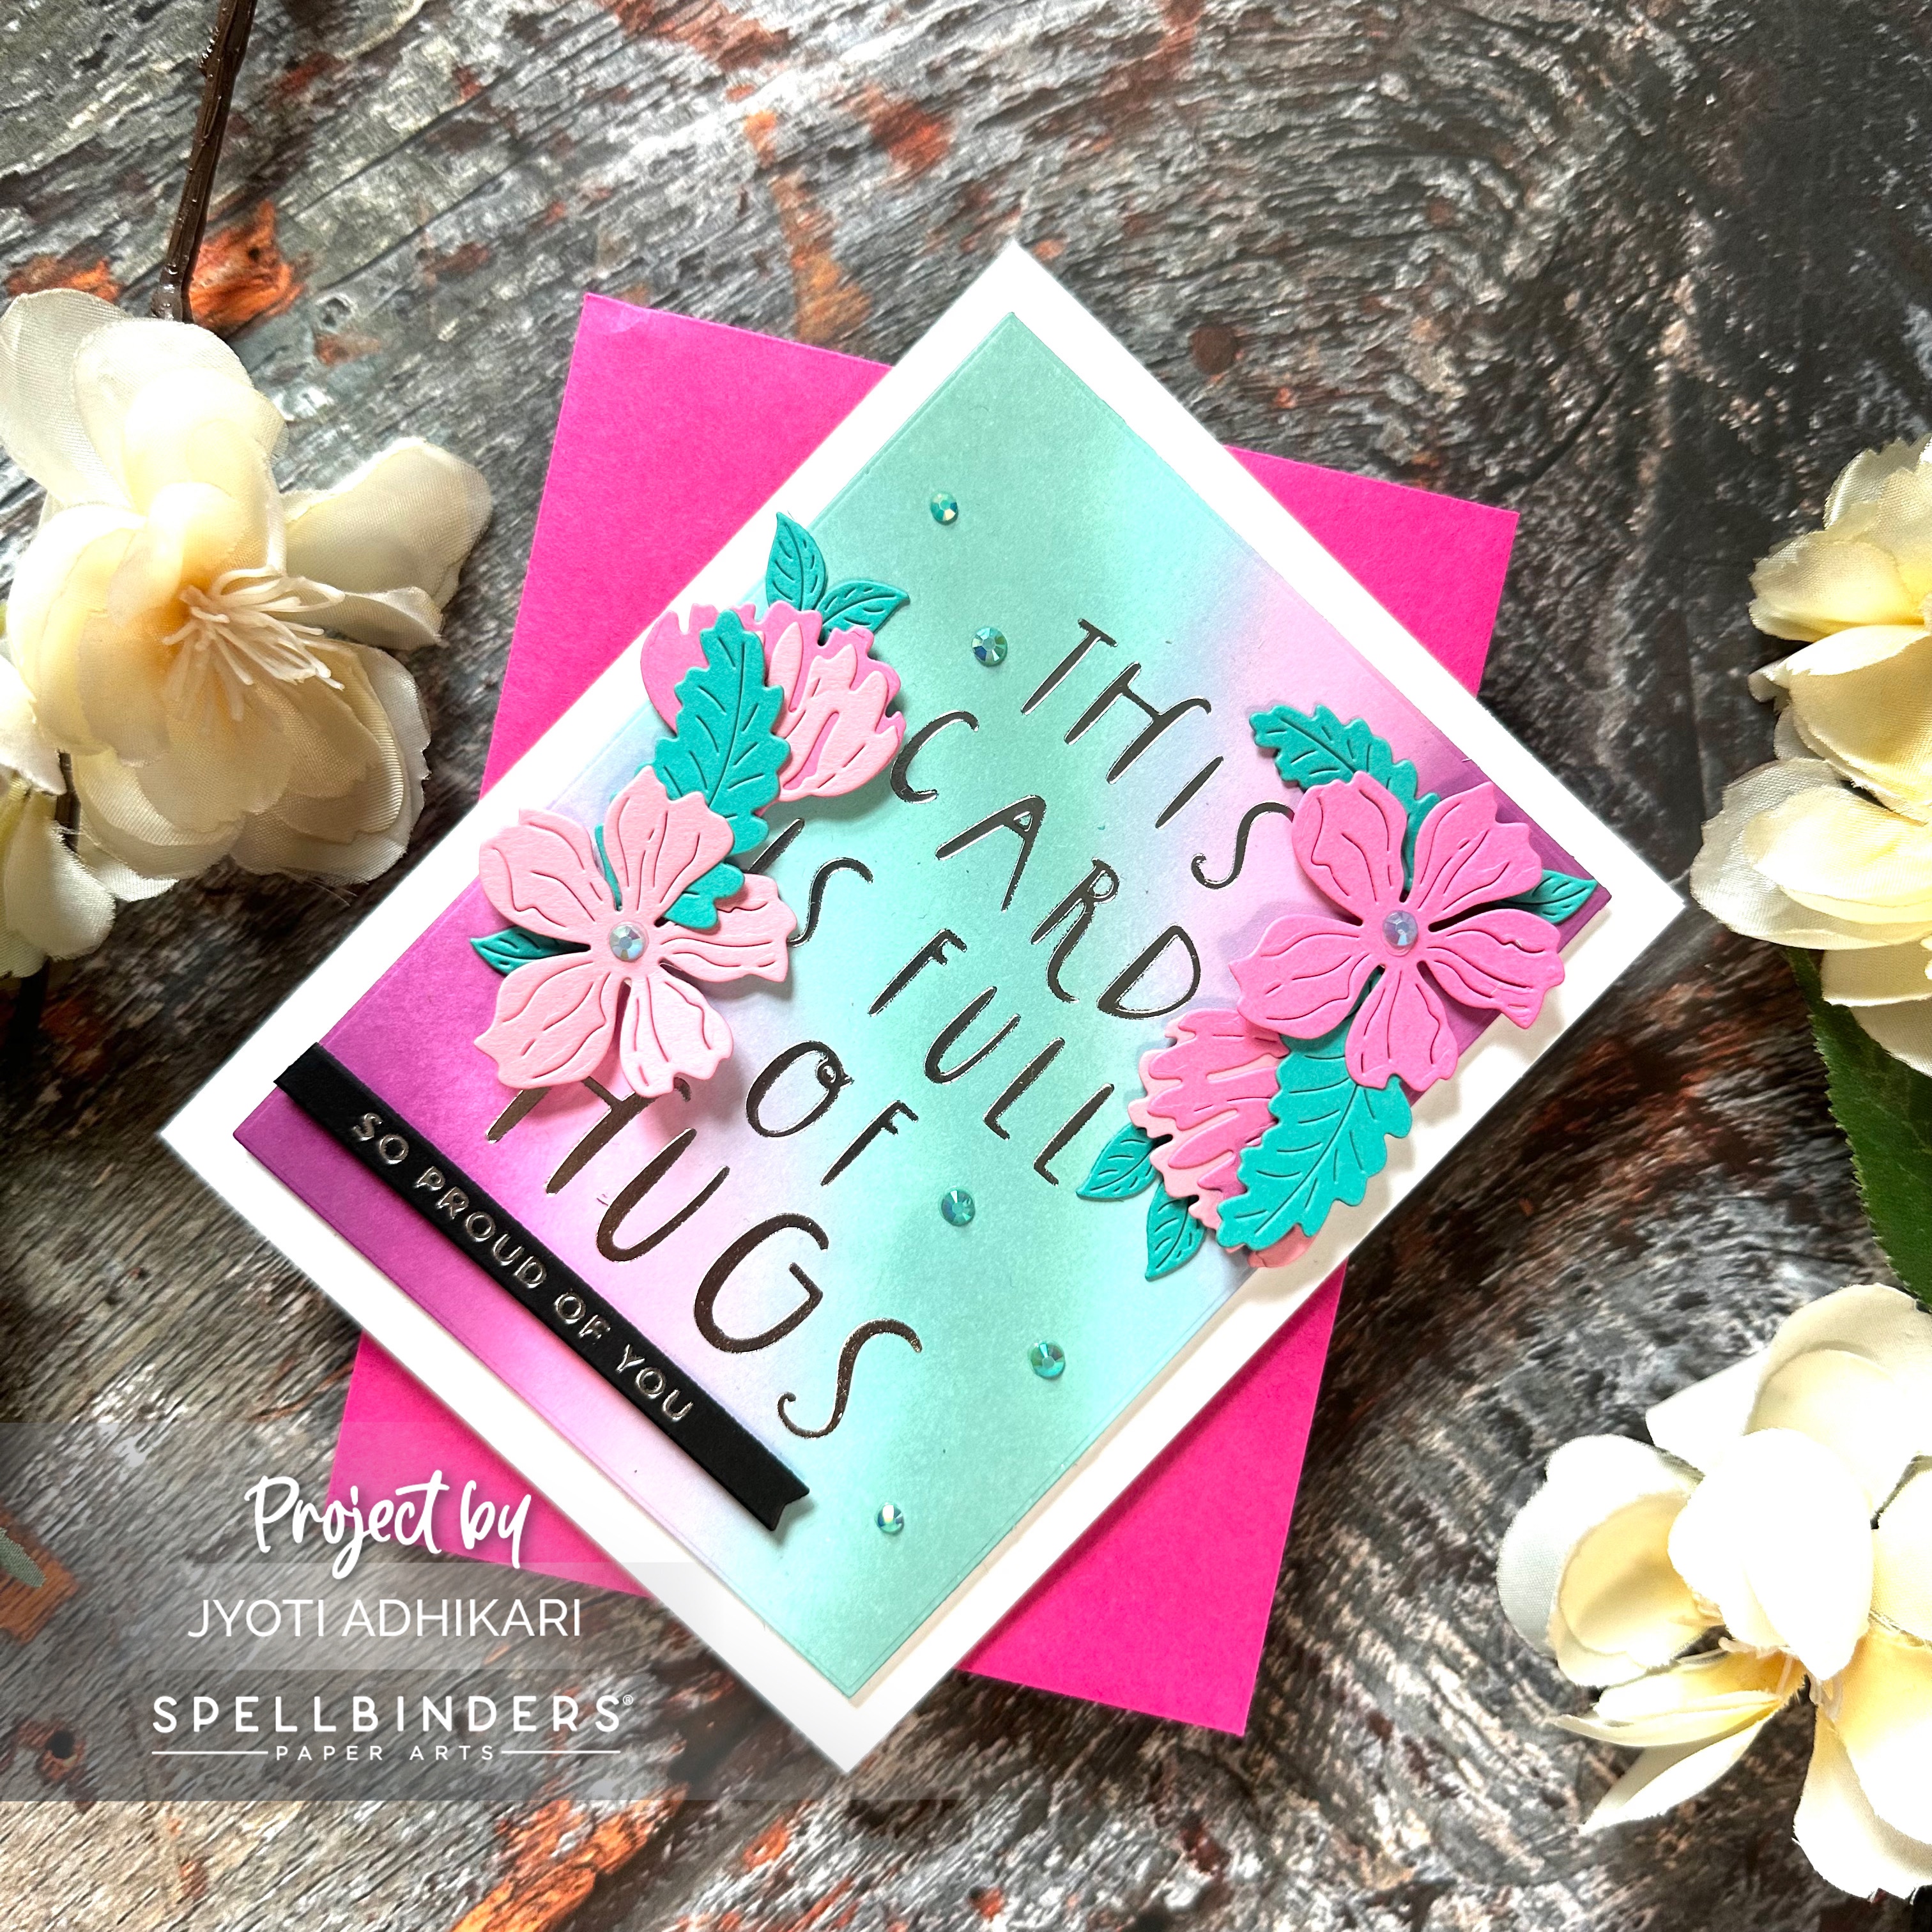
Decorations
I used some of the flowers to decorate this card wherever I felt appropriate. The flowers are from STYLISH OVALS HELLO YOU FLORAL DIES.
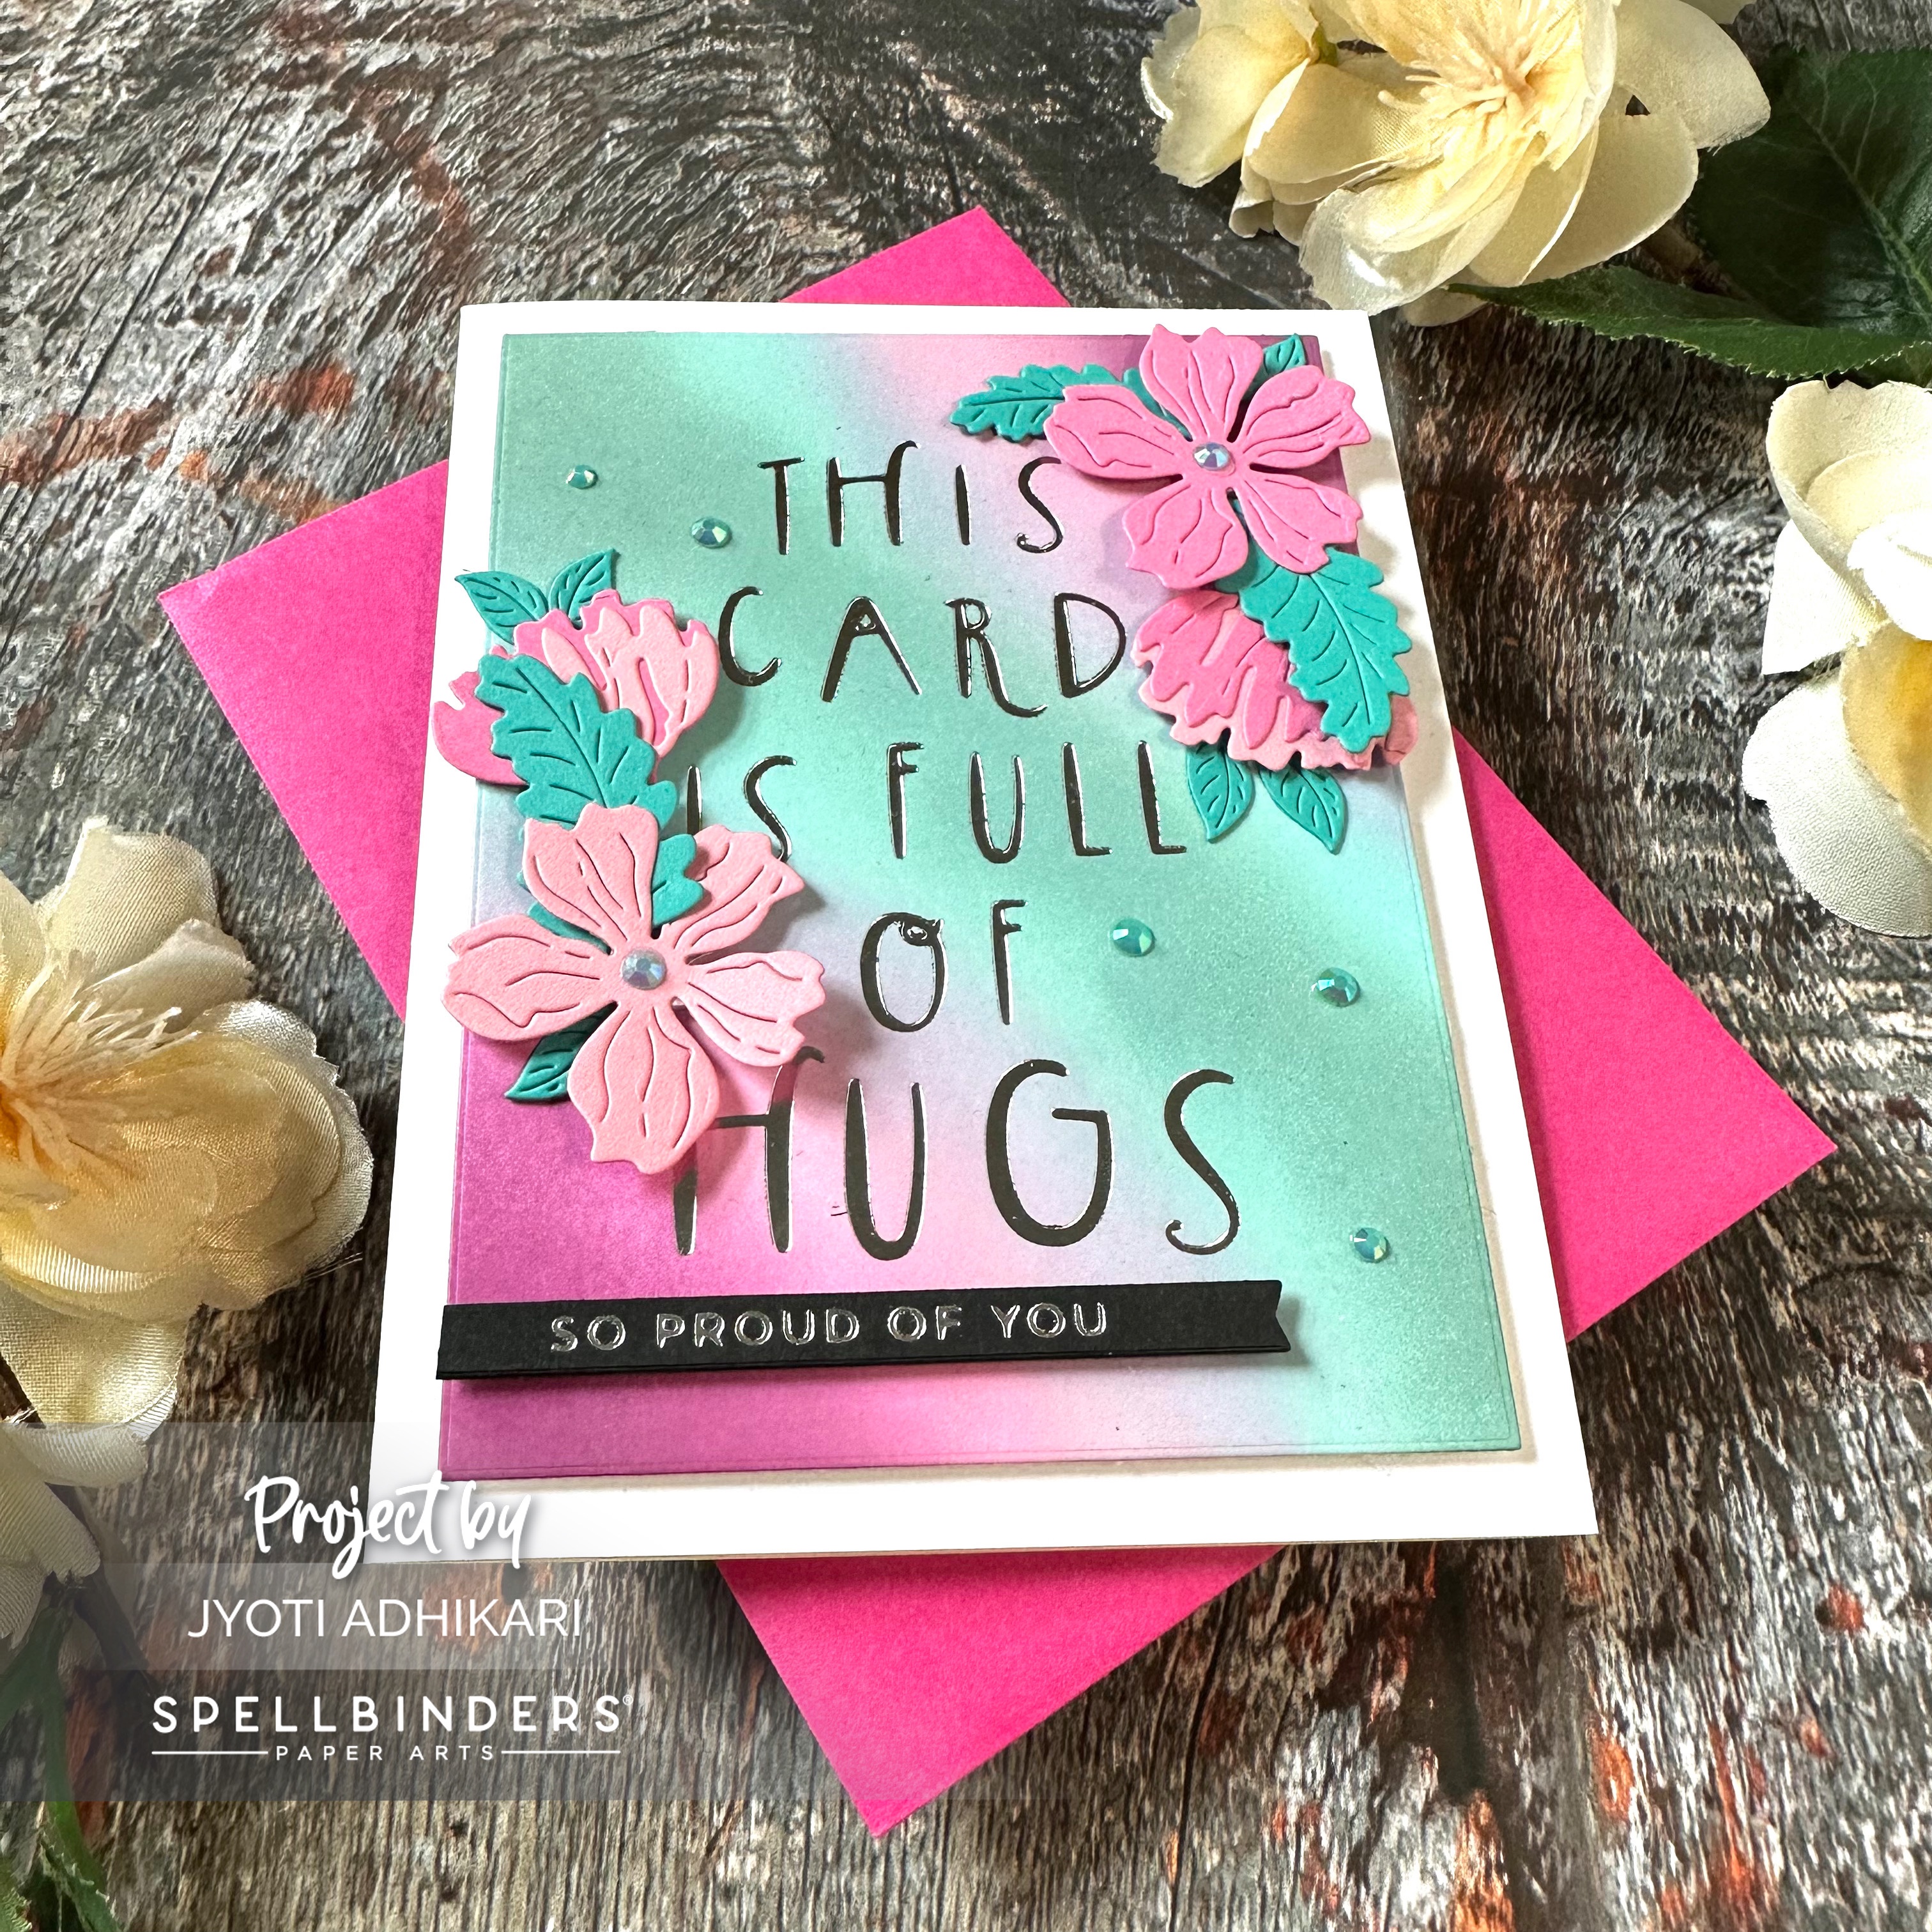
Sentiment
The foiled sentiment on the background is a big part of the sentiment for this card. I also added a sub sentiment strip along the bottom. So now the whole sentiment says ” This card is full of hugs, So proud of you ”
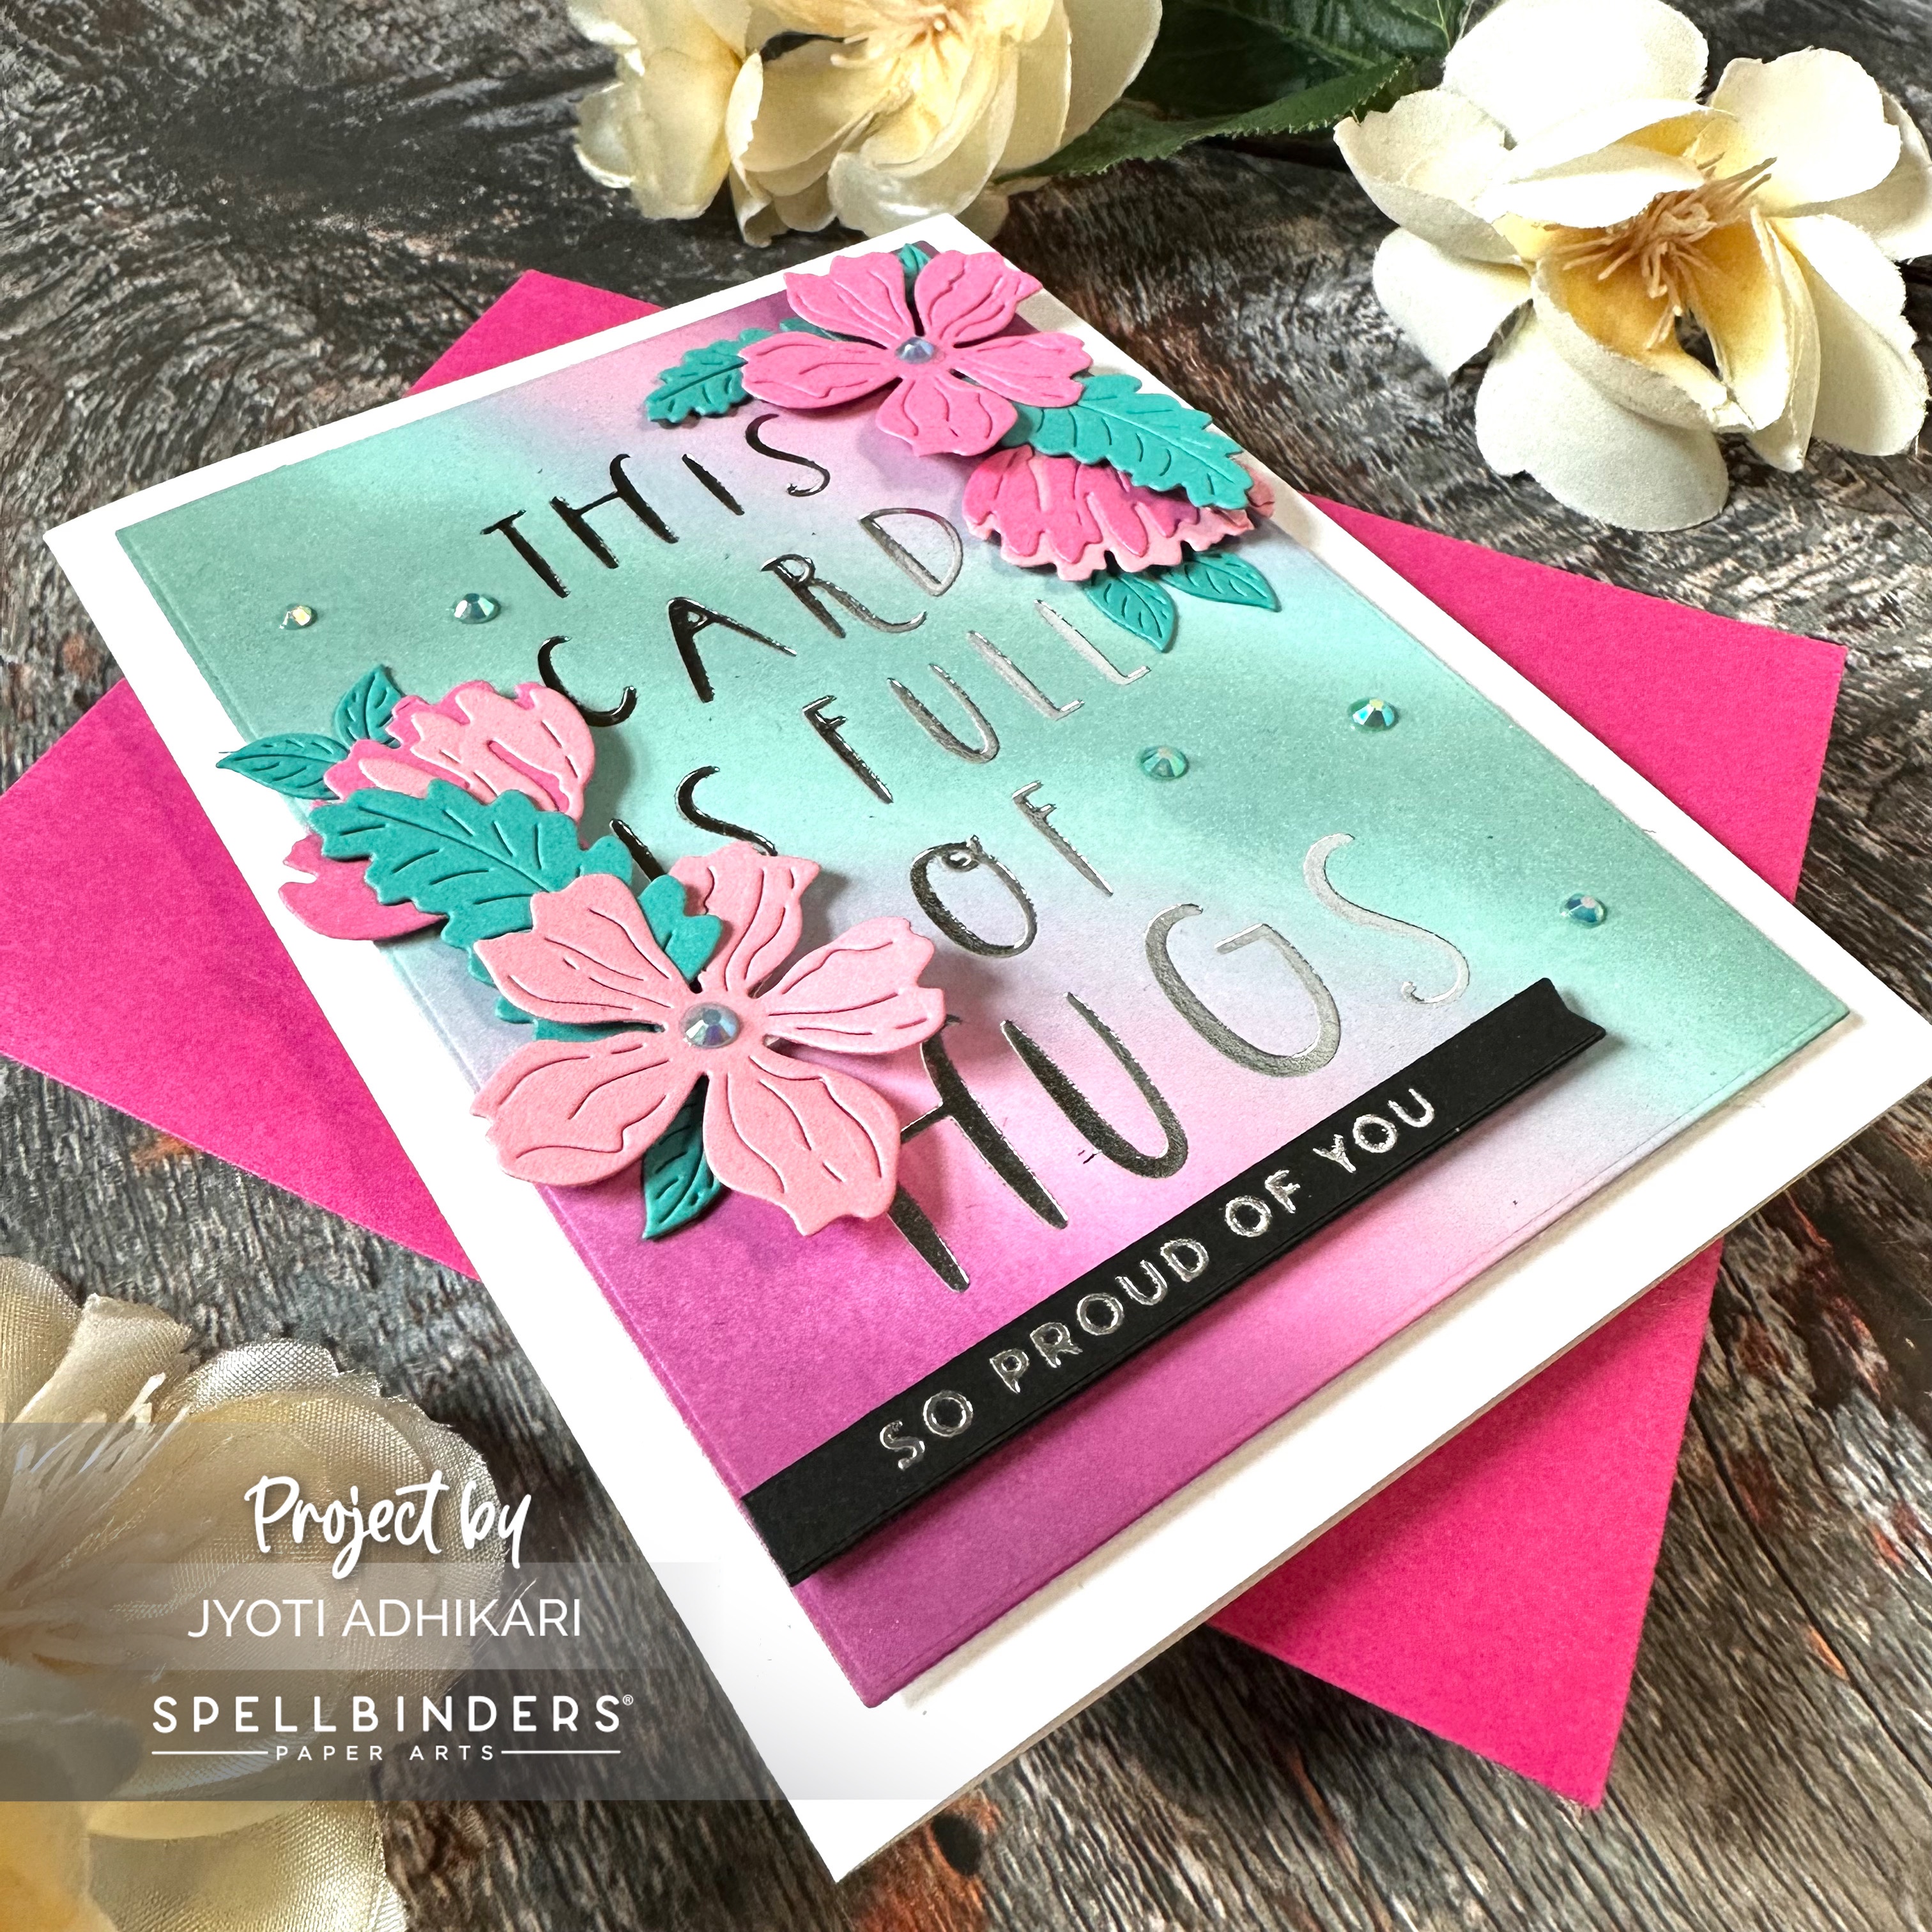
Embellishment
No card is complete without embellishment for me, unless the card is too busy to add any. I added some of the jewels in the center of the flowers and some scattered around the background like before.
This completed my third and last card for today. I hope you find this post inspiring. Thank you for visiting.
Hugs,
