Spellbinders’ yet another fantastic release is here and it is called STYLISH OVALS COLLECTION. This collection is full of fun oval dies, floral dies, glimmer set, stamps and so on.
Hello Everyone!
I am back with a long overdue post featuring some of the products from the STYLISH OVALS COLLECTION. I moved recently but my craft-room is still a mess. And yes I have a craft-room now instead of a 2 by 3 feet desk in one corner of my bedroom and some shelves above it as my craft-space. But since there are lots of post move must dos still left to tackle my craft-room hasn’t gotten much attention. I am still able to craft though with everything spread on the floor. Fun, isn’t it??
So today I am sharing a bunch of cards that were made on my craft-room floor.
First Card
This first card is rich and colorful with a lot of details. I have used a few products from this release to create this card.
Focus
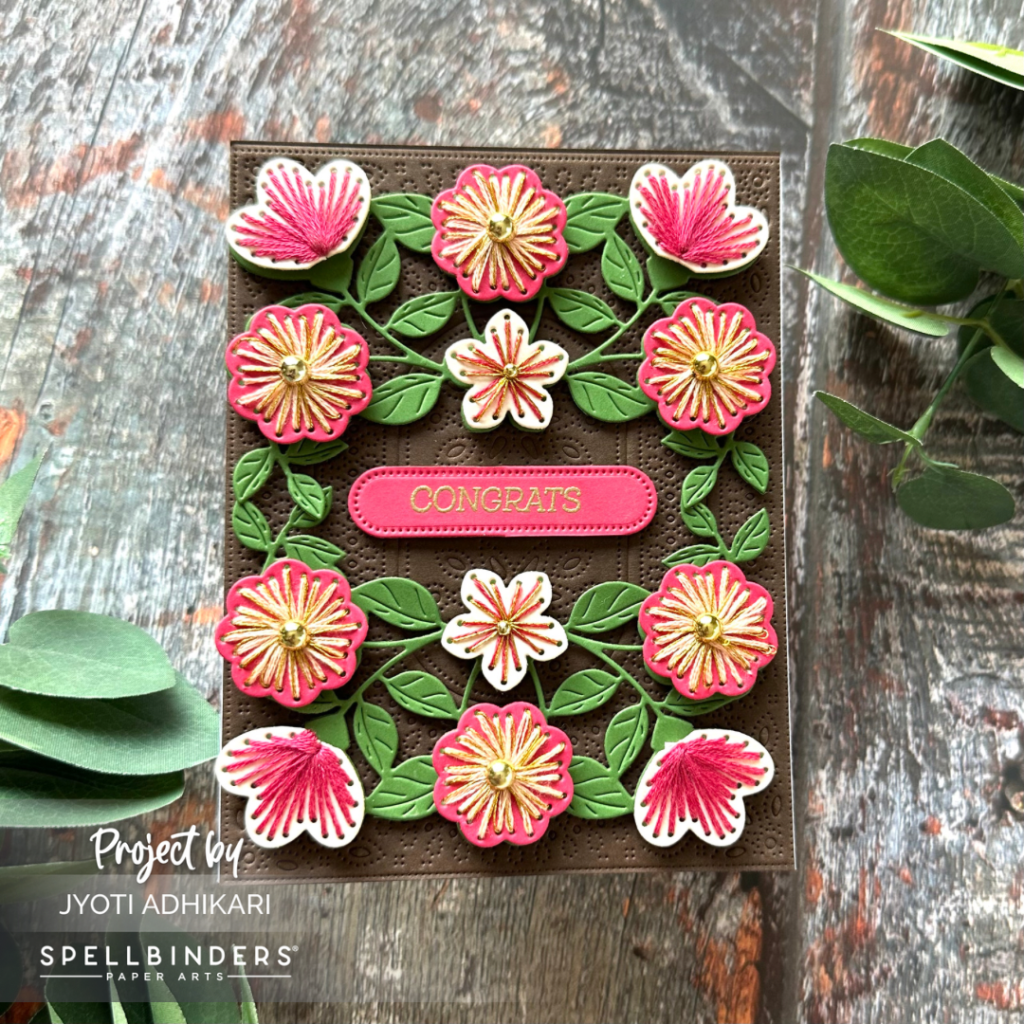
The main focus of this card is the floral pattern that you see in the card. I used STYLISH FLORAL FLIP FRAME ETCHED DIES.The leaves and the stems are cut with the help of just one die. I love Spellbinders dies like this as it makes things so much easier. I used spellbinders card-stock for my die-cutting today. Combinations of pale pink and dark pink for the flowers and green for the leaves.
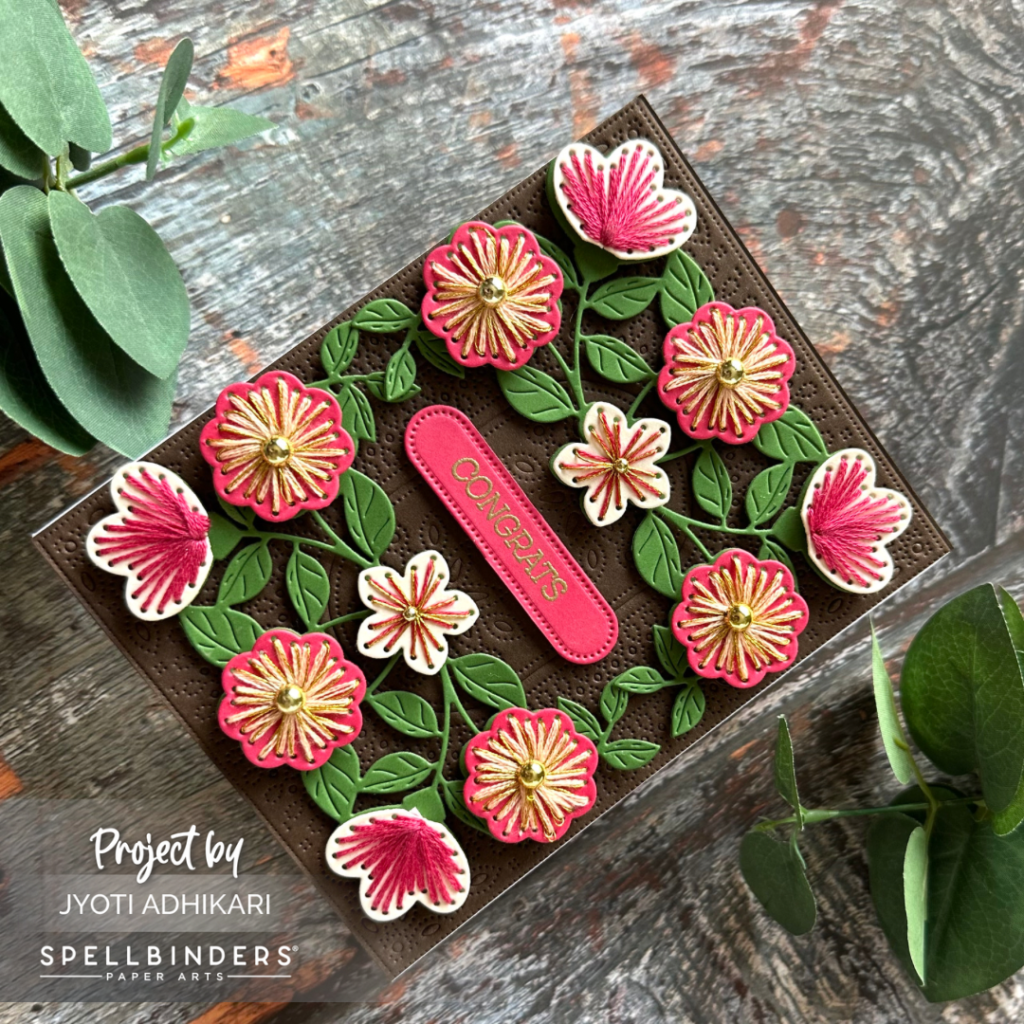
These are stitching dies. But of course I altered the thread I used in stitching different flowers. The bigger dark pink flowers are stitched using three strands of pale pink DMC thread with one strand of gold thread. The pale pink ones are stitched with just dark pink three strands of thread but the little star shaped pale pink flowers are done with one strand of gold and two strands of dark pink.
Background
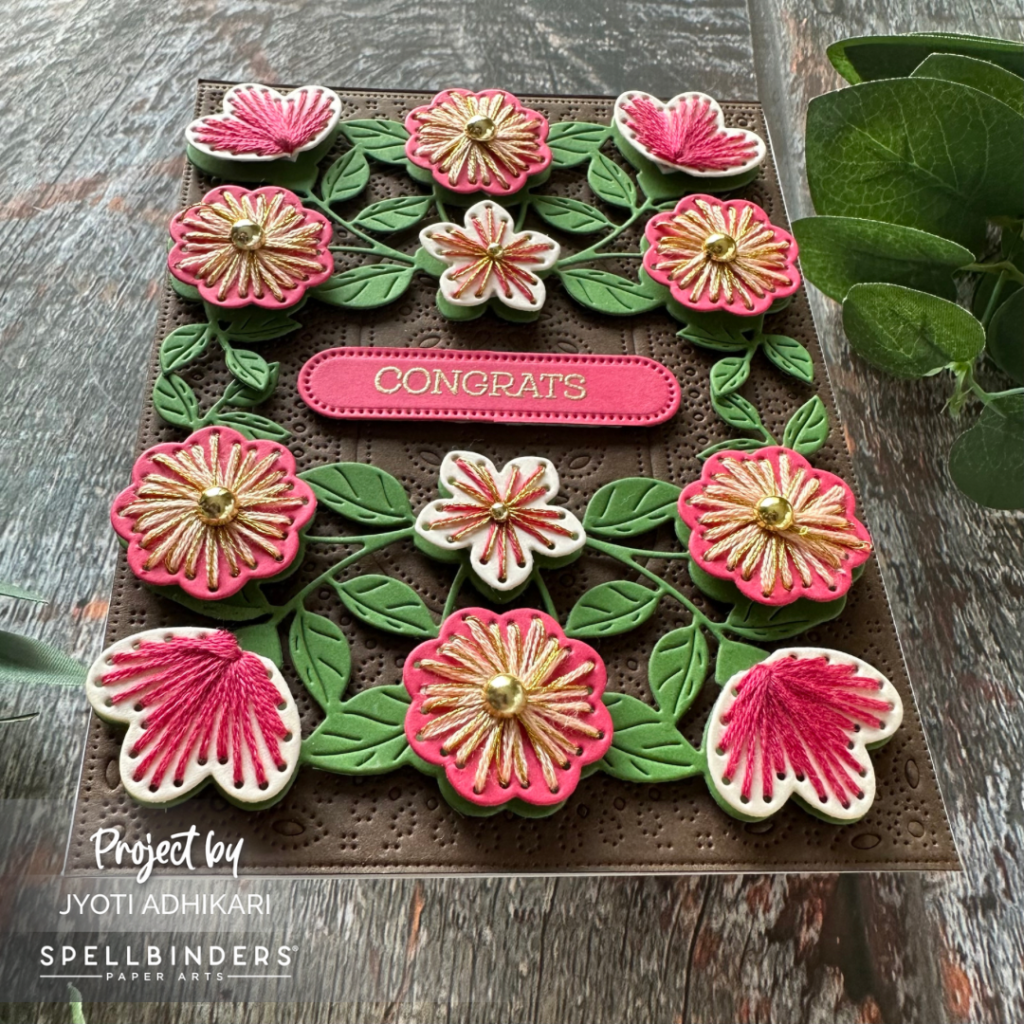
I had this color combination in mind with dark background and pink and green elements. The Timber Color Essential Card-stock was perfect for my project. I used the INFINITY PUNCE AND PIERCE PLATE This plate cuts the A2 panel in beautiful pierced pieces that you can either use it together or separately. For my card today I just embossed it using the embossing sandwich on my Spellbinders Die Cutting Machine.
Sentiment
For the sentiment on this card I used one of the sentiment that says “Congrats” from the FILL MY HEART SENTIMENTS clear stamp and embossed it in gold on dark pink card-stock. I then used one of the die from the STYLISH OVAL THANKS GLIMMER HOT FOIL PLATE to cut out the embossed sentiment and added it in the center of my flower arrangements.
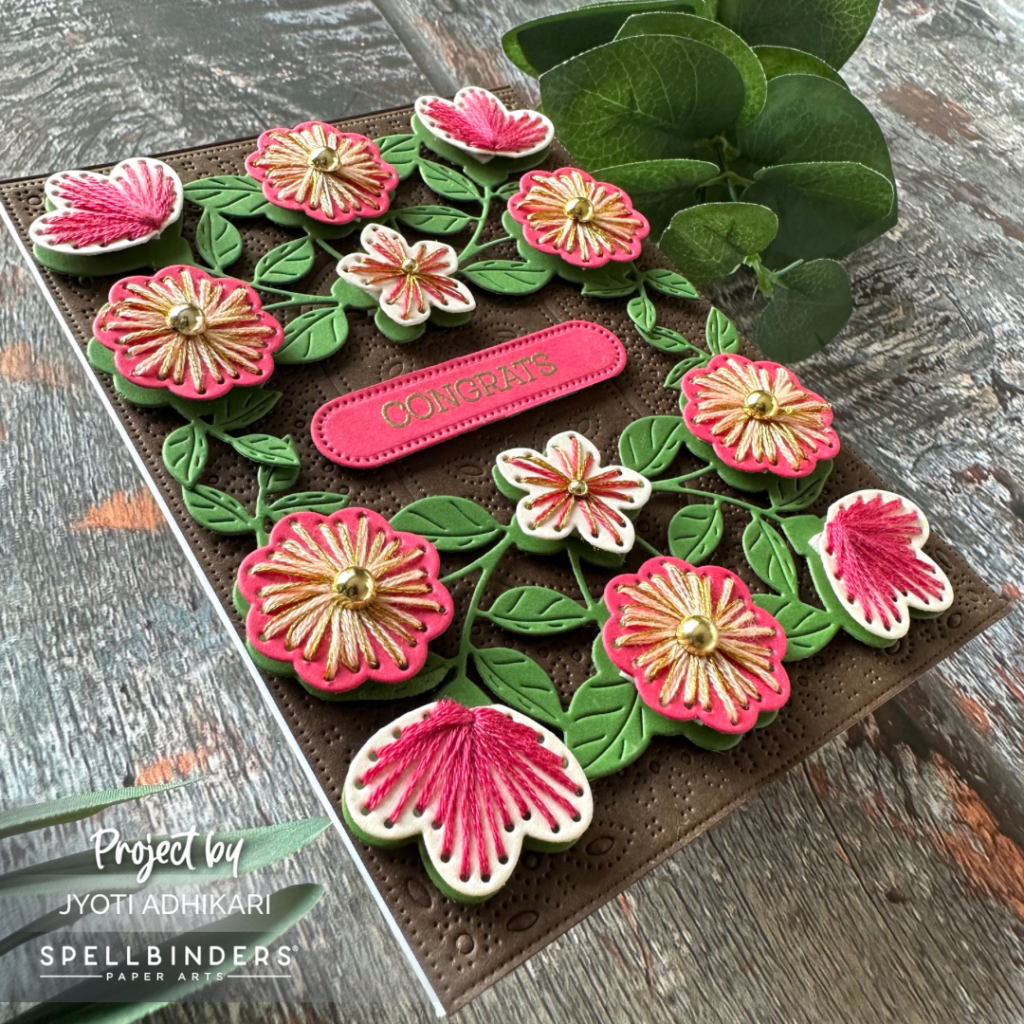
The flowers and leaves are added with foam tape. You can see the layers and dimension in above photo.
Second Card
My second card mainly focuses on the STYLISH OVAL HELLO YOU FLORAL ETCHED DIE and INFINITY PUNCH AND PIERCE COVER PLATE. I loved the combination of these two products so much that I created a bunch of cards with these.
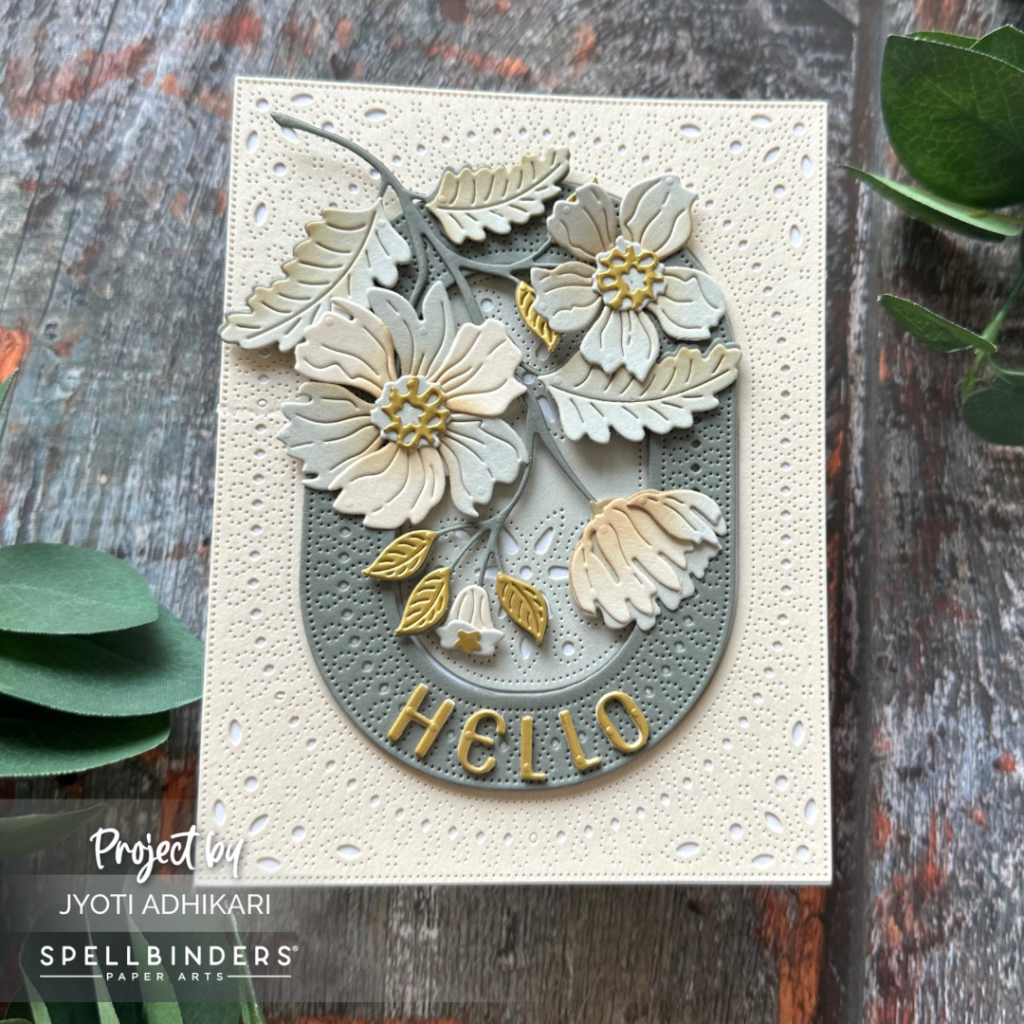
The soft and feminine color combination of Silver Fox, Barely Peach and Lunar Gray Color Essential Card-stocks and a hint of Brushed Gold Card-stock makes me so happy. I added some Distressed Oxide ink in color Frayed Burlap to give the petals and leaves some dimension. I think it’s very subtle but adds interest to my die-cut pieces.
Background
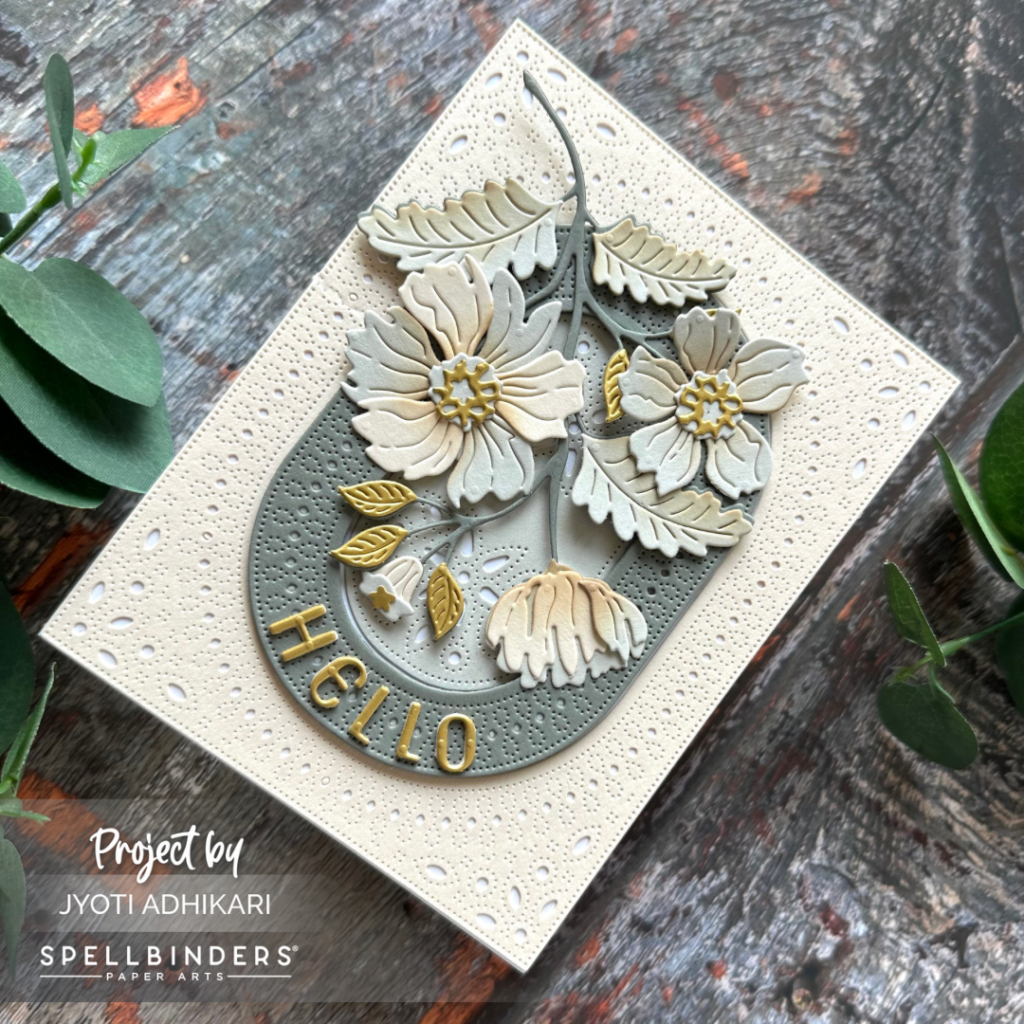
I used the INFINITY PUNCH AND PIERCE COVER PLATE to cut out the card-stock three times in these three colors. Then I mixed and matched the pieces to get different arrangements of same color combination for three cards. I used another background I created in my Third card.
Focus
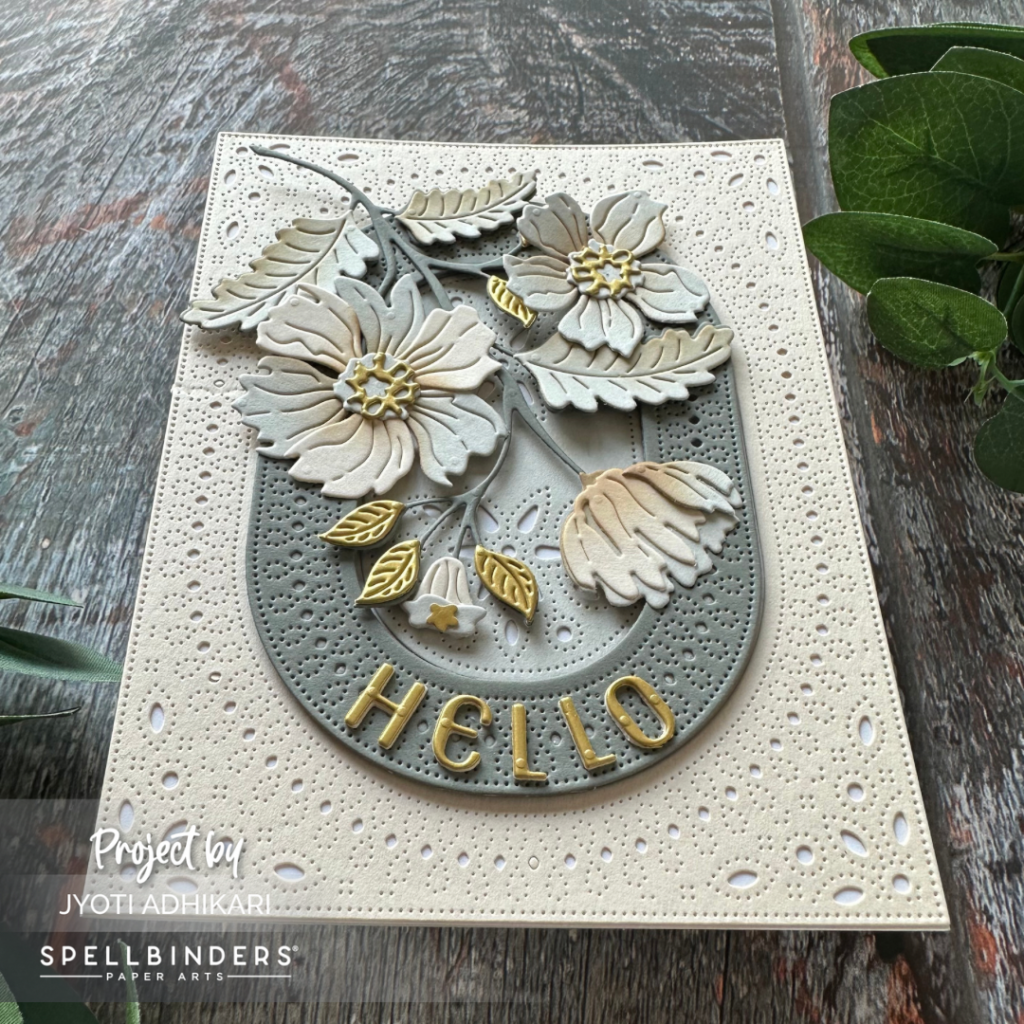
Then I arranged the floral cluster coming down from the left hand top corner. For extra dimension I added pieces of foam tapes at the back of the die-cut flower arrangement.
Sentiment
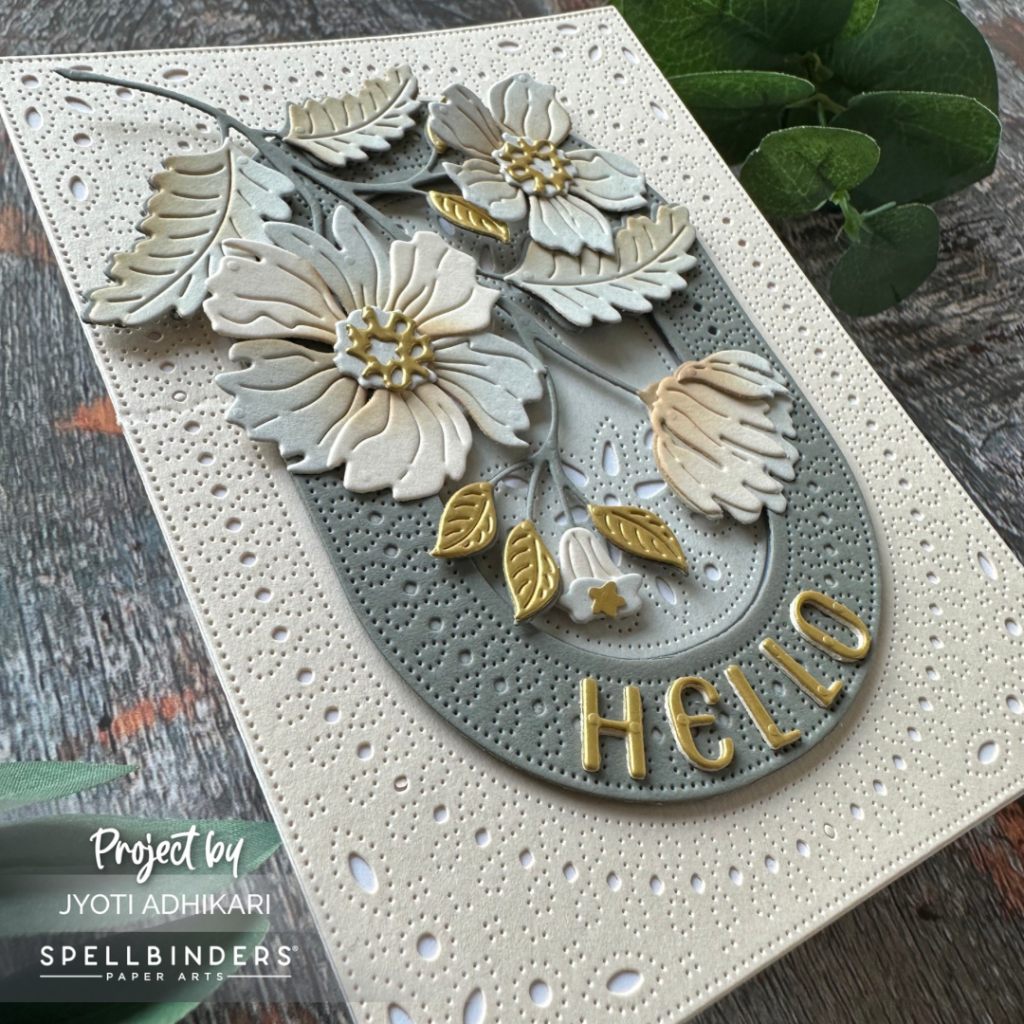
A simple die cut Hello arranged along the oval arch sufficed for this card. I used three layers of barely peach die cuts and then on top added the brushed gold die cut.
My second card is done.
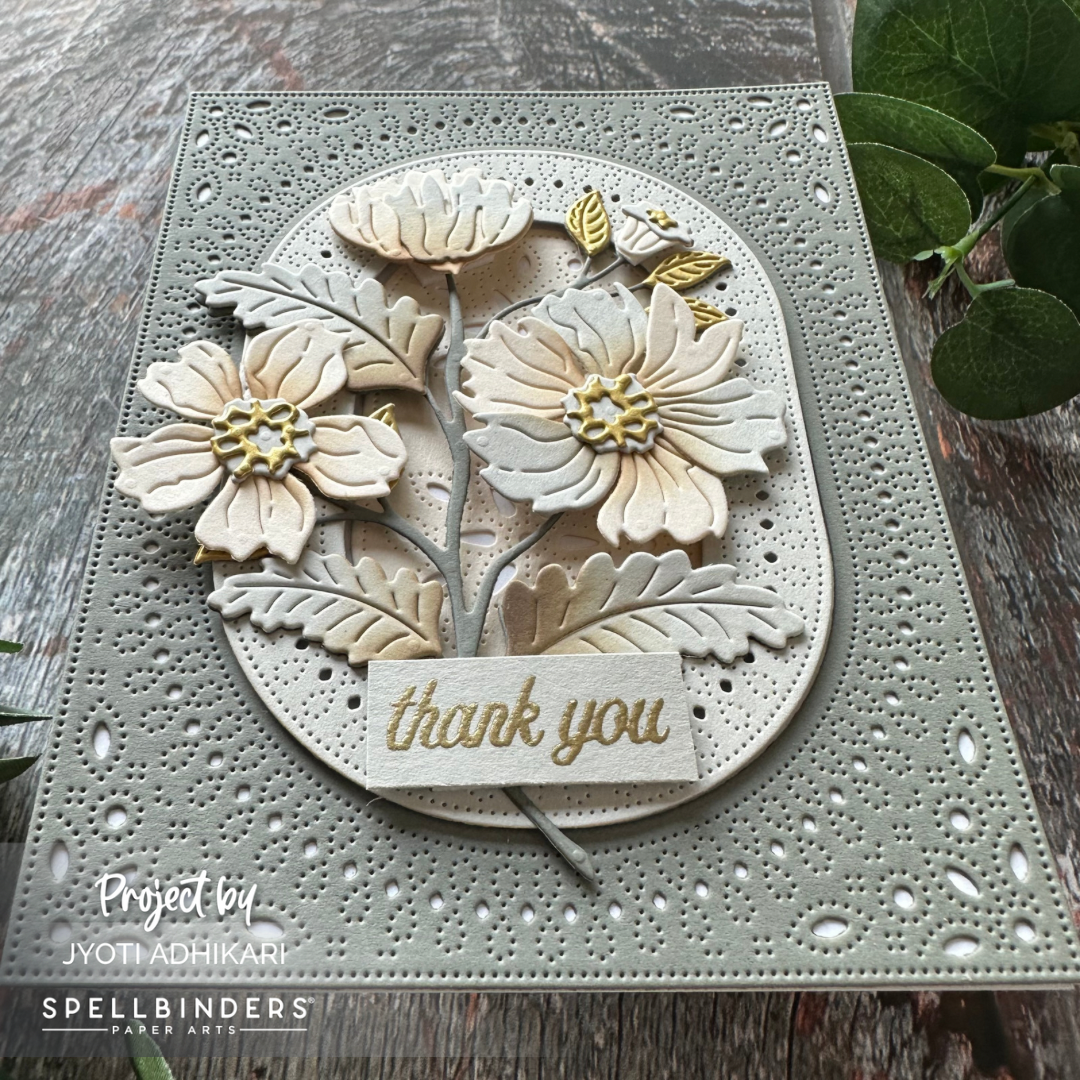
Third Card
The third one is similar to my second one as I used the second background I created on this card.
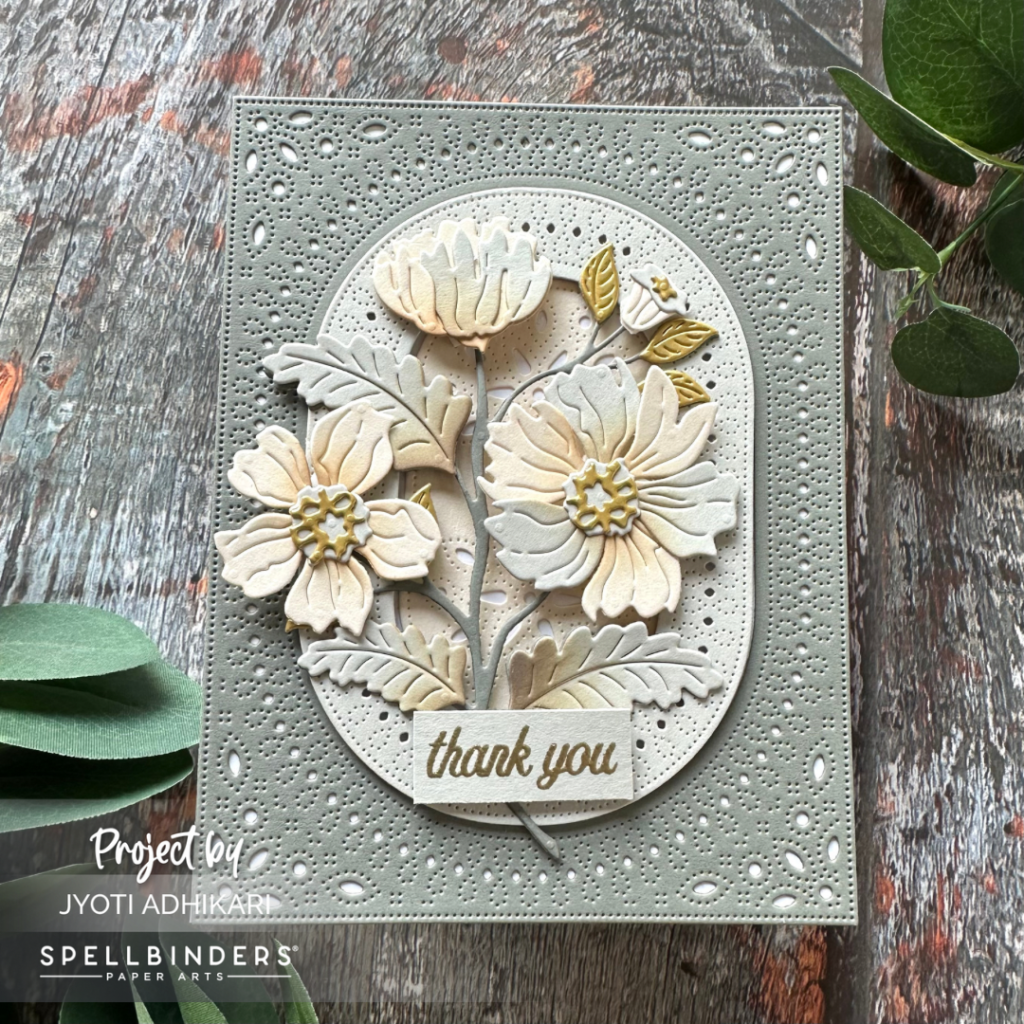
Only difference is I arranged the flowers in the center of the card and added a stamped and embossed sentiment that says “Thank You”along the bottom.
I love the white card-base peeking through the die cut holes of this cover plate. This cover plate is going to be my favorite and I will be using it a lot.

This last card brings us to the end of this post. I still have one more background created with the leftover die cuts which I will be using in another card soon.
Thank you for visiting. I hope you found this post inspiring.
Hugs,

All of the cards are just beautiful and so inspiring!
Thank you so much Dorothy! I appreciate you stopping by.
Gorgeous cards. I love the two die sets you used, especially that cover plate. TFS
Gorgeous cards! Love the 2nd & 3rd!
Thank you so much Pauline! I appreciate you stopping by.
Gorgeous cards. I love the 2nd & 3rd card and the colors you used. Thanks so much for sharing.
Thank you so much JoAnn for visiting. I’m glad you liked my cards.
LOVE the last 2 cards. Just not really into the stitched look. But really like the colors and style of the last 2. First time looking at your blog.
Thank you so much for visiting Kathy. I’m glad you liked them.
Jyoti! I adore your brown with coral-y pinks!! both really gorgeous!
=]
Thank you so much Michelle.